Do your kids love animals?
These zoo animal craft ideas are a fun and creative way to bring their favorite creatures to life.
Ranging from roaring lions to colorful parrots and adorable pandas, there are plenty of fun crafts that children can make using simple materials.
Whether you’re looking for a fun activity to keep little hands busy on a rainy afternoon, a creative classroom project, or simply something new to try together, these crafts are a great place to start.
With paper plates, cardboard, paint, glue, and a little imagination, kids can create their own zoo full of cute animals while having fun along the way.
In this article we’ll explore cute and easy zoo crafts made for you.
Paper Plate Zoo Animal Craft You’re Going to Love.
Turn everyday paper plates and simple paper supplies into fun zoo animals.
These crafts are easy for kids to personalize with different colors, patterns, and facial features while helping them explore their favorite animals through creative play.
1. Paper Plate Lion
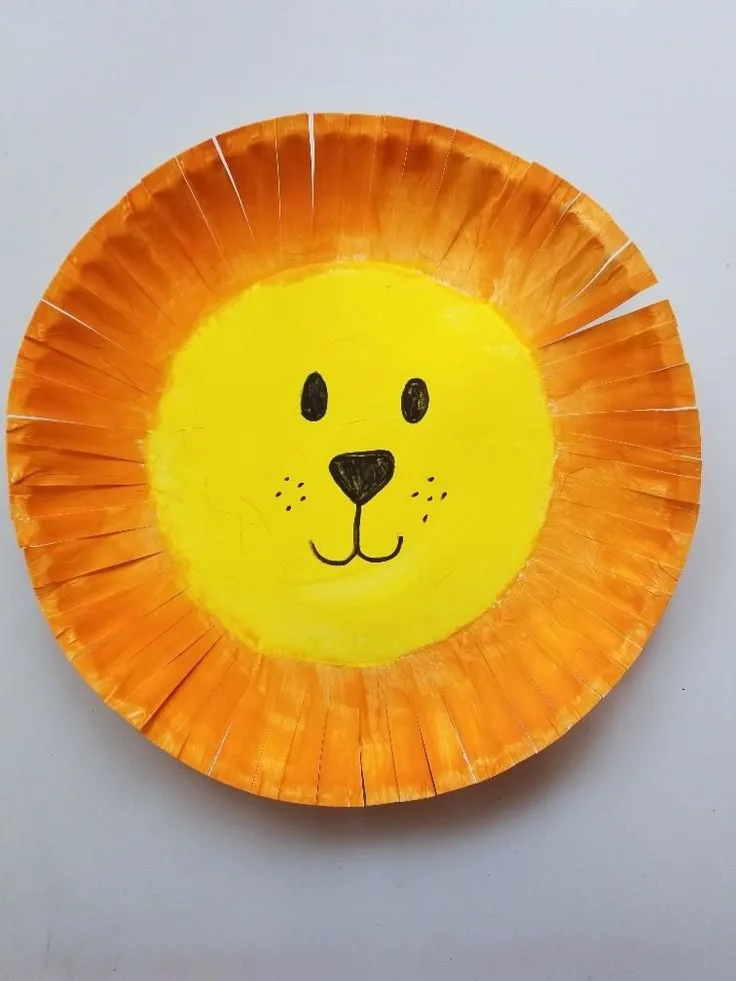
Looking for a simple craft that lets your kids get creative while making an adorable zoo animal?
This paper plate lion is the perfect craft for you.
It turns a simple paper plate into a cute lion’s face and is easy and inexpensive to make.
Materials Needed:
A paper plate, Yellow or orange paint, Construction paper, Scissors, Glue, Paintbrush, Black marker.
Optional Materials:
Googly eyes, Extra paper or other decorative materials for the mane and facial details
How to Make It:
1. Prepare the paper plate:
Paint the plate yellow or orange, or use a paper plate that already has the color you want. Let it dry completely.
2. Create the mane:
Make small cuts around the outer edge of the plate and bend the strips outward to create the lion’s mane.
You can also use strips of construction paper for a fuller mane.
3. Make the face:
Add the eyes, nose, mouth, and whiskers using construction paper, a black marker, or googly eyes.
4. Add the finishing touches:
Add any extra details or decorations you like to give your lion its own personality.
5. Let it dry: Allow the finished craft to dry completely before displaying or playing with it.
2. Paper Plate Elephant
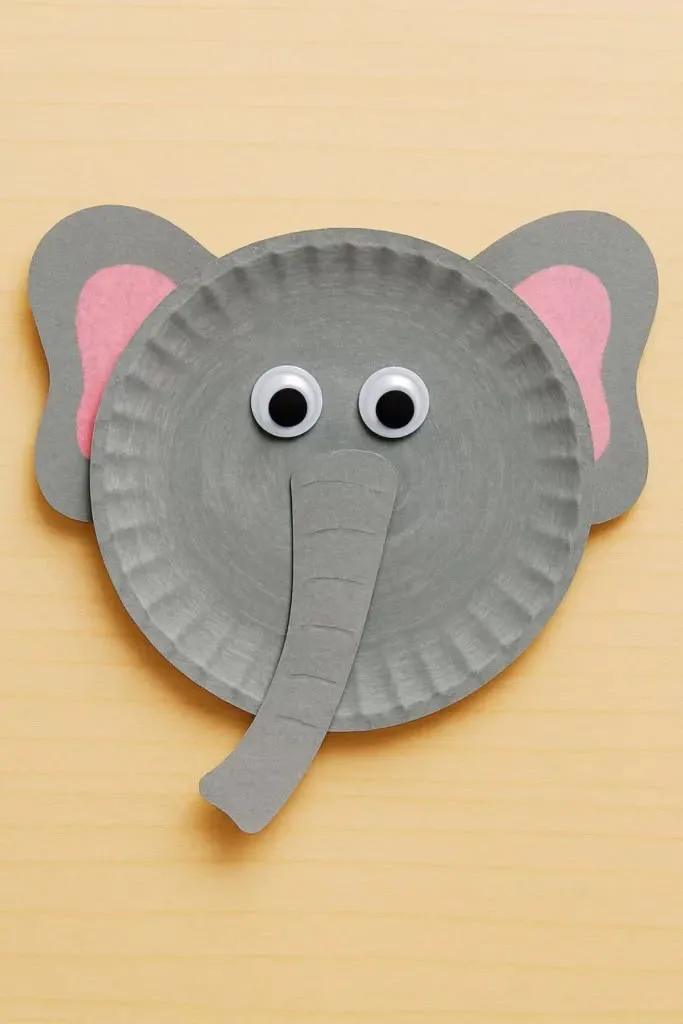
Create a cute elephant from a simple paper plate.
It’s another easy and inexpensive craft that gives kids plenty of room to express their creativity.
Materials Needed:
1 paper plate, gray or light-blue paint, construction paper, scissors, glue, a paintbrush, and a black marker.
Optional Materials:
Googly eyes and pink paper or paint for extra details.
How to Make It:
Paint or color the paper plate gray or light blue, or use a paper plate that already has the color you want.
Cut out two large ears and a long trunk from construction paper, then glue them onto the plate. Add the eyes, mouth, and other facial details, followed by any finishing touches you like.
Finally, let the elephant dry completely before displaying or playing with it.
You may also like;
25 Fun & Creative Kids Activity Ideas for Home and Outdoor (No Screens Needed)
25 Eye-Catching 10th Birthday Decoration Ideas Kids Will Love
3. Paper Plate Tiger
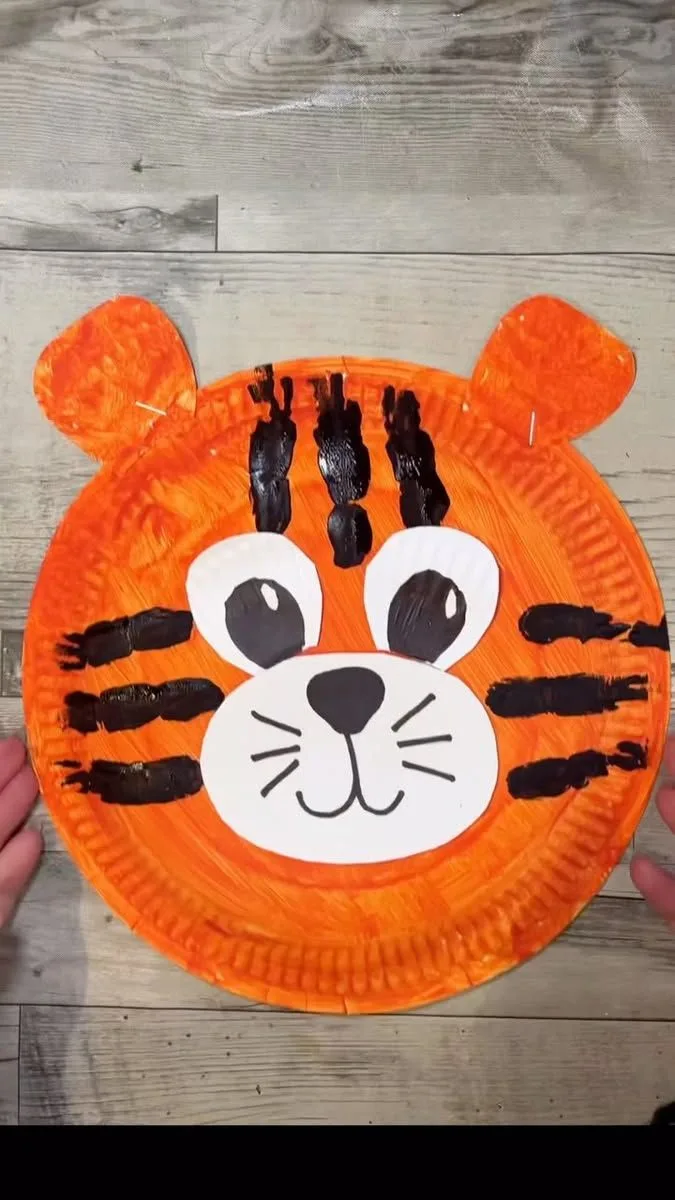
Yet another simple craft and fun craft to try out.
This paper plate tiger is a fun and inexpensive craft that turns an ordinary paper plate into a cute tiger.
Materials Needed:
1 paper plate, orange paint, black and white construction paper, scissors, glue, a paintbrush, and a black marker.
Optional Materials:
Googly eyes and pink paper for extra facial details.
How to Make It:
Paint the paper plate orange, or use an orange plate if you already have one.
Let it dry completely, then create the tiger’s stripes using black construction paper or a black marker.
Cut out two ears from orange construction paper and attach them to the top of the plate.
Add the eyes, nose, mouth, and whiskers to create the face.
Finish with any extra details you like, then let the tiger dry completely.
4. Paper Plate Panda
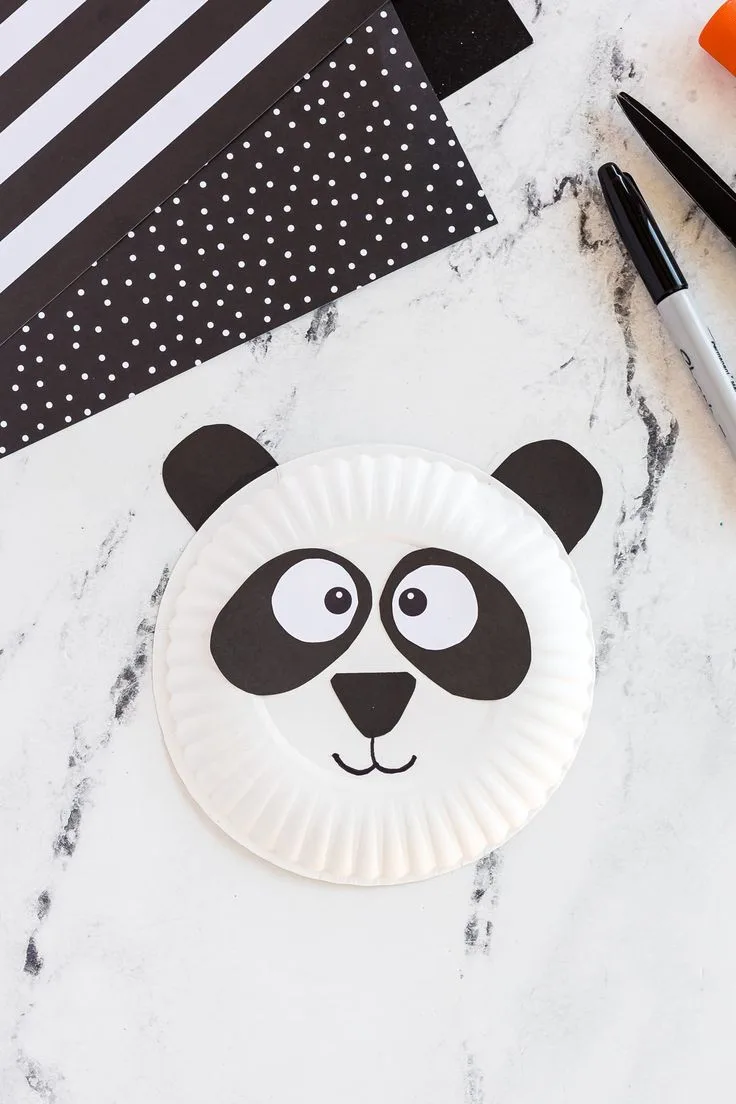
Create an adorable panda from a simple paper plate.
This easy and inexpensive craft gives kids plenty of room to get creative while making one of their favorite zoo animals.
Materials Needed:
1 paper plate, black construction paper, white paper, scissors, glue, and a black marker.
Optional Materials:
Googly eyes and pink paper for extra facial details.
How to Make It:
Start with a white paper plate, or paint one white if needed.
Cut out two rounded ears and two black patches for the panda’s eyes from the black construction paper.
Glue the ears to the top of the plate and the eye patches onto the face.
Add the eyes, nose, mouth, and other facial details, then finish with any extra decorations you like.
Let the panda dry completely before displaying it.
5. Paper Plate Parrot
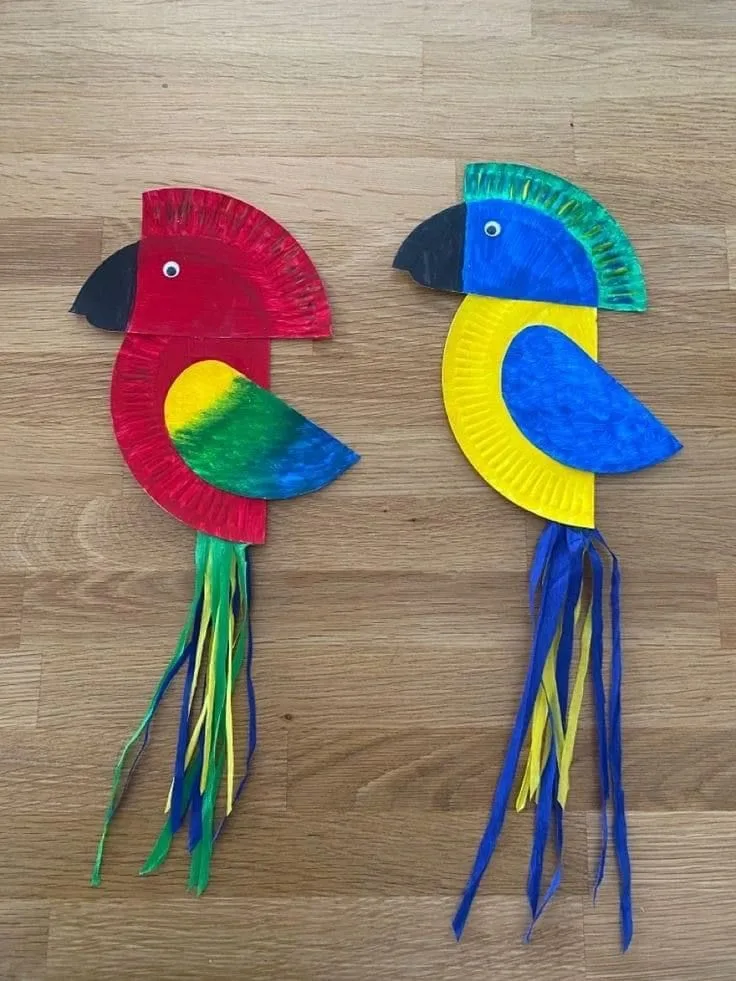
Looking for a colorful craft that lets your kids get creative while making a cheerful zoo animal?
This paper plate parrot is a fun and inexpensive craft that turns a simple paper plate into a bright, playful bird.
Materials Needed:
1 paper plate, red paint, a paintbrush, yellow construction paper, colorful crepe or construction paper, scissors, and glue.
Optional Materials:
Googly eyes and a stapler if you prefer to attach the tail instead of gluing it.
How to Make It:
Paint the paper plate in a bright color and let it dry.
Cut the plate in half and use one half to create the parrot’s body.
Cut a beak and wing from yellow construction paper and glue them onto the body.
Add a googly eye or make one from paper.
Cut strips of colorful paper to create the parrot’s bright tail, then attach them to the bottom of the body.
Finish with any extra details you like and let the parrot dry completely.
Recycled and Cardboard Made Crafts Just for You.
Turn everyday cardboard and recyclable materials into fun zoo animals.
These crafts are a great way for kids to get creative while giving old items a playful new purpose.
6. Cardboard Tube Giraffe
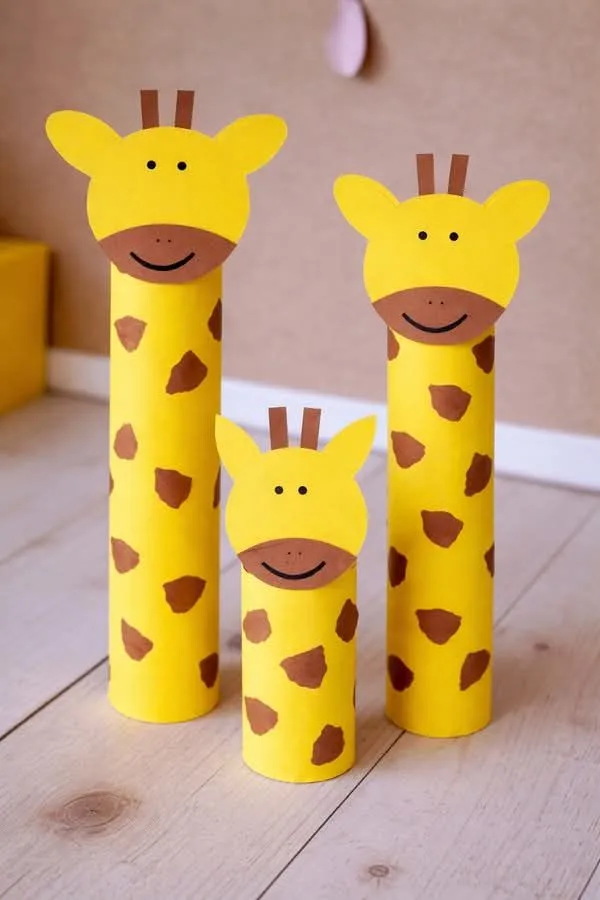
This cardboard tube giraffe is an easy and inexpensive craft that lets kids get creative while making a cute little giraffe they can also use for pretend play.
Materials Needed:
1 cardboard tube or toilet paper roll, yellow paint or yellow construction paper, brown paint or a brown marker, construction paper, scissors, glue, a paintbrush, and a black marker.
Optional Materials:
Googly eyes, pipe cleaners for the tail or horns, and extra decorative materials.
How to Make It:
Paint the cardboard tube yellow or cover it with yellow construction paper, then let it dry.
Add brown spots all over the tube using paint or a marker.
Cut out the giraffe’s head, ears, and horns from construction paper and attach them to the top of the tube.
Add the eyes, nose, and mouth, then create the legs and tail.
Finish with any extra details you like and allow the giraffe to dry completely before playing with it.
7. Cardboard Tube Zebra
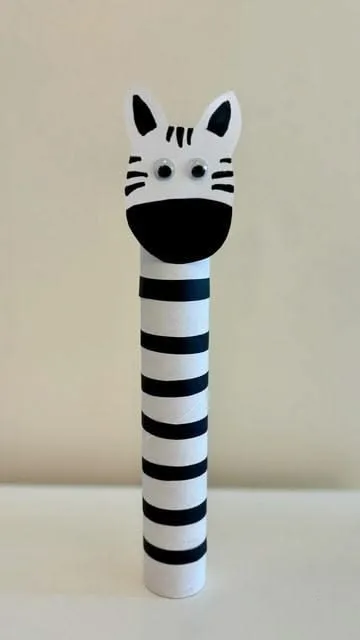
Those bold black-and-white stripes make zebras one of the most recognizable animals at the zoo.
With a simple cardboard tube and a few craft supplies, kids can recreate those striking stripes and turn an everyday recycled item into a cute little zebra.
Materials Needed:
1 cardboard tube or toilet paper roll, white construction paper, black marker, scissors, glue, pencil, and tape.
Optional Materials:
Googly eyes, black and white yarn or pipe cleaners for the mane and tail, and pink paper for the inside of the ears.
How to Make It:
Cover the cardboard tube with white construction paper and draw black stripes all over it.
Cut out a zebra head, ears, and four legs from white construction paper, then add stripes to each piece with a black marker.
Attach the head and legs to the tube, then add the ears, eyes, mane, and tail.
Finish with any extra details you like and let the glue dry completely before playing with your zebra.
8. Newspaper Hippo
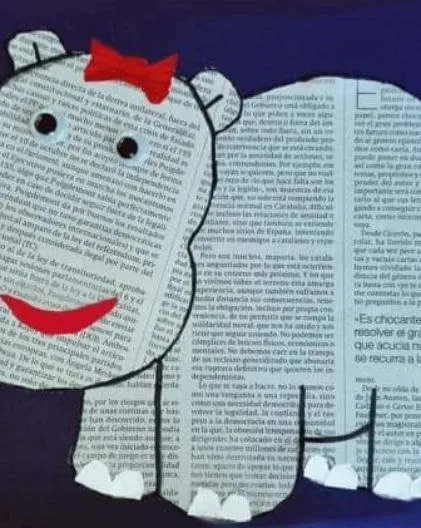
Who knew old newspapers could be transformed to become such a cute zoo animal?
This newspaper hippo is a creative way for kids to turn old paper into a colorful animal while experimenting with cutting, painting, and gluing.
Materials Needed:
Old newspaper, light-blue cardstock or construction paper, purple or blue paint, scissors, glue, a black or gray marker, and a paintbrush.
Optional Materials:
Googly eyes, blue tissue paper for a water effect, and small decorative materials.
How to Make It:
Start by painting pieces of newspaper in shades of purple or blue and leave them to dry.
Cut out the hippo’s head, body, ears, legs, and mouth from the painted newspaper.
Arrange and glue the pieces onto the cardstock, then add the eyes, nostrils, mouth, and other facial details.
For a fun finishing touch, add strips of blue tissue paper underneath the hippo to make it look like it is relaxing in water. Let the craft dry completely.
9. Recycled CD Lion
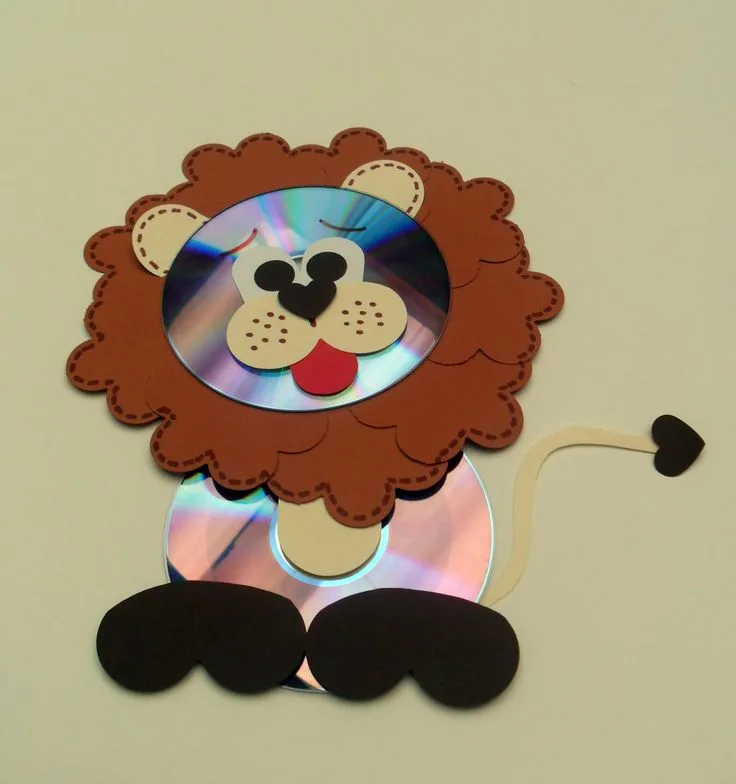
Old CDs don’t have to end up forgotten in a drawer.
Turn one into a bright lion face instead, giving kids a fun way to reuse something that would otherwise be thrown away while creating a colorful zoo animal.
Materials Needed:
1 old CD, tan, orange, yellow, and black construction paper, scissors, glue, and a black marker.
Optional Materials:
Glitter and googly eyes.
How to Make It:
Cut a circle of tan or yellow paper slightly larger than the CD and cut small slits around its edges to create the lion’s mane.
Glue the CD onto the center of the mane, then cut out and attach the lion’s eyes, nose, mouth, and other facial features.
Add any extra decorations you like, then allow the craft to dry completely.
Memorable Handprint Craft for Your Kids.
Little hands become big zoo adventures.
Turn handprints and fingerprints into adorable animals while creating fun keepsakes kids will love.
10. Handprint Lion
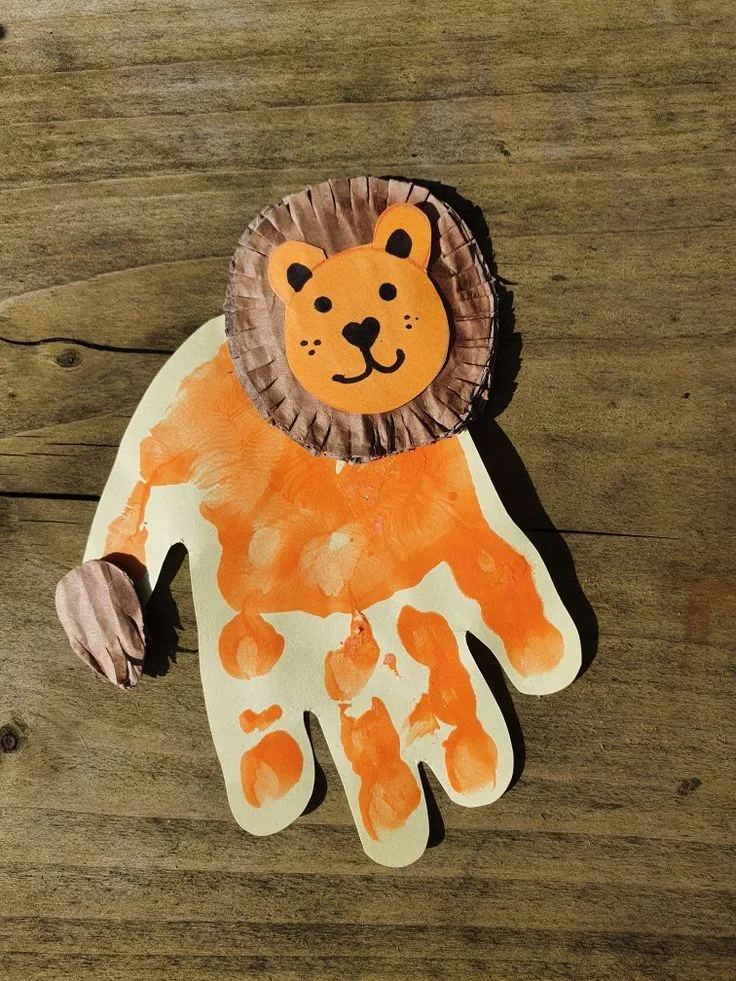
Let little hands become the king of the jungle with this adorable handprint lion.
It’s a creative keepsake that turns a child’s handprint into a playful zoo animal they can be proud to display.
Materials Needed:
White or colored paper, washable orange or yellow paint, a paintbrush, brown or yellow paint for the mane, and a black marker.
Optional Materials:
Googly eyes and crayons or colored pencils for decorating the background.
How to Make It:
Paint the child’s hand orange or yellow and press it firmly onto the paper with the fingers spread apart.
Allow the handprint to dry, then add a mane around the palm using brown or yellow paint.
Draw the lion’s eyes, nose, mouth, and other facial details with a black marker.
Add a tail and any extra details around the lion, then let the artwork dry completely.
11. Handprint Giraffe
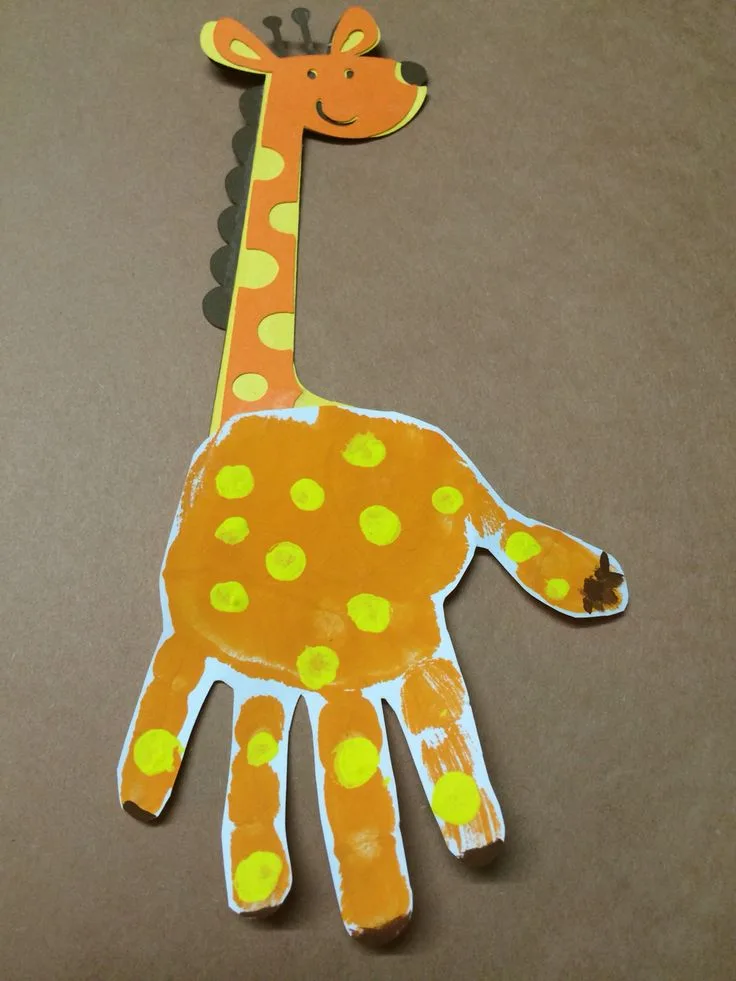
A little handprint can become a surprisingly adorable giraffe!
This creative craft lets kids turn their own hand and arm into a long-necked zoo animal while adding colorful spots and tiny details to bring it to life.
Materials Needed:
Yellow construction paper, brown construction paper, scissors, glue, a pencil, brown and black paint, and a black marker.
Optional Materials:
Googly eyes and extra colored paper for decorating.
How to Make It:
Trace the child’s hand and arm onto yellow construction paper, then cut out the shape.
Use the hand as the giraffe’s head and the arm as its long neck.
Add brown spots across the giraffe’s body and create the ears and horns.
Glue on the eyes, draw the nostrils and a small smile, then add a mane and tail.
Finish with any extra details you like and let the artwork dry completely.
12. Handprint Monkey
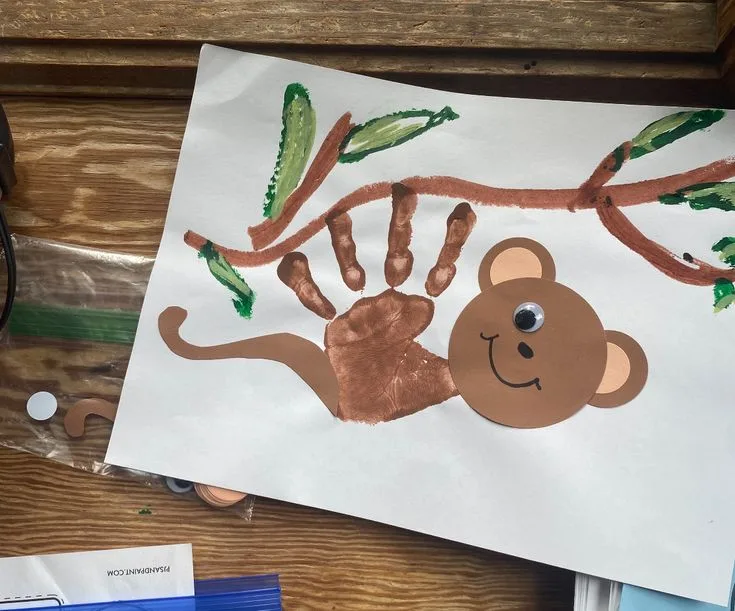
Turn a little handprint into a playful monkey swinging through the jungle.
This fun craft uses the shape of a child’s hand to form the monkey’s body, making the finished artwork feel personal and extra cute.
Materials Needed:
Brown, tan, green, and white construction paper, scissors, a pencil, glue, and a black or pink marker.
Optional Materials:
Googly eyes, green yarn or wool for a vine, and a monkey face template.
How to Make It:
Trace the child’s hand onto brown construction paper and cut it out.
Create the monkey’s head and face from the brown and tan paper, then attach it to the thumb side of the handprint.
Add a curved green paper vine and position the fingers around it to make the monkey look like it is hanging on.
Attach a tail, add the eyes and facial details, and finish with any extra jungle details.
Exciting Puppets and Mask Crafts.
Let the zoo come alive.
Kids can create playful animal puppets and masks, then use them for imaginative games, stories, and make-believe adventures.
13. Paper Bag Monkey Puppet
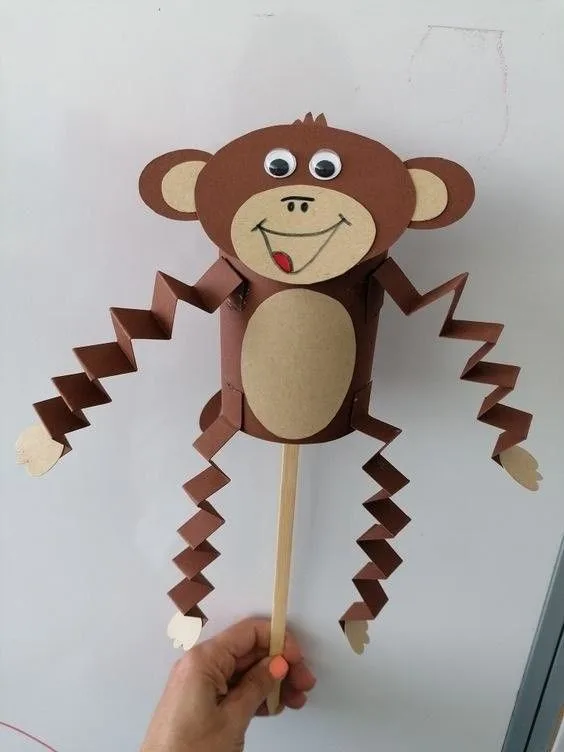
Give an ordinary paper lunch bag a playful makeover and turn it into a monkey that can actually “talk”!
This craft is especially fun because kids can use the finished puppet for pretend play, storytelling, or a mini zoo-themed puppet show.
Materials Needed:
1 brown paper lunch bag, brown and tan construction paper, pink paper, scissors, glue, a pencil, and a black marker.
Optional Materials:
Googly eyes, crayons or colored pencils, and yarn for extra details.
How to Make It:
Place the paper bag with the flap facing upward, as this will become the monkey’s moving mouth.
Cut out the monkey’s head, ears, face, belly, and a long curved tail from construction paper.
Add the lighter-colored face and inner ears to the darker brown pieces, then glue the eyes, nose, and mouth onto the head.
Cover the front of the paper bag with brown paper and attach the belly in the center.
Glue the finished head onto the flap, then attach the tail to the back of the bag.
Add any extra details you like, allow the glue to dry, and your monkey puppet is ready for a little storytelling fun.
14. Paper Bag Zebra Puppet
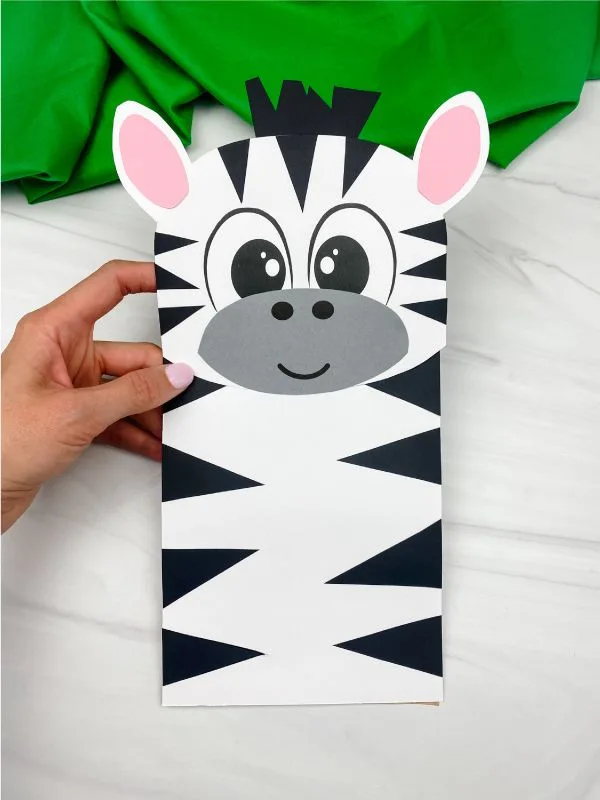
Those bold stripes make a zebra instantly recognizable, and they make this puppet especially fun to decorate.
Kids can turn a plain paper bag into a striped zebra with a movable mouth, then use it for stories and imaginative zoo play.
Materials Needed:
1 paper lunch bag, white and black construction paper, pink construction paper, scissors, glue, a pencil, and a black marker.
Optional Materials:
Googly eyes, white or black yarn for the mane and tail, and crayons or colored pencils.
How to Make It:
Place the paper bag flat with the flap facing upward, as the flap will become the zebra’s head and movable mouth.
Cover the main body of the bag with white construction paper, then add black stripes using strips of paper or a black marker.
Cut out the zebra’s ears and add smaller pink pieces inside them before gluing them to the head.
Create the eyes, nose, and mouth and attach them to the flap.
Add a black paper mane behind the head and a tail to the back of the bag.
Once everything is securely attached and dry, put your hand inside the bag and bring your zebra puppet to life.
15. Zoo Animal Masks
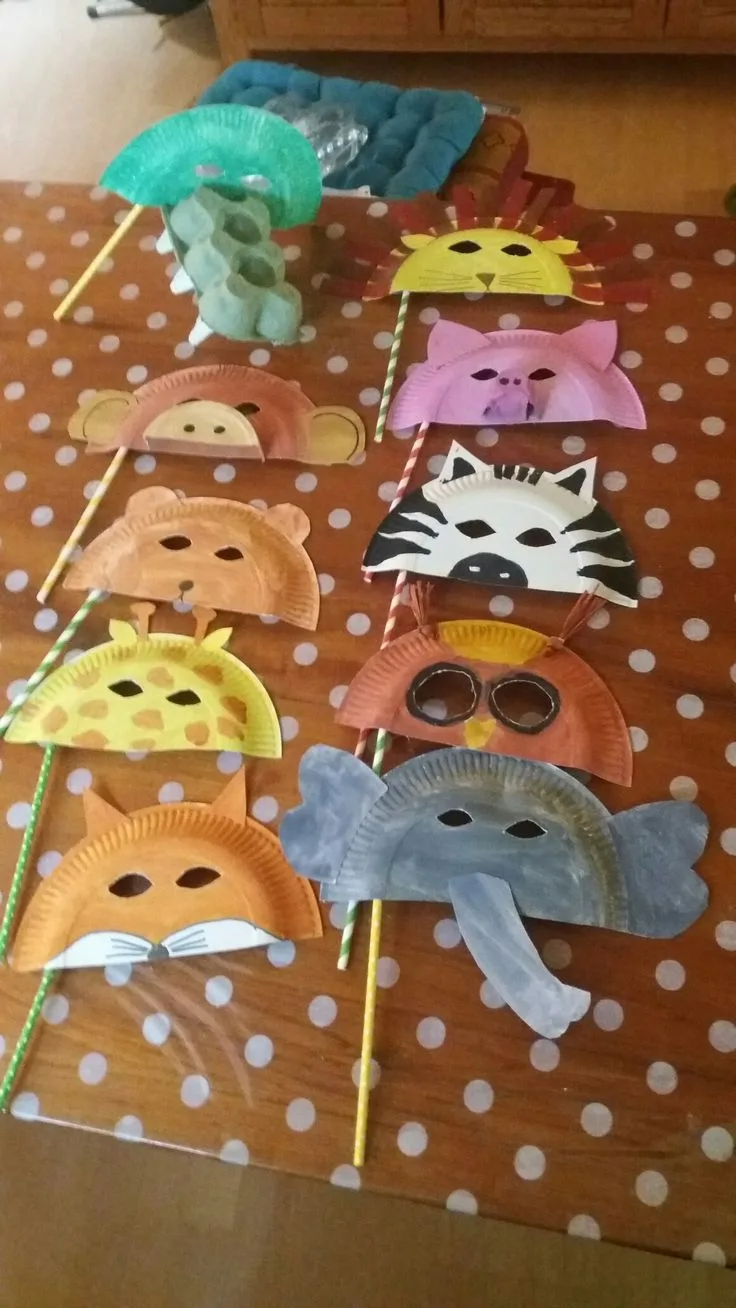
Let kids choose their favorite zoo animal and bring it to life with a mask they can decorate themselves.
From a fierce tiger to a cheerful parrot or a gentle elephant, this craft gives them plenty of freedom to create different animal faces and then use them for imaginative play.
Materials Needed:
Cardstock or thick construction paper, pencil, scissors, crayons or markers, glue, and a ruler or craft stick.
Optional Materials:
Googly eyes, colored paper, yarn, elastic string, and paint for adding extra details.
How to Make It:
Start by drawing or tracing a simple animal face shape onto cardstock, choosing an animal such as a lion, tiger, elephant, monkey, or panda.
Mark where the eyes will go and have an adult cut out the eye holes.
Let the child decorate the mask with colors and animal-specific features such as stripes, spots, ears, whiskers, a trunk, or a mane.
Add extra paper pieces for features that need more dimension, then attach a craft stick to the bottom so the mask can be held in front of the face.
If you want a wearable version, an adult can make small holes on the sides and attach elastic securely.
Let the mask dry before using it for pretend zoo adventures.