This Post Will Show You DIY Botanical Easter Egg Dyes Using Kitchen Scraps: How I Created Beautiful Eggs the Natural Way
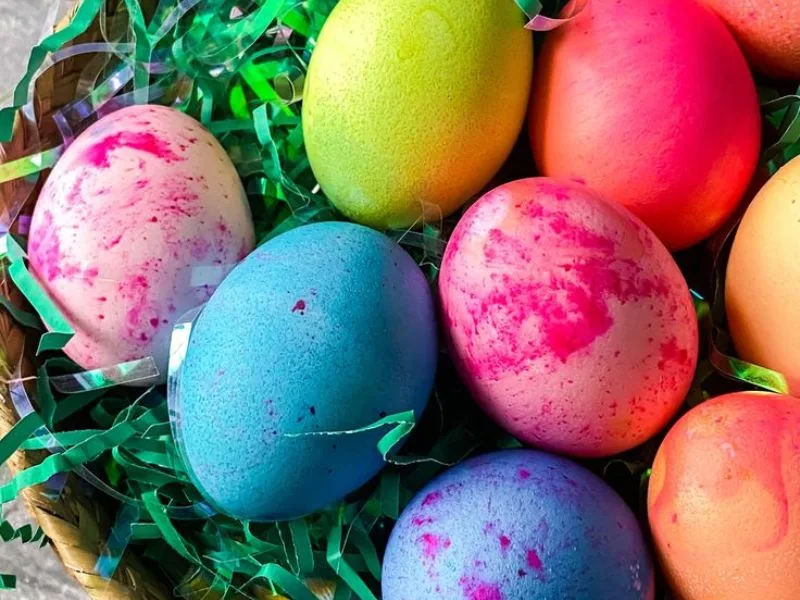
Every Easter, I used to find myself standing in the store aisle, staring at those brightly colored dye kits.
They promised quick results and bold shades. As a result, I bought them every year without hesitation. However, one Easter felt different.
While cleaning out my kitchen, I noticed onion skins, beet peels, cabbage leaves, and even used tea bags heading straight into the trash.
Suddenly, a simple question stopped me: why was I throwing away ingredients that could create beautiful color? From that moment, curiosity took over.
Instead of purchasing another artificial kit, I decided to experiment with what I already had. What began as a small kitchen project quickly transformed into one of the most meaningful Easter traditions I’ve ever created.
Not only did I produce stunning earthy eggs, but I also felt more connected to the season and more intentional about celebration.
In this guide, I’ll walk you through exactly how I dye Easter eggs using kitchen scraps. Along the way, I’ll share what works best, what to avoid, and why this natural method is worth trying, especially if you value sustainability, creativity, and slower living.
This article dives into How to Host a Sustainable Easter Egg Hunt (Eco-Friendly & Fun)
Why I Chose Botanical Easter Egg Dyeing
Before explaining the steps, it’s important to understand why this method truly changed my perspective.
First and foremost, botanical dyeing is eco-friendly. Unlike store bought kits, it involves no artificial chemicals, plastic packaging, or synthetic color tablets.
Instead, everything comes directly from ingredients already in your kitchen.
In addition, it’s budget conscious. Because you’re using scraps you would normally discard, the cost is minimal. That alone makes the process feel practical and resourceful.
However, what surprised me most was the emotional experience. Natural dyeing forces you to slow down.
The colors develop gradually. Each egg turns out slightly different. Consequently, the process feels calming rather than rushed.
Finally, botanical dyeing feels timeless. Long before commercial dyes existed, people relied on plants and spices to color eggs.
By returning to that tradition, Easter preparation becomes intentional rather than hurried.
What You’ll Need (Simple Supplies Only)
One of the best parts of this project is its simplicity. You don’t need specialty tools or complicated materials. Instead, you likely already have everything at home.
Here’s what I use:
- White or brown eggs
- Kitchen scraps (detailed below)
- White vinegar
- Water
- Small pots or saucepans
- A strainer or spoon
- Old towels or paper towels
- Leaves, flowers, onion skins, or rubber bands (optional for patterns)
That’s all. If you can boil eggs, you can confidently complete this project.
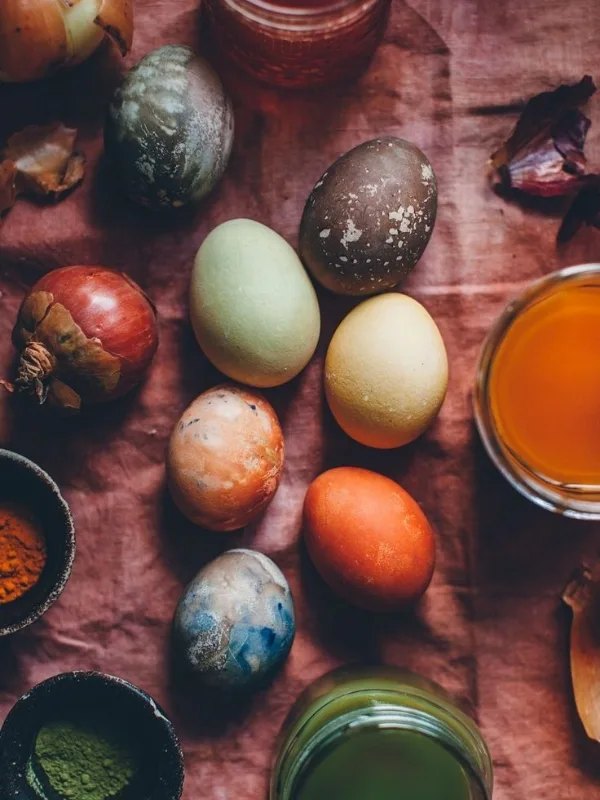
The Best Kitchen Scraps for Natural Easter Egg Dyes
Not all scraps produce the same results. Over time, I discovered which ingredients consistently create beautiful shades.
1. Onion Skins (My Favorite Choice)
Without question, onion skins are the most reliable natural dye source.
Yellow onion skins create warm amber, golden, and burnt orange tones. Meanwhile, red onion skins produce deeper rust, maroon, and sometimes subtle purplish hues.
Because the pigment is strong and dependable, I save onion skins for weeks leading up to Easter.
2. Red Cabbage Leaves
Surprisingly, red cabbage produces blue tones. Depending on soaking time, the color can range from soft sky blue to muted grayish blue.
If you prefer cooler shades, this ingredient delivers consistent results.
3. Beet Peels and Scraps
Beets create soft pinks and dusty rose tones. Although the liquid looks dark in the pot, the final egg color appears much lighter and softer.
Therefore, don’t judge the dye bath by its initial intensity.
4. Used Tea Bags or Loose Tea
For neutral tones, tea works beautifully. It produces beige, tan, and soft brown shades that suit minimalist Easter decor.
5. Coffee Grounds
Coffee creates earthy brown tones with natural speckling. If you love a rustic or farmhouse aesthetic, this option works well.
6. Turmeric for Bright Yellow
Although turmeric isn’t technically a scrap, it’s worth including. It produces vibrant golden yellow shades and blends well with other dyes.
You might be interested in 10 Painful Signs Your Partner Doesn’t Love You Anymore (2026 Guide)
DIY Botanical Easter Egg Dyes Using Kitchen Scraps: How I Created Beautiful Eggs the Natural Way
Step One: Preparing the Eggs

Preparation significantly affects the final result. Therefore, I always start carefully.
First, I gently wash each egg with warm water. This removes residue or oils that could block color absorption. Although this step seems small, it makes a noticeable difference.
Next, I decide whether to use hard-boiled or blown eggs. In most cases, I prefer hard-boiled eggs because they’re simpler to manage.
Once prepared, the eggs are ready for dyeing.
Step Two: Making the Botanical Dye Baths
Now the transformation begins.
For each dye bath, I follow a consistent formula:
- Place kitchen scraps in a pot.
- Add enough water to fully cover them.
- Bring the mixture to a boil.
- Reduce heat and simmer for 20–40 minutes.
- Strain out the solids.
- Add 1–2 tablespoons of white vinegar.
The longer you simmer, the richer the dye becomes. In fact, if I want deeper color, I allow the liquid to sit overnight before using it.
Because natural dyes develop gradually, patience improves the outcome.
Step Three: Creating Natural Patterns
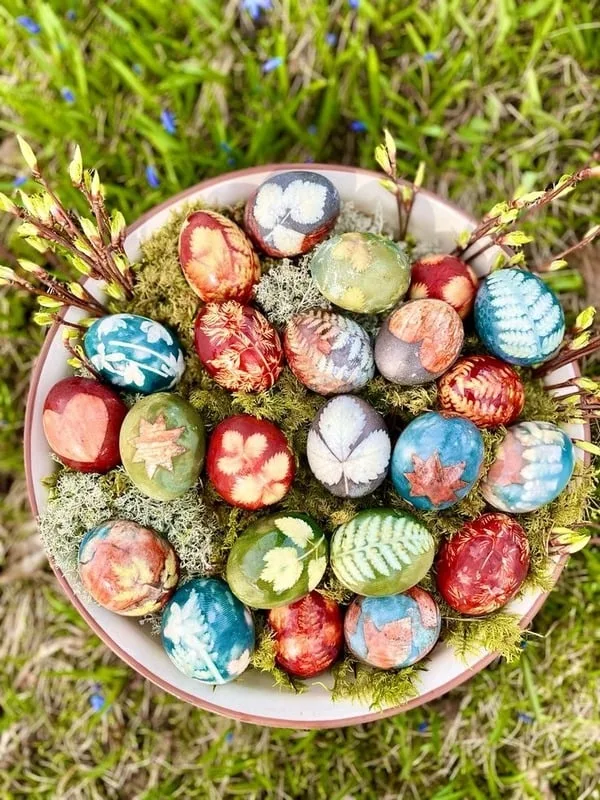
Although optional, pattern making adds personality to each egg.
To create botanical designs, I use:
- Small leaves
- Flower petals
- Rice or grains
- Thin onion skin layers
First, I place the leaf or flower against the egg’s surface. Then, I wrap the egg tightly with onion skin or fabric and secure it with string or a rubber band. After dyeing, the design reveals itself like a pressed imprint.
As a result, no two eggs ever look identical. That unpredictability makes the project feel artistic rather than mechanical.
Step Four: Dyeing the Eggs
Once the dye baths are ready, I carefully lower the eggs into the liquid. At this point, you can choose between two methods.
Option 1: Simmering Raw Eggs
- Place raw eggs directly into dye.
- Simmer gently for 15–20 minutes.
- Allow eggs to sit longer for deeper tones.
- This method is faster and more efficient.
Option 2: Soaking Hard Boiled Eggs
- Boil eggs separately first.
- Place cooled eggs into dye.
- Soak for 30 minutes to several hours.
- Refrigerate overnight for richer color.
This approach provides more control over tone intensity. Depending on time, I alternate between both techniques.
Step Five: Drying and Revealing the Colors
After dyeing, I remove the eggs carefully and place them on an old towel to dry. Importantly, I avoid rinsing them, as water can wash away pigment.
Once dry, I gently unwrap any leaves or fabric. The reveal moment is always rewarding. Each egg feels like a small surprise.
If desired, I rub a tiny drop of olive oil onto the shell. This enhances the color and adds a soft sheen.
You might be interested in reading How to Dry Locs After a Gym Workout Without Odor or Damage
What I Learned From My First Attempt
My first experience wasn’t perfect. Nevertheless, it was valuable.
Some eggs appeared lighter than expected. Others turned darker than planned. Through trial and error, I learned several important lessons:
- Patience improves color depth.
- Vinegar strengthens pigment adhesion.
- Natural dyeing is beautifully unpredictable.
Unlike artificial kits, botanical dyes don’t guarantee identical results. However, that uniqueness becomes part of their charm.
Why This Became an Easter Tradition
Over time, this process shifted my mindset about holiday preparation.
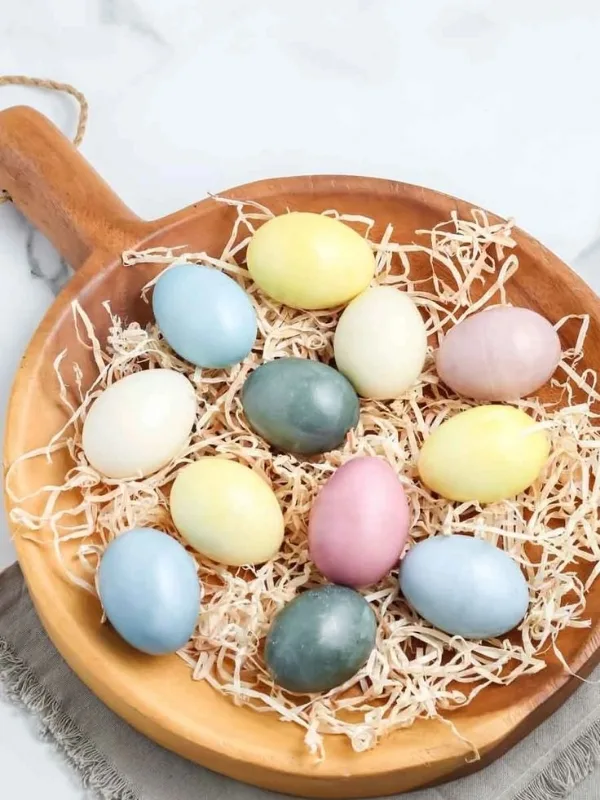
Instead of rushing through decorations, I now slow down and collect scraps intentionally. The boiling pots, subtle color changes, and gentle anticipation create a mindful rhythm.
Additionally, the softer tones feel authentic. They don’t shout for attention. Instead, they reflect the quiet renewal of spring.
Here’s a detailed guide on The Ultimate Coquette Bachelorette Itinerary: A Dreamy Weekend of Bows, Blooms & Bliss
As a result, Easter feels less commercial and more meaningful.
Tips for the Best Results
If you’re trying botanical dyeing for the first time, keep these tips in mind:
- White eggs produce brighter colors.
- Brown eggs create muted tones.
- Longer soaking leads to deeper shades.
- Always add vinegar.
- Avoid overcrowding the pot.
- Embrace slight imperfections.
Above all, remember that natural variation is part of the beauty.
Why You Should Try Botanical Easter Egg Dyeing
DIY botanical Easter egg dyeing using kitchen scraps goes beyond decoration. It connects you to nature, reduces waste, and transforms ordinary ingredients into art.
Moreover, it encourages intentional celebration. Instead of focusing on perfection, you focus on process.
If you’ve ever wanted a slower and more meaningful Easter tradition, this is your opportunity. Start small. Use what you have. Trust the transformation.
Once you see those naturally dyed eggs resting on your counter, you may never return to artificial kits again.
FAQs on DIY botanical Easter egg dyes using Kitchen scraps
1. How do you naturally dye Easter eggs with kitchen scraps?
First, simmer scraps such as onion skins or cabbage in water. Then, strain the liquid, add vinegar, and either simmer raw eggs or soak boiled eggs until the desired color develops.
2. Why is vinegar necessary?
Vinegar helps natural pigments bond to the eggshell. Without it, the color may appear faint. Therefore, adding vinegar significantly improves results.
3. Which scraps produce the strongest colors?
Onion skins are the most reliable. Meanwhile, cabbage creates blue tones, beets produce pink shades, and turmeric offers bright yellow.
4. Do white or brown eggs work better?
White eggs show brighter color. In contrast, brown eggs create softer, earthy tones.
5. How long should eggs soak?
For lighter shades, soak 30–60 minutes. For deeper hues, leave them several hours or overnight.
This Post Showed You DIY Botanical Easter Egg Dyes Using Kitchen Scraps: How I Created Beautiful Eggs the Natural Way.