There is nothing more frustrating than saving an intricate manicure, sitting down with your polish, and realizing the design needs three brushes, a steady hand, and patience you do not have. Beginner nail art should feel achievable, not like a miniature painting exam.
The easiest designs rely on dots, swipes, stickers, simple French edges, glitter placement, sponge gradients, and forgiving finishes that still look intentional when they are not perfectly even.
You can keep things subtle with nude polish and tiny accents or lean brighter with colorful tips, mismatched dots, chrome, and playful patterns.
Most of these ideas work on short natural nails and require only basic tools you may already own. Start with the easiest technique of all: simple dot accents.
1. Single-Dot Accent Nails
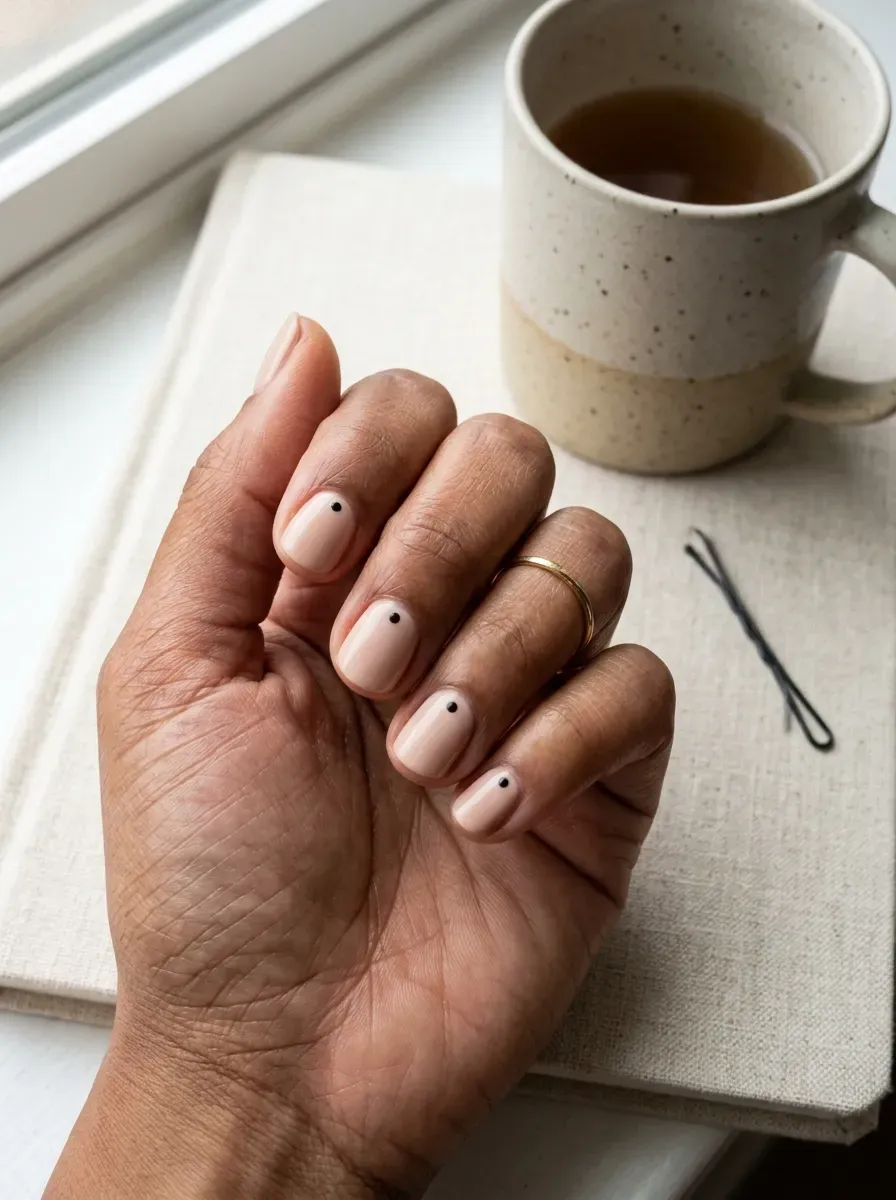
A single dot is one of the easiest ways to make plain polish look intentional. Place it near the cuticle, center, or sidewall using a dotting tool, toothpick, or rounded bobby-pin end.
Nude polish keeps mistakes less noticeable. Dip lightly rather than loading the tool heavily, because oversized dots spread faster than beginners expect.
See more 11 Romantic Date Night Ideas at Home That Turn Everyday Evenings Into Unforgettable Memories
2. Glitter Accent Nail Manicure
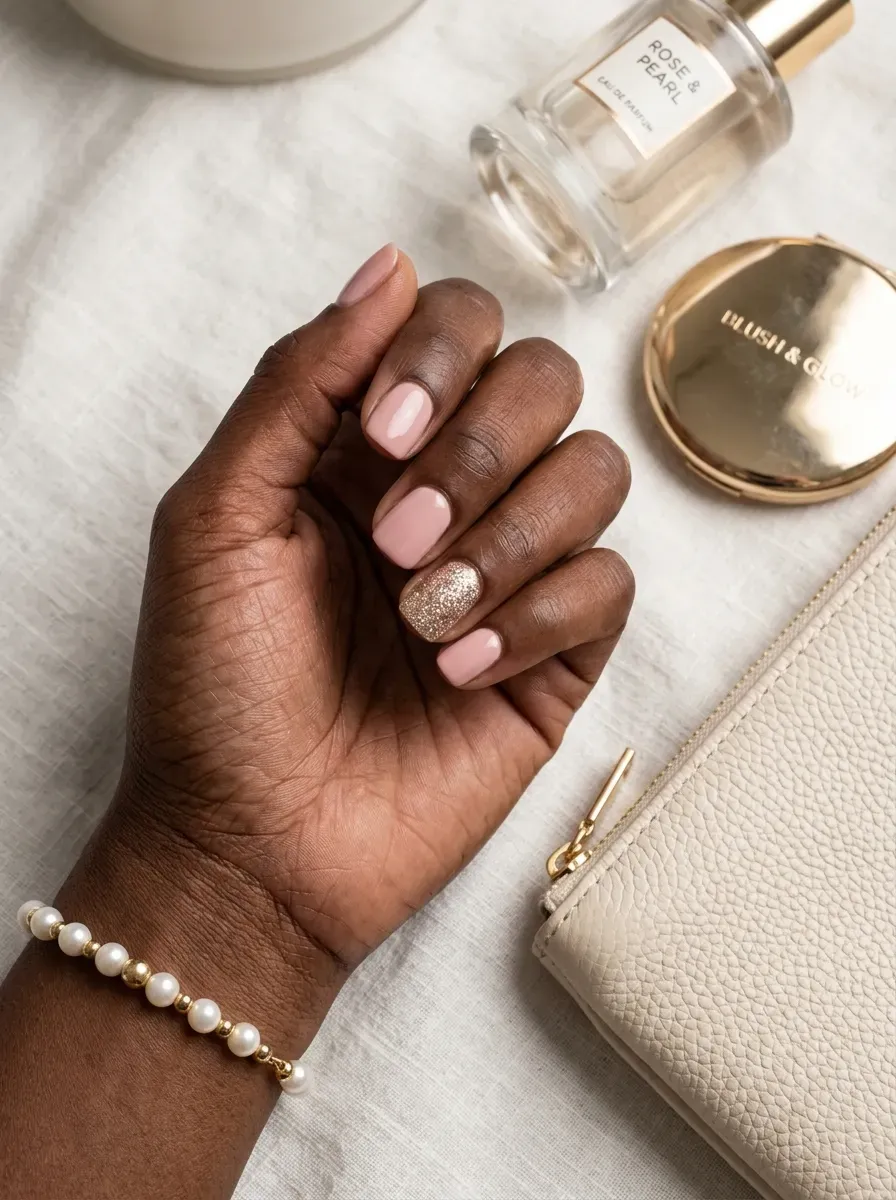
Painting one nail with glitter requires no drawing and still gives a basic manicure contrast. Fine glitter is easier than chunky particles because the surface levels more smoothly and needs less placement.
Keep the remaining nails in one cream shade so the accent looks deliberate. Two thin glitter coats usually give better coverage than trying to achieve full sparkle in one thick layer.
3. Easy Side-Swipe Color Nails
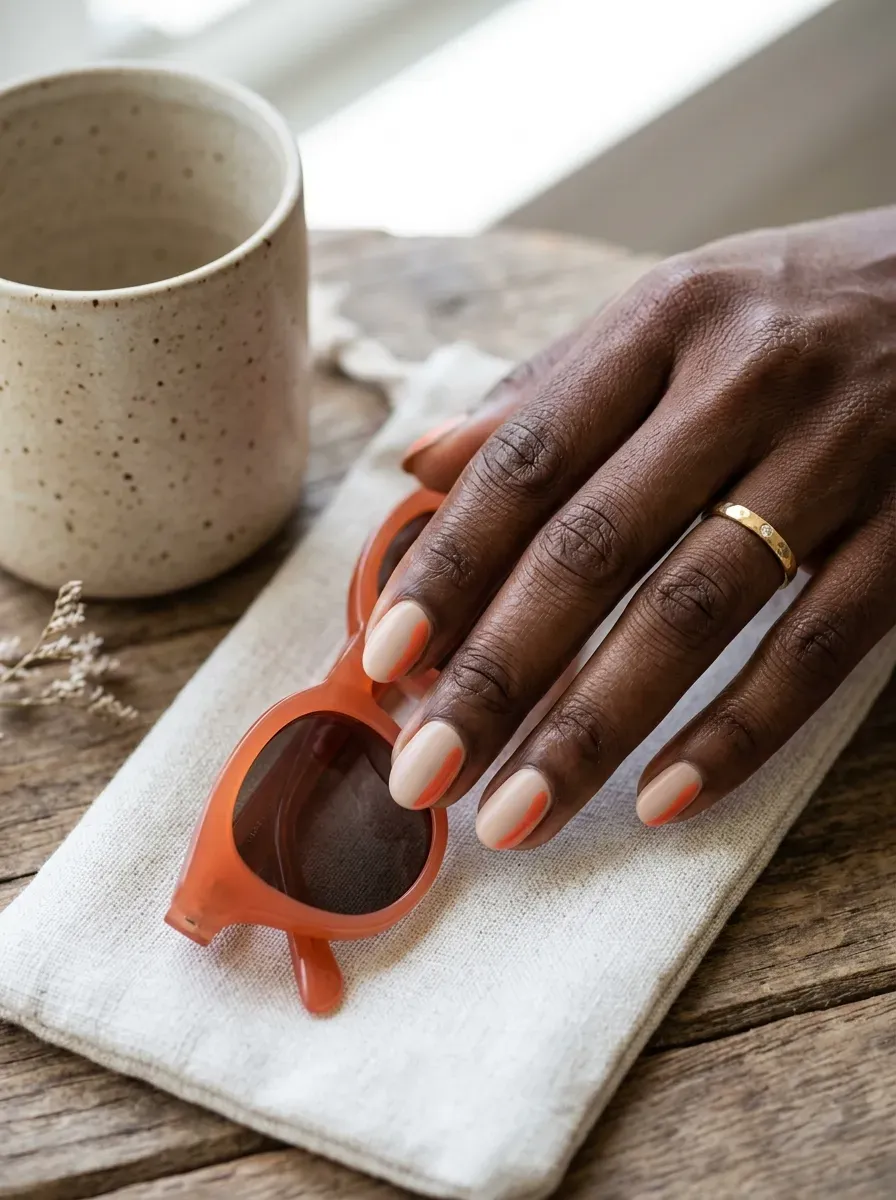
Side-swipe nail art works because the edges do not need to match exactly. Drag one loaded polish brush diagonally from the side of the nail, leaving part of the base color exposed.
A contrasting shade makes the simple gesture look graphic rather than unfinished. Wipe most excess polish from the brush first so the swipe stays thin and dries evenly.
Read now 29 Meaningful Gift Ideas for Girlfriend or Wife That Feel Thoughtful, Emotional & Deeply Personal
4. Sponge Ombré Nails
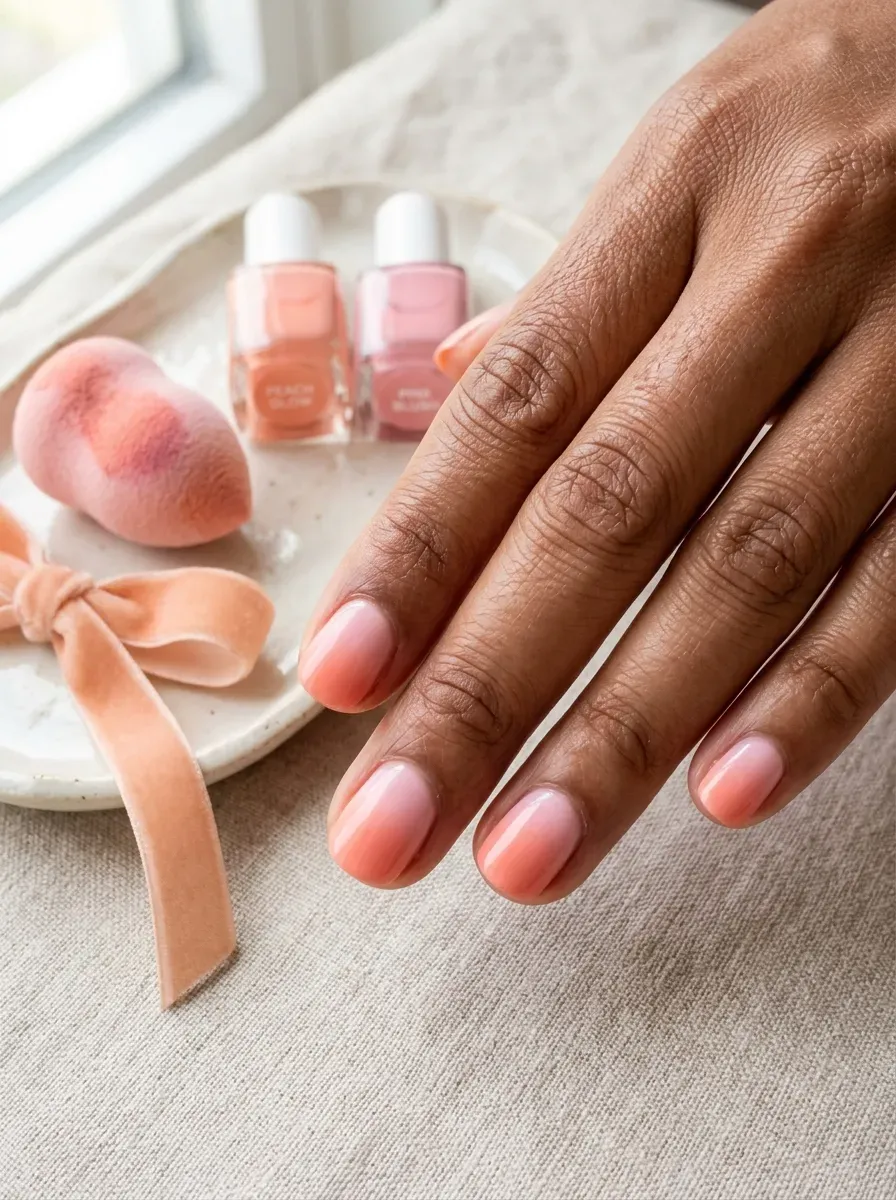
A makeup sponge can create an ombré that looks more complicated than it really is. Paint two neighboring colors onto the sponge, then tap lightly across the nail until the transition softens.
Pink and peach are forgiving because their tones blend naturally. Apply liquid latex or petroleum jelly around the skin first, since the cleanup takes longer than the actual gradient.
5. Sticker Floral Accent Nails
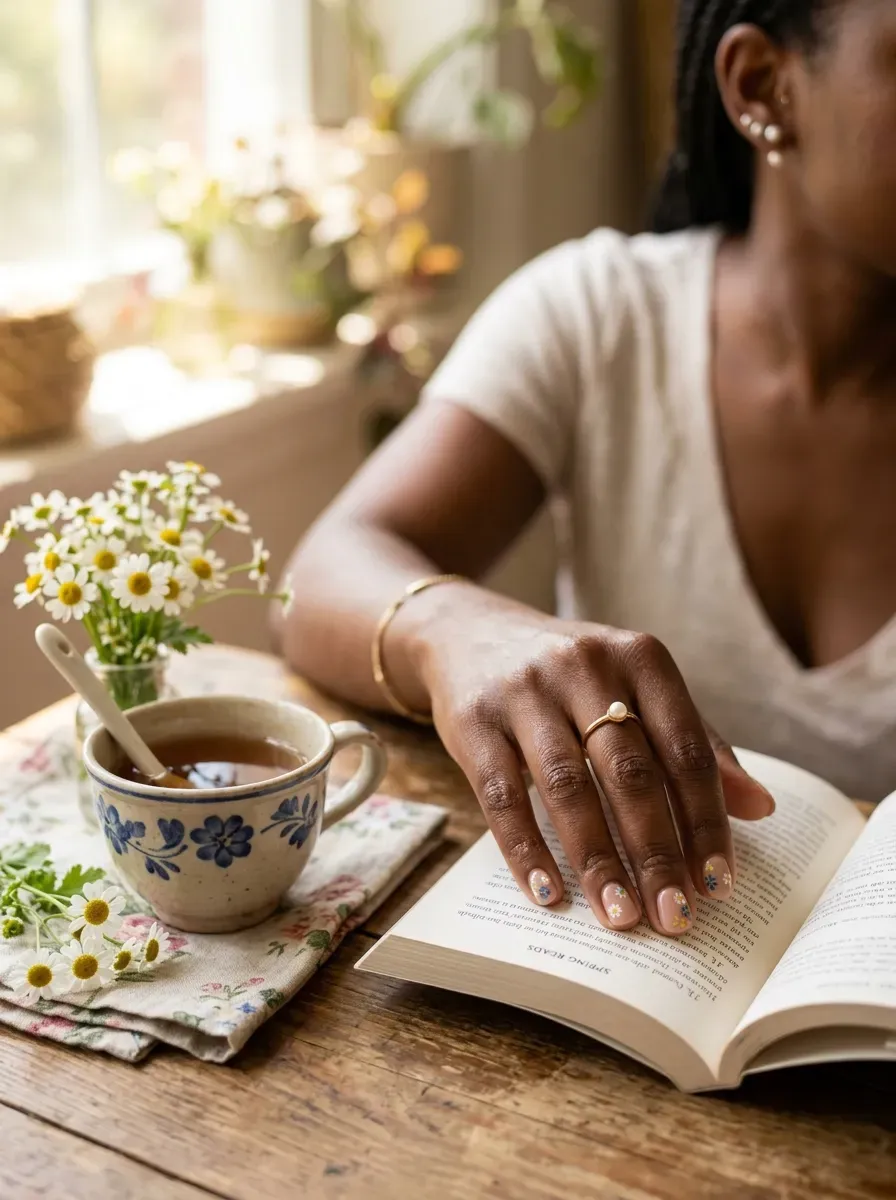
Nail stickers are useful when you want detailed florals without painting a single petal. A sheer or pale base makes even inexpensive decals look cleaner, especially when only two or three nails carry artwork.
Press every sticker flat before sealing it. Run top coat slightly beyond the sticker edges so corners do not lift after hand washing.
6. Mismatched Polka-Dot Nails
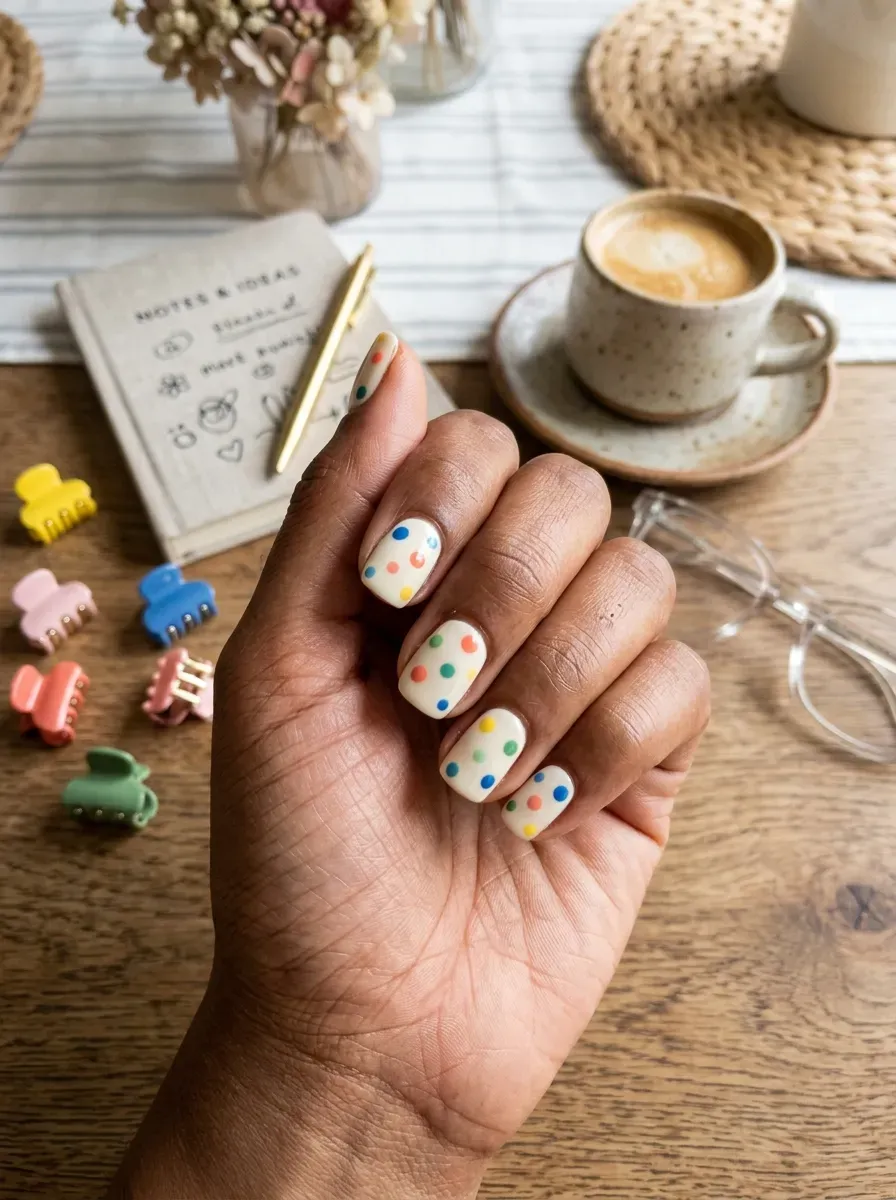
Polka dots are beginner-friendly because uneven spacing can become part of the design. Use several colors over one neutral base and vary the dot sizes instead of trying to duplicate every nail.
A toothpick works for tiny dots, while a bobby pin creates larger circles. Let the dots dry fully before top coat so the brush does not drag their edges.
Check out 60 is the New 30: 17 Silver Sisterlocks That Prove Beauty Only Gets Better with Age!
7. Simple Colorful French Tips
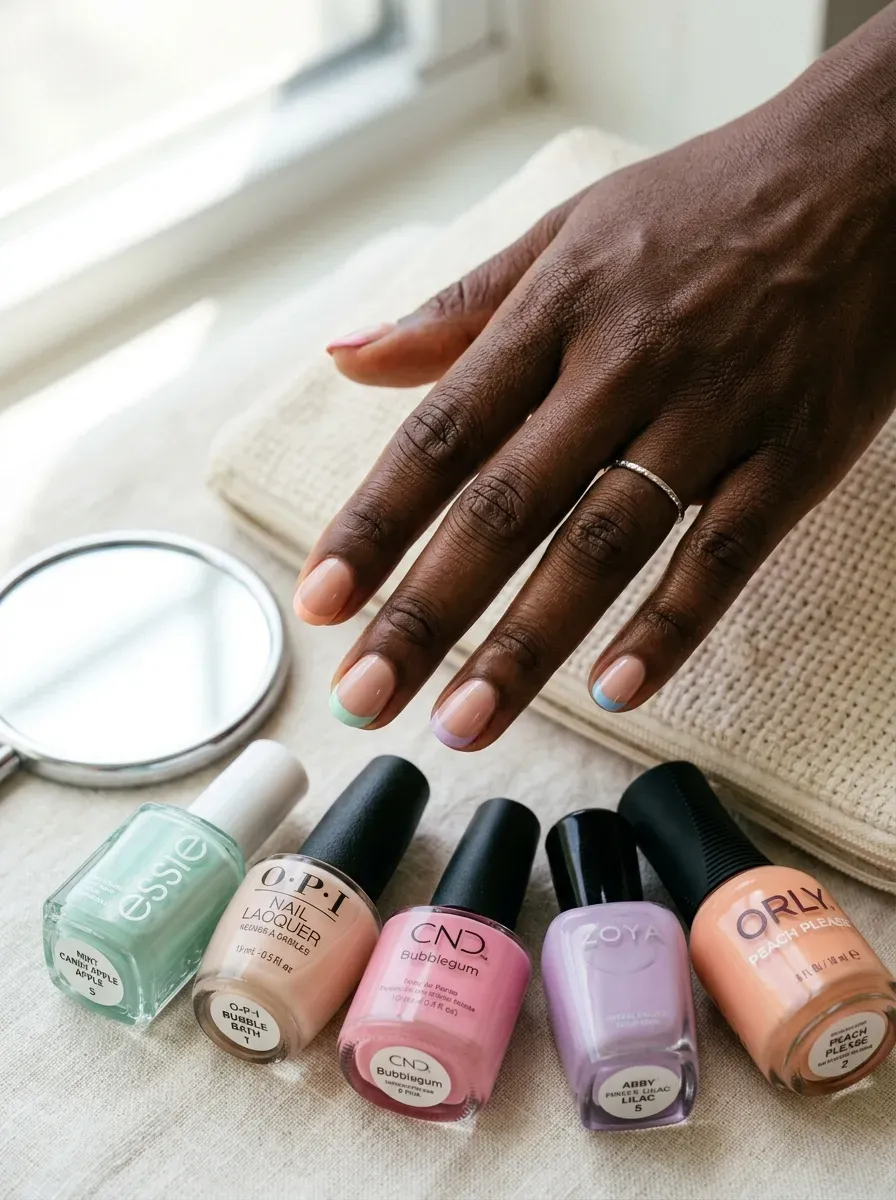
Colorful French tips do not need a salon-perfect smile line to work. Beginners can follow the natural free edge with the side of the polish brush, especially on short rounded nails.
Using a different pastel on each finger makes small inconsistencies less noticeable. Start with very little polish and build the tip gradually instead of trying to make one thick stroke.
8. Gold Foil Nude Nails
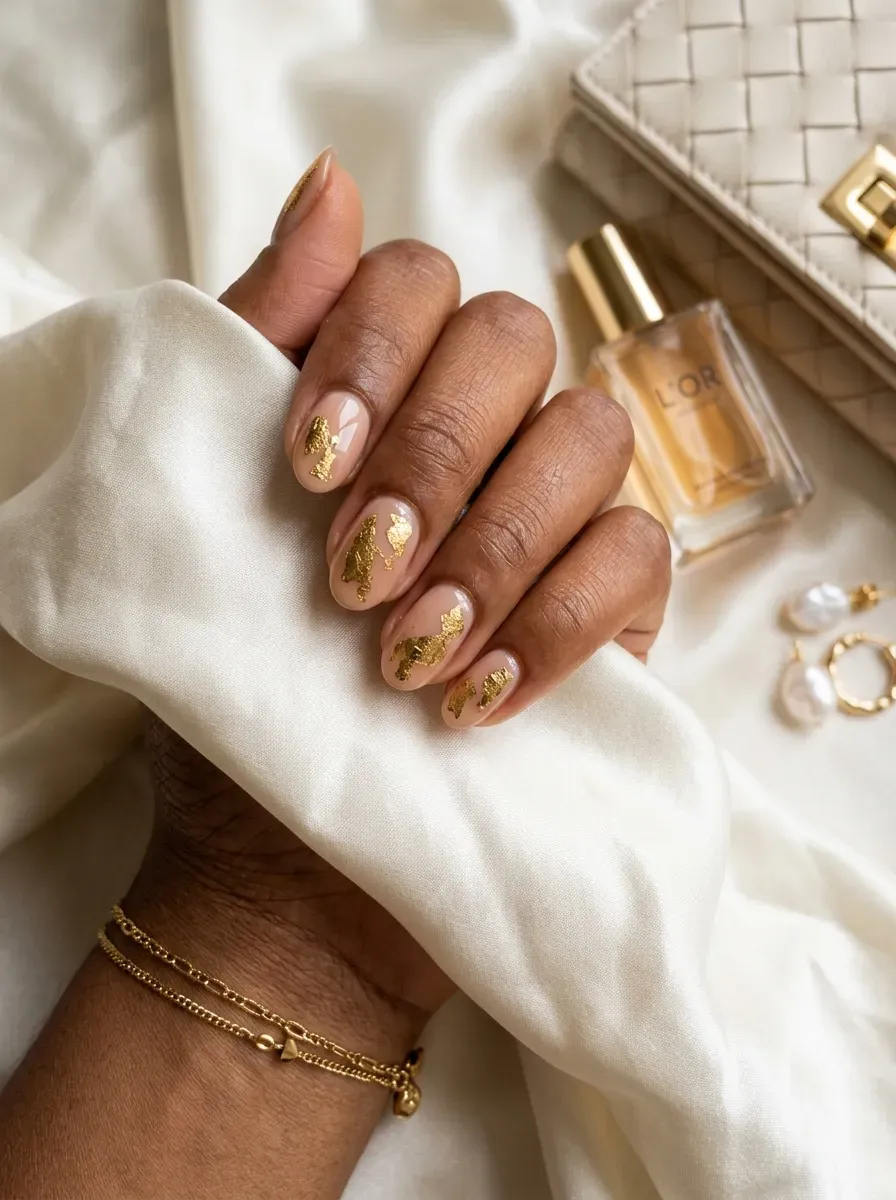
Gold foil is forgiving because irregularity makes the design look better, not worse. Tear small pieces, place them onto tacky polish or gel, and scatter them differently across each nail.
A nude base prevents the metallic detail from feeling too busy. Press foil completely flat before top coat, because raised corners can catch hair and lift surprisingly quickly.
9. Half-and-Half Color Nails
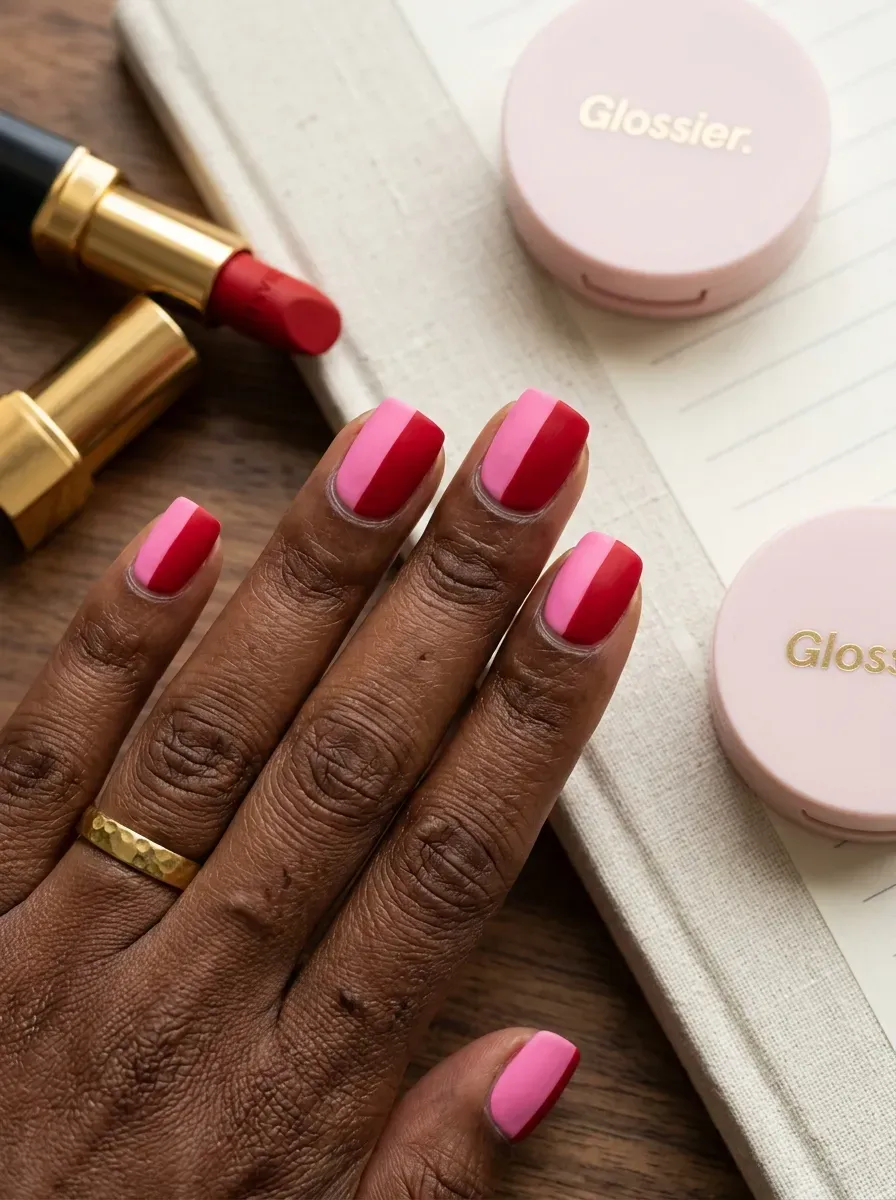
A vertical half-and-half design gives you nail art without curves, flowers, or detailed brushwork. Paint the lighter shade first, let it dry, then cover one side with the darker color.
The dividing line can be slightly imperfect and still read clearly. Use a thin piece of nail tape as a temporary guide if freehand painting feels too unpredictable.
Se also The 14 Best Low-Alcohol Bachelorette Drinks: Fun, Flirty Sips Without the Hangover
10. Tiny Heart Dot Nails
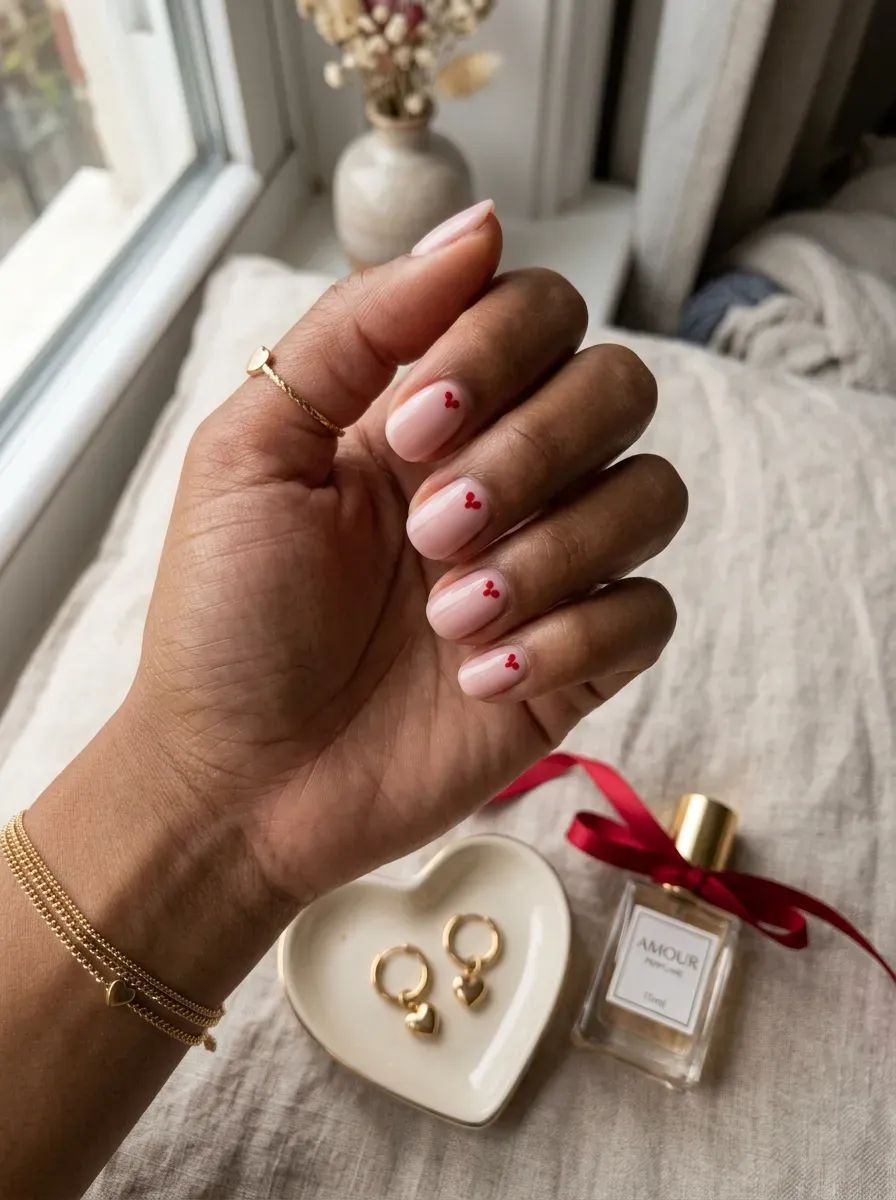
Tiny hearts are easier than they look when you stop trying to draw an outline. Place two small dots beside each other, then drag both downward into one point using a toothpick.
Keep the hearts tiny so uneven sides are less obvious. Work one heart at a time while the polish is still wet, since dried dots will not pull smoothly into a point.
11. Dry-Brush Abstract Nails
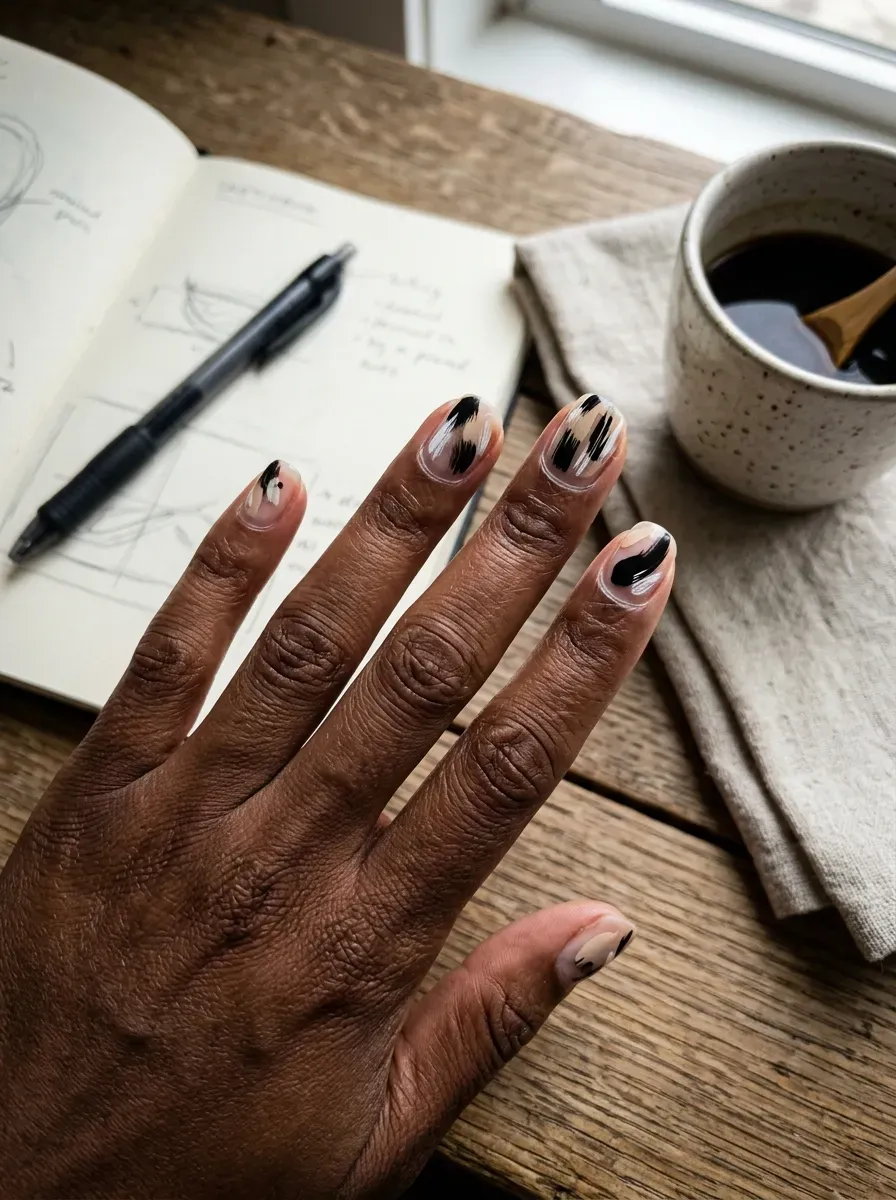
Dry-brush art actually benefits from imperfect coverage. Remove most polish from the brush, then lightly drag the remaining pigment across a dry base so streaks and gaps appear naturally.
Neutral colors make the effect look more intentional and less messy. Stop after one or two strokes per nail; repeatedly brushing the same area usually turns the airy texture into a solid patch.
12. Easy Glitter Gradient Nails
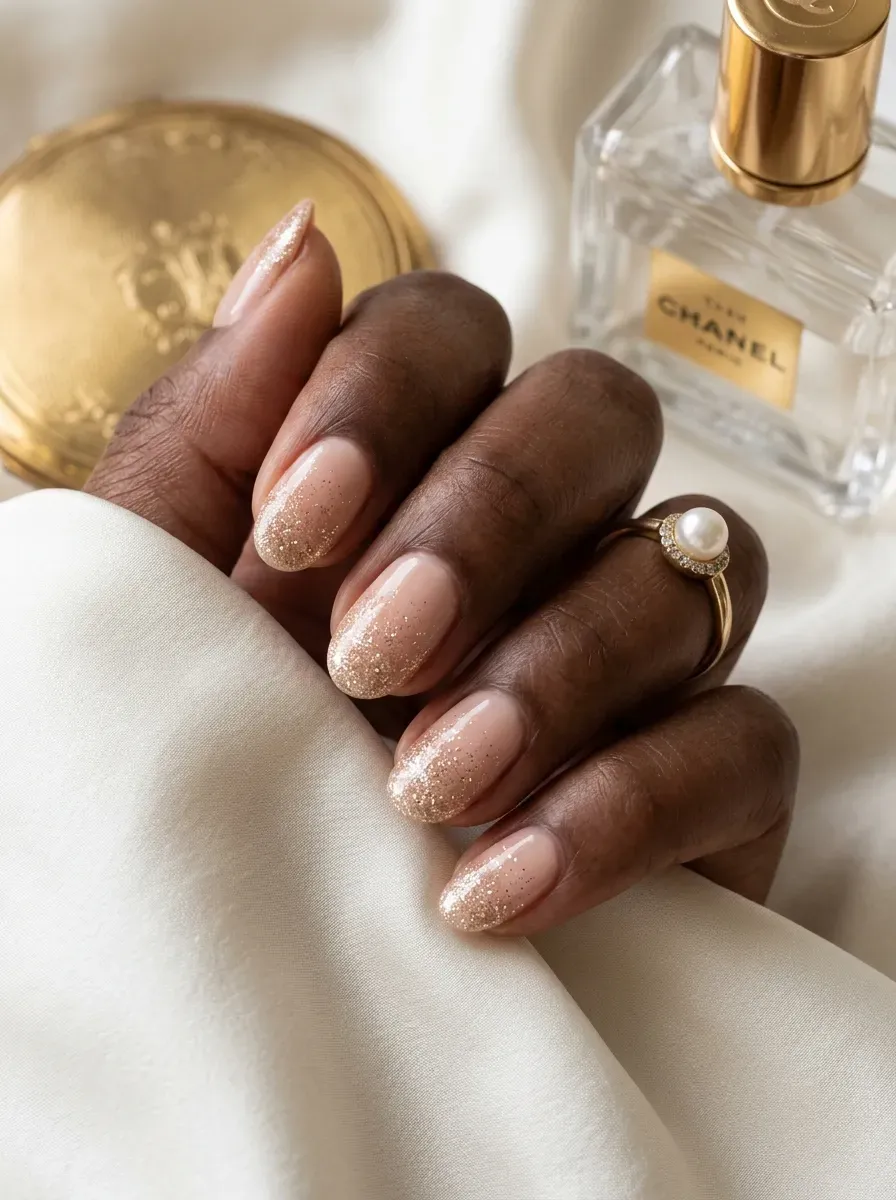
A glitter gradient hides beginner mistakes because there is no exact line to follow. Concentrate sparkle at the tip, then use whatever remains on the brush to dab a few particles lower down.
Fine glitter creates the smoothest fade and seals more easily than chunky pieces. Use a sponge if you want denser sparkle without adding several thick coats of clear polish.
Read also 25 Locs Hairstyles for Black Women Over 40
13. Press-On Accent Nail Mix
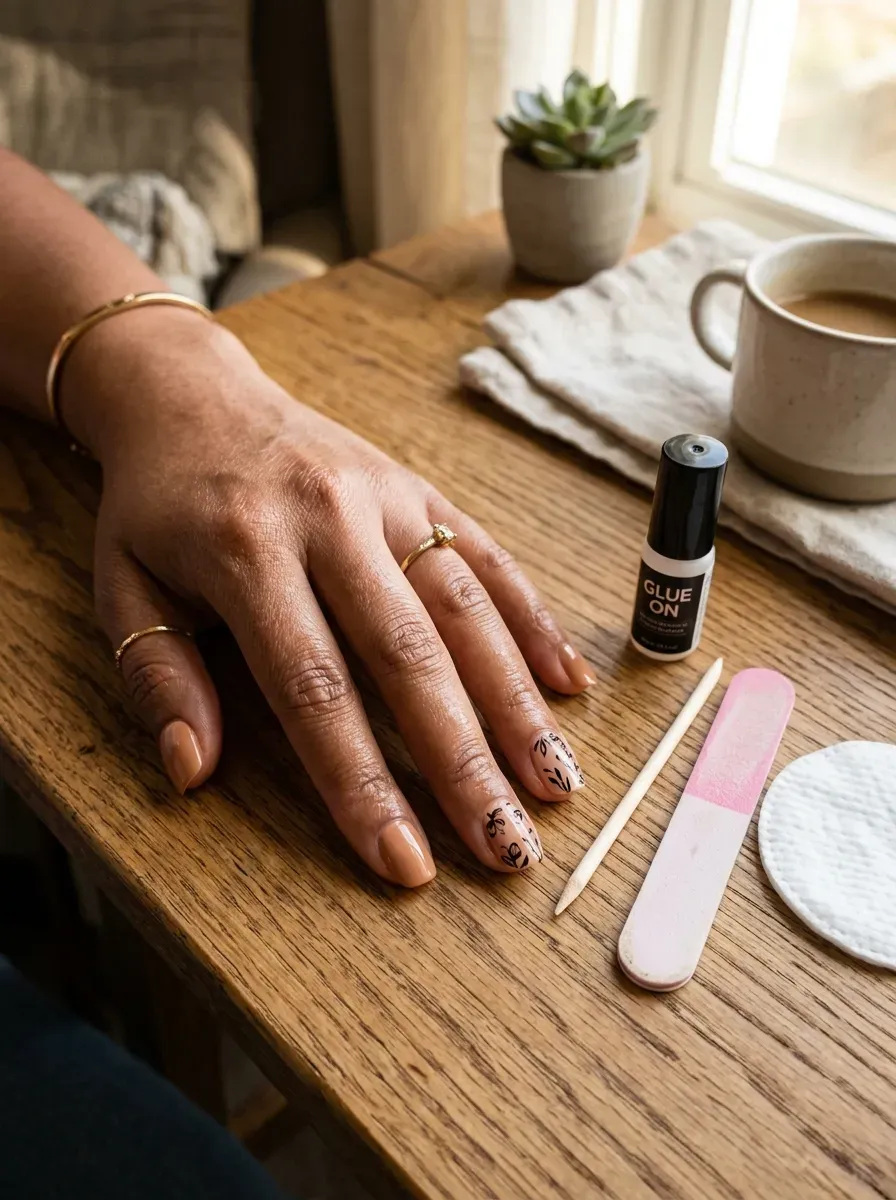
Press-ons remove the hardest part of nail art because the design already exists before it reaches your hand. Mixing plain nude nails with one or two patterned accents keeps the finished set from looking overly busy.
Correct sizing matters more than advanced technique. File the side edges gently if needed, then press each nail firmly from cuticle to tip to reduce trapped air.
14. Two-Tone Diagonal Nails
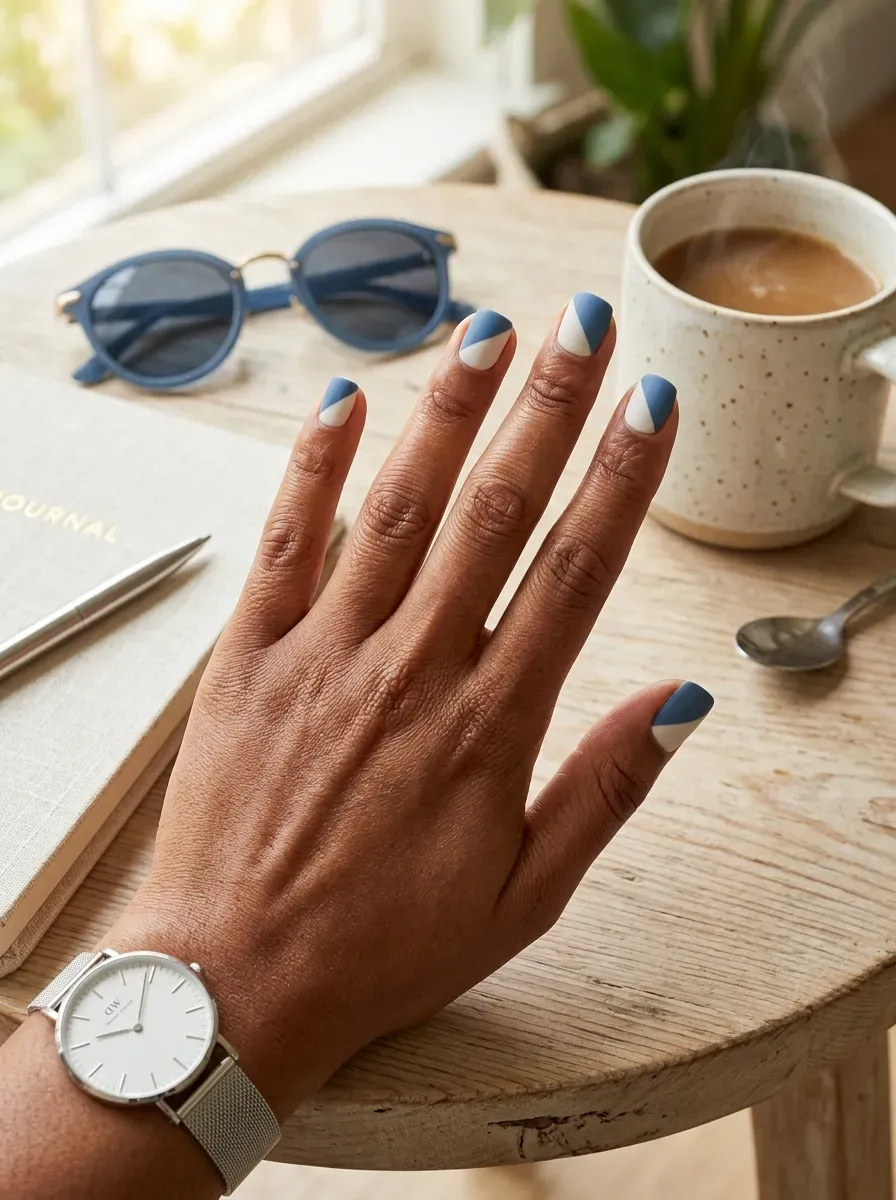
Diagonal color blocking looks more dynamic than a straight split but takes almost the same effort. Paint one base shade, let it dry completely, then add a second color across one corner.
Nail tape can create a sharper division, although slightly uneven freehand lines still work. Remove tape while the second polish is wet so the edge does not lift with it.
15. Loose Swirl Line Nails
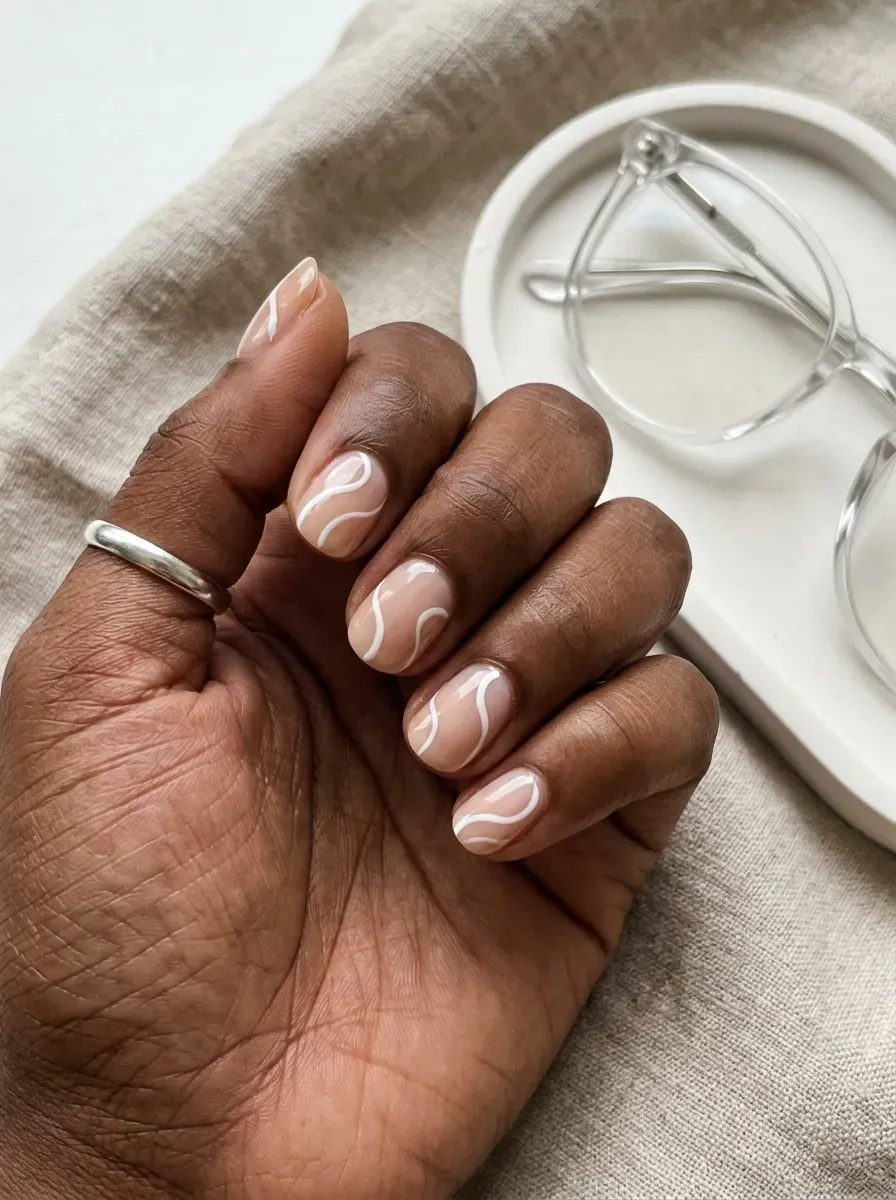
Swirls are easier for beginners than straight lines because curves do not need to match. Use a thin brush or toothpick and let each line move differently across the nail.
A sheer base gives you room to stop before the design feels crowded. Keep only two or three curves per nail, since adding more lines often makes small mistakes much more noticeable.
Check out The Final Rose Bachelorette Game Ideas: Fun Party Games Every Bride Squad Will Absolutely Love
16. Confetti Speckle Nails
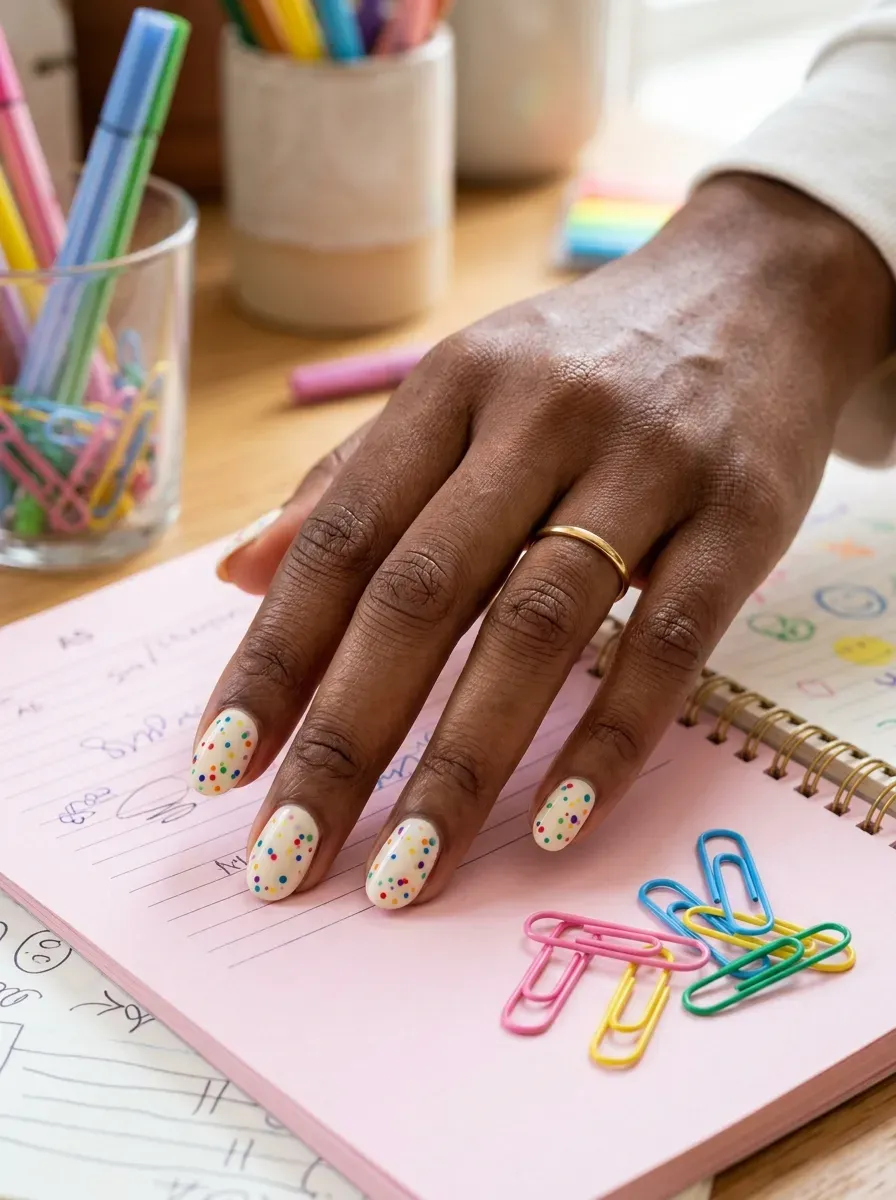
Confetti speckles are almost impossible to place incorrectly because randomness is the point. Flick tiny dots with a stiff brush or use a ready-made speckled topper over cream polish.
Keep the color palette limited to three or four shades so the result stays intentional. Cover your work surface before flicking polish, because the technique can send tiny droplets farther than expected.
17. Metallic Sticker Stripe Nails
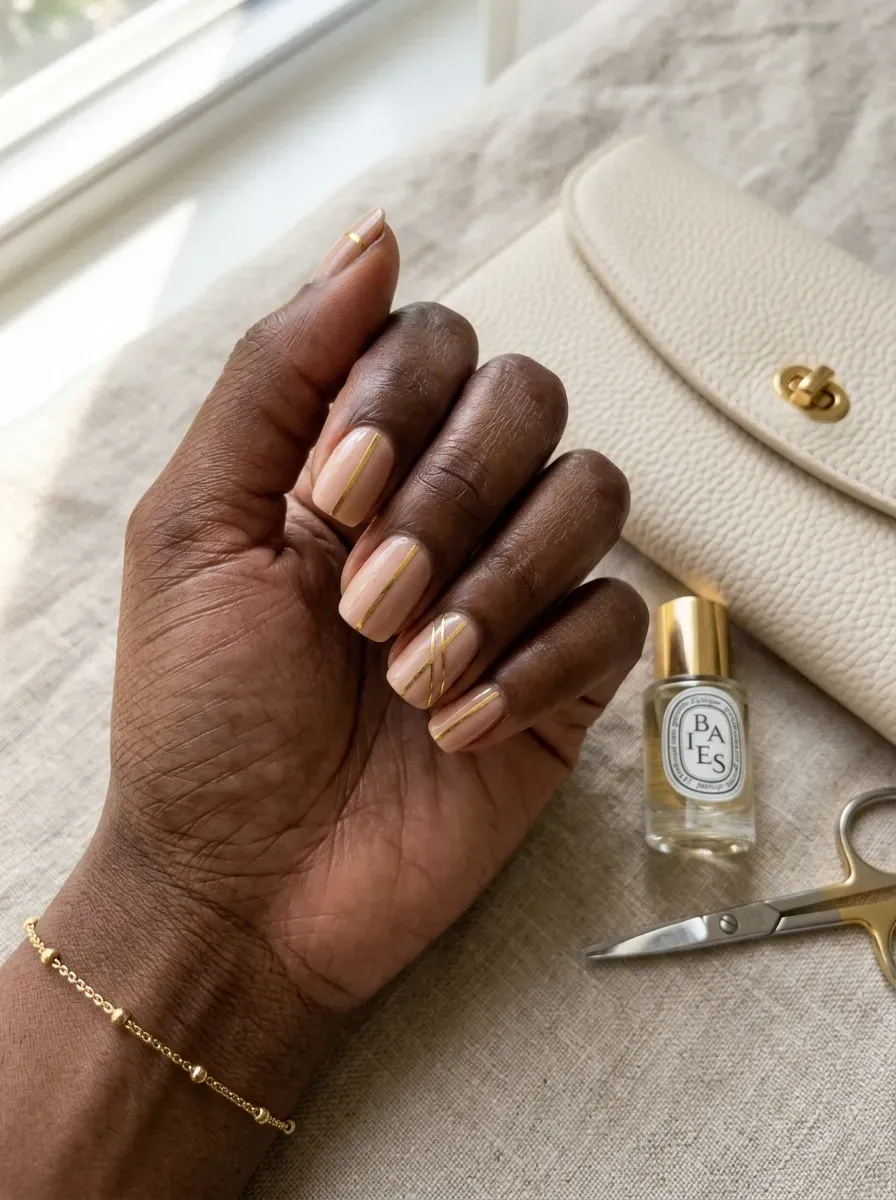
Metallic nail tape creates sharp lines without needing a steady brush hand. Place one vertical or diagonal strip over fully dry polish, trim it slightly inside the nail edge, then seal everything.
Gold looks especially rich over nude, brown, burgundy, or black. Do not let the tape reach past the free edge, because exposed ends are usually the first place lifting starts.
18. Easy Marble Dab Nails
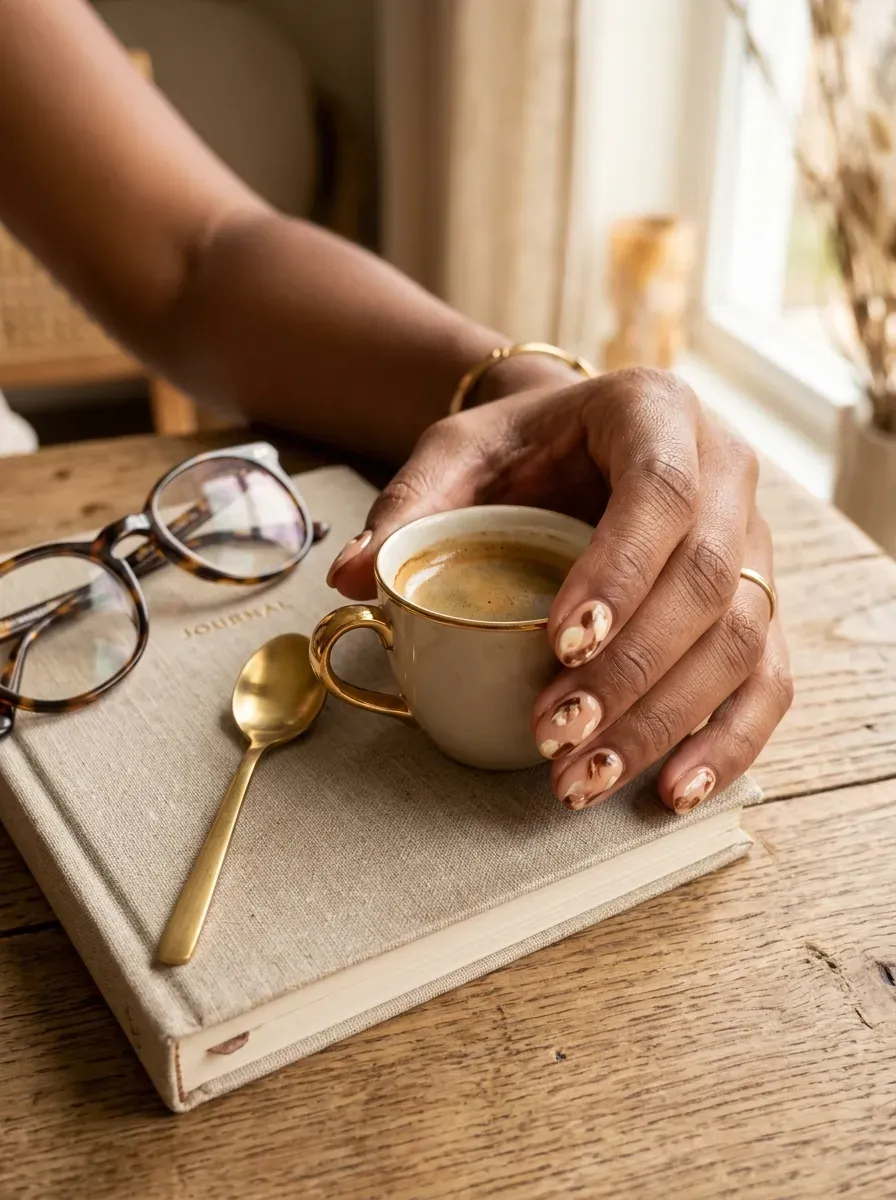
Beginner marble does not need realistic stone veining. Dab two or three similar shades onto the nail while they are still slightly workable, then soften the borders with a clean brush.
Cream, caramel, and mocha are forgiving because accidental blending still looks cohesive. Avoid overmixing; stopping while separate color patches remain creates more convincing marble than turning everything into one muddy shade.
19. Reverse French Half-Moon Nails
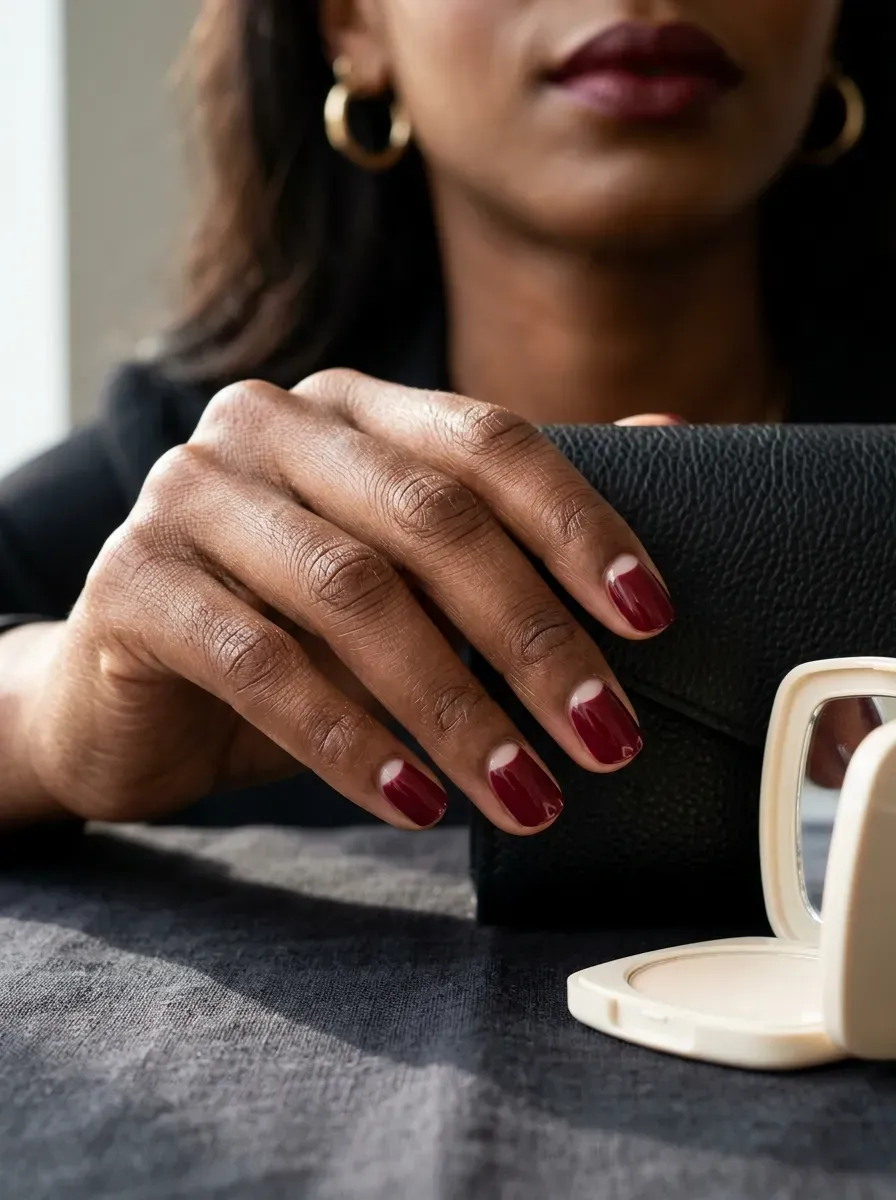
A reverse French manicure moves the accent line to the cuticle area, where beginners can use round reinforcement stickers as guides. Paint the full nail, position the sticker, then add the contrasting shade above it.
Leaving the half moon nude makes grow-out less obvious. Press sticker edges down firmly before painting so color does not seep underneath and blur the curve.
See now 12 Couples Bucket List Ideas for Relationships That Go Beyond the Ordinary
20. Clear Polish with Random Color Dabs
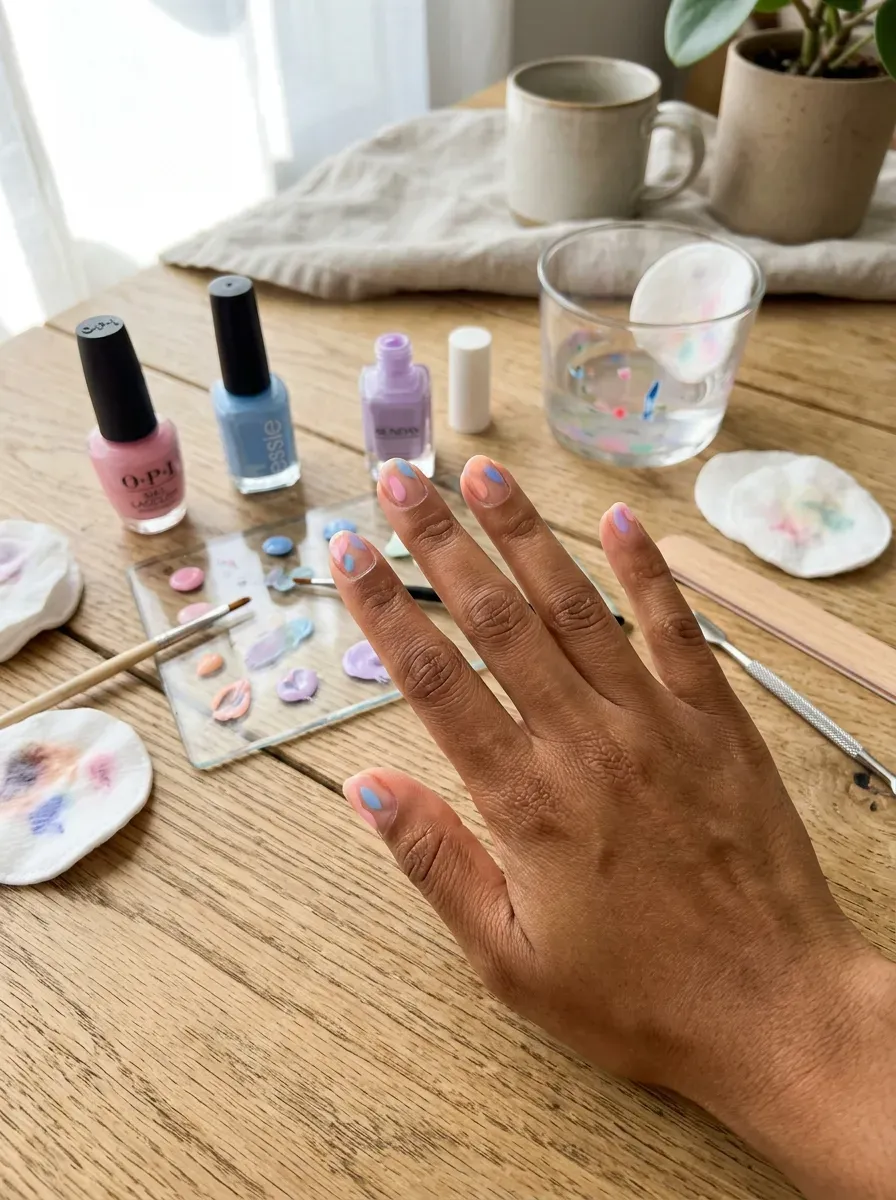
Random color dabs are ideal when precision is the thing stopping you from trying nail art. Place small patches of several colors over clear polish and let the shapes stay uneven.
Spacing matters more than symmetry. Leave visible gaps between the colors so the manicure looks airy instead of smeared together. Finish with one smooth top coat only after every dab has dried completely.
The Five Beginner Tools That Actually Make Nail Art Easier
You do not need a drawer full of professional nail-art equipment to start experimenting. A few simple tools cover most beginner designs and are easier to control than trying to improvise everything with the polish bottle brush.
A dotting tool is useful for polka dots, flowers, hearts, and small accents. If you do not own one, the rounded end of a bobby pin can do the same job. A toothpick handles smaller dots and can drag wet polish into heart points or loose marble lines.
Thin nail-art tape creates clean geometric sections and can also be left on the nail as a metallic stripe. A small makeup sponge handles gradients, glitter placement, and soft aura-style effects.
Finally, a narrow clean-up brush dipped lightly in remover helps correct polish around the sidewalls without restarting the entire manicure.
Good lighting matters almost as much as the tools. Sit somewhere you can clearly see both sides of the nail. Beginners often create more problems by repeatedly fixing a line they cannot see properly than by making the original mistake.
Why Thin Polish Layers Are Easier for Beginners
Thick polish may seem like a shortcut because it covers faster, but it usually makes beginner nail art harder. Heavy coats move around the nail, flood the cuticle, take longer to dry, and can wrinkle when another design layer is added too soon.
Thin layers give you control. The first coat does not need to look completely opaque; its job is to establish an even base. A second coat can improve coverage without creating a bulky edge.
The same principle applies to dots, swirls, French tips, and color blocking. Remove excess polish from your tool before touching the nail. You can always add another small amount, but taking away a thick blob after it spreads is much harder.
Drying time matters with regular lacquer. If your base remains soft, stickers, tape, sponges, and detailing brushes can pull it up. Give each stage enough time before adding another.
When using gel, cure each layer according to the product instructions rather than making coats thicker in an attempt to save time. Controlled application nearly always produces a cleaner result.
How to Make Both Hands Look Decent When One Hand Is Less Steady
The non-dominant hand is where beginner nail art usually becomes frustrating. A design that feels simple on one hand can suddenly look impossible when you switch sides.
Choose techniques that tolerate variation. Dots, glitter gradients, stickers, foil, dry-brush strokes, speckles, and random color dabs do not require both hands to match exactly. Mismatched designs can actually make the difference look intentional.
Stabilize your hands before painting. Rest both forearms on a table and place the hand being painted flat instead of holding it in the air. When drawing a line, moving the finger underneath the brush can sometimes be easier than trying to move your less-steady hand smoothly.
Work from the easiest nails toward the hardest rather than starting with the thumb simply because it comes first. Give yourself room to learn the motion.
If one hand turns out slightly different, resist the urge to keep adding polish to “fix” it. Beginners often turn a small uneven line into a bulky one by correcting it repeatedly.
Which Beginner Designs Last the Longest
Durability depends more on surface texture and sealing than on how complicated a design appears. Flat techniques such as dots, swirls, French tips, color blocking, stickers, foil, and gradients can all wear well when the edges are fully covered with top coat.
Raised decorations require more care because anything sticking above the nail has a greater chance of catching on hair, fabric, or bags. That is why simple painted designs are usually easier for someone learning at home.
Free-edge wear matters too. Cap the tip lightly with base, color, and top coat when the product system recommends it, especially if you type frequently or use your hands heavily.
With regular polish, reapplying a thin layer of top coat after several days can refresh shine and reduce minor surface wear. Gel should not be repeatedly covered to hide lifting. If the product separates from the natural nail, proper removal or repair is safer than sealing moisture underneath.
Clean preparation and thin coats will usually improve wear more than extra decoration ever can.
How to Choose Colors When the Technique Is Simple
Simple nail art puts more attention on color because there are fewer details competing for the eye. If you are using only dots, stripes, French tips, or one accent nail, the shades need enough contrast to make the technique visible.
Beginners can make color decisions easier by choosing one neutral base and one or two accents. Beige with black looks graphic, nude with gold feels polished, cream with brown stays soft, and sheer pink with red gives classic contrast. Pastels are forgiving when you want several colors in one manicure.
Skin undertone can guide the neutral base. Warm undertones often work naturally with caramel, peach, cream, warm beige, and chocolate. Cooler undertones can suit mauve, blue-red, lavender, cool pink, and silver, while neutral undertones can move between both groups.
Do not worry about matching every finger exactly. A limited palette creates cohesion even when each nail uses the colors differently. That flexibility is particularly useful while you are still learning placement and brush control.
Choosing Your First Beginner Nail Design
Start with how much nail space you have. Very short nails are easiest with dots, stickers, tiny hearts, simple tips, glitter, and small swipes, while slightly longer nails give diagonal blocks, ombré, swirls, and marble more room.
Next, choose your color intensity. Nude, cream, and blush keep mistakes subtle; brighter pink, blue, coral, or multicolor designs make the manicure more playful.
Think about the occasion as well. Minimal dots or metallic stripes work easily for everyday wear, while glitter, foil, hearts, and colorful French tips feel more festive.
Maintenance matters too. Flat painted designs and stickers are easier to live with than anything raised.
If you want the least pressure possible, choose a design where irregularity is part of the look. Dry brushing, confetti speckles, random dabs, and foil are especially forgiving.