Halloween nails do not have to mean orange and black cartoon pumpkins. If your everyday style already leans dark, deep colors, lace, silver hardware, the season is a reason to push that aesthetic further instead of setting it aside for a costume palette.
A gothic manicure works year round in a way a jack o lantern accent never will, which makes it one of the more practical seasonal choices on the calendar.
Some of these designs lean on a single deep color and nothing else. Others bring in lace texture, metal charms, or a hand painted detail that only reads clearly up close. Start with whichever one matches the amount of time you actually have in the chair.
Matte Oxblood Coffin Nails

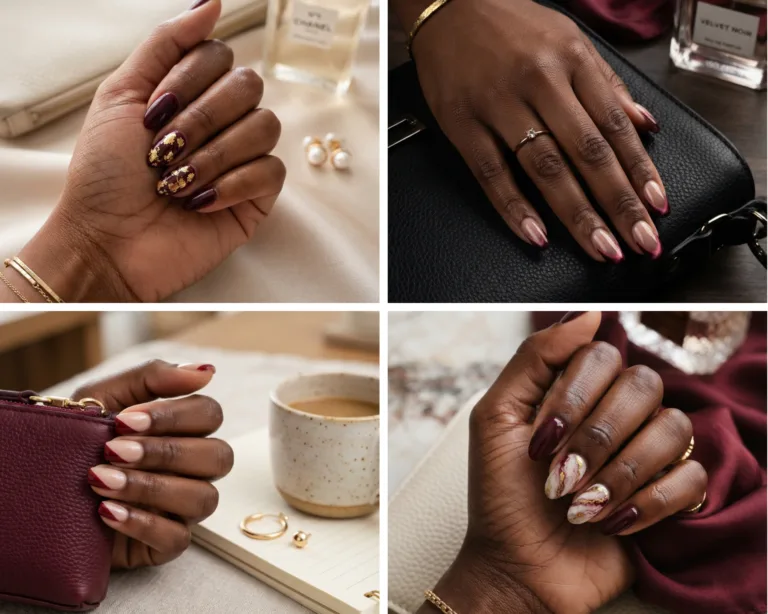
Oxblood sits somewhere between burgundy and true black, which gives it more depth than a standard red without tipping into full horror territory. Matte finish flattens the shine so the color reads as dried rather than glossy, closer to old leather than fresh polish.
Coffin shapes give the flat wide tip enough surface for the deep tone to actually register instead of getting lost.
Two thin coats keep the color even, since a single thick coat of dark matte polish tends to pool near the cuticle.
Save for later 39 Halloween Party Nail Ideas That Turn Heads
Black Lace Overlay Nails
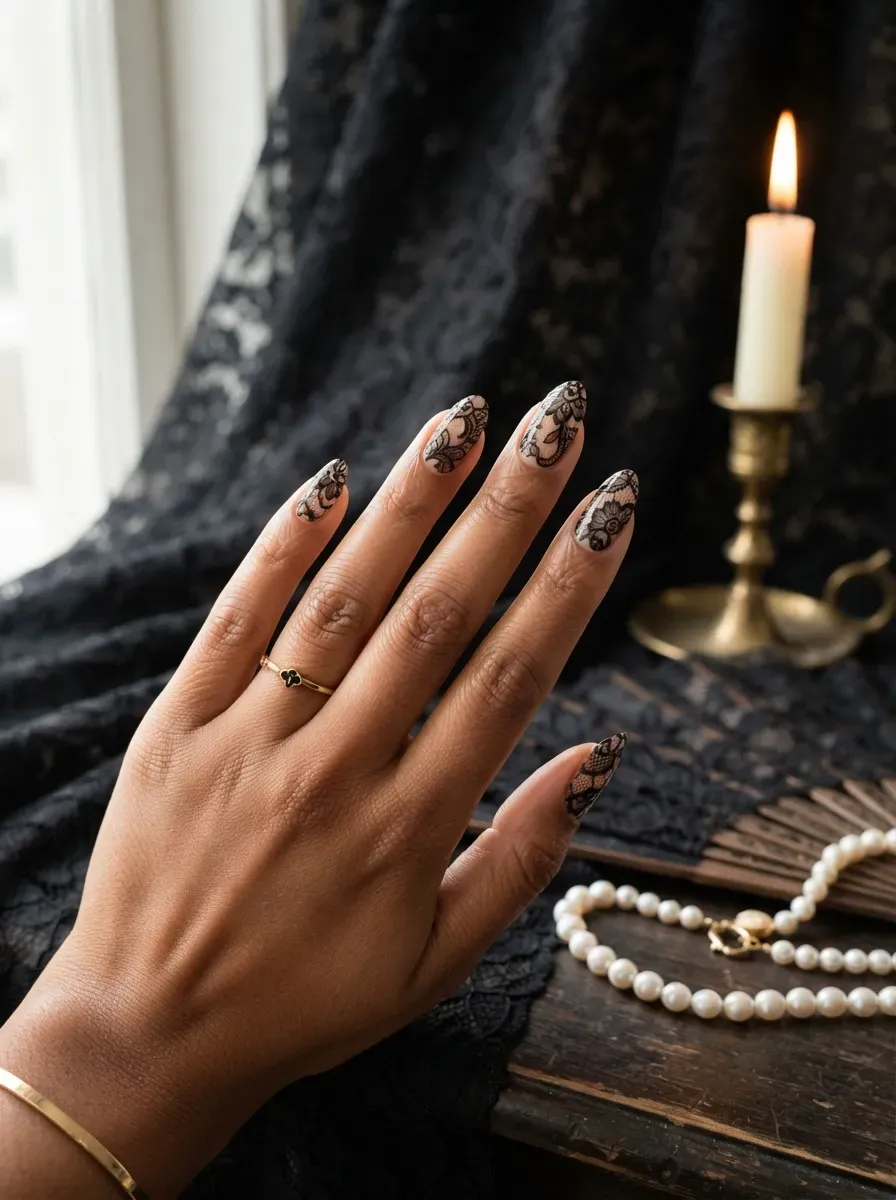
Real lace has open space built into its pattern, and the nail version needs that same restraint to read correctly instead of looking like a solid black smear.
A detail brush and thinned black gel paint give the cleanest thread like lines for the pattern. Almond or coffin shapes give the lace enough surface to actually show its detail.
Avoid touching the wet linework longer than usual, since this design smudges under fingerprints more easily than most.
Gothic Cross Accent Nail
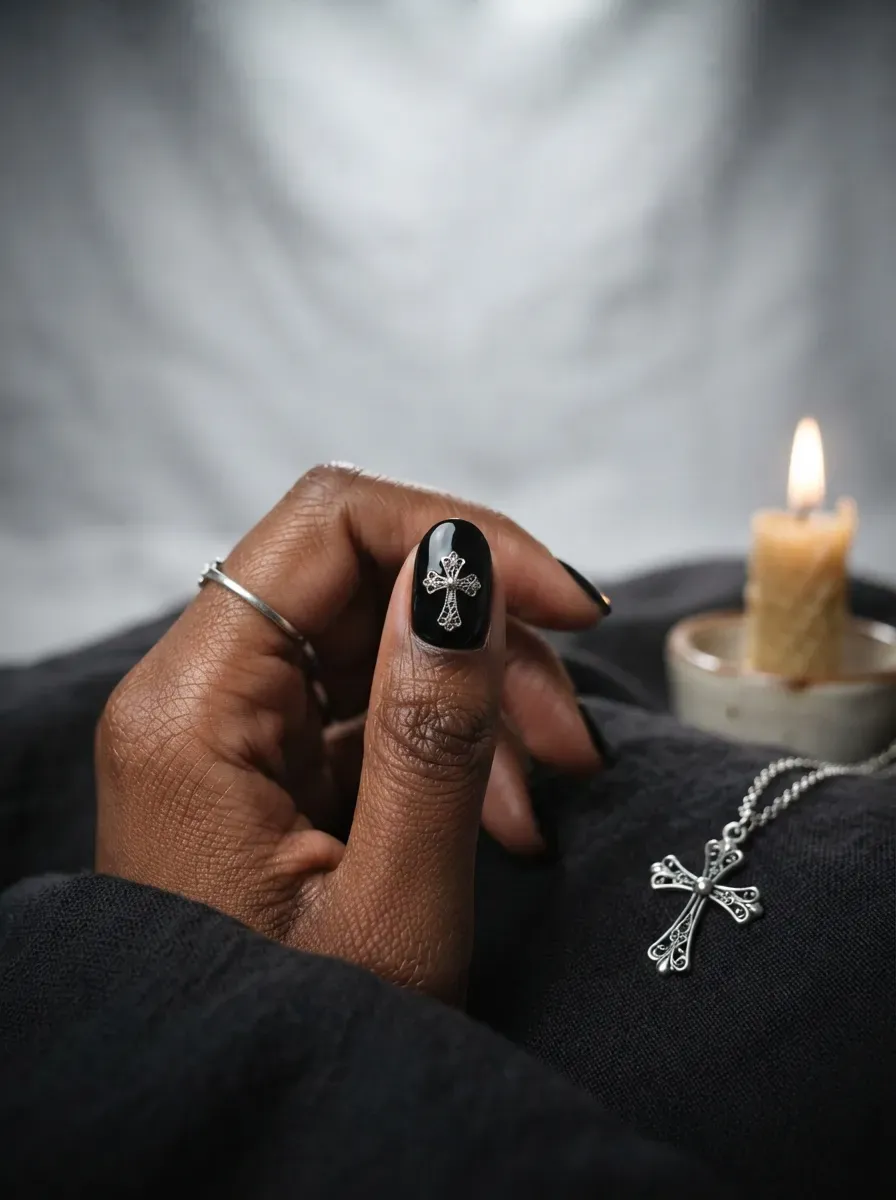
A small ornate cross, painted in silver rather than gold, gives one accent nail a Victorian mourning jewelry feel instead of a simple religious symbol.
Black base polish on the surrounding nails keeps the accent as the clear focal point. Square or coffin shapes give the cross’s vertical and horizontal lines a flat surface to sit against.
Keep the cross slightly off center rather than perfectly symmetrical, since real antique jewelry rarely comes out mechanically even either.
Blood Drip Nail Art
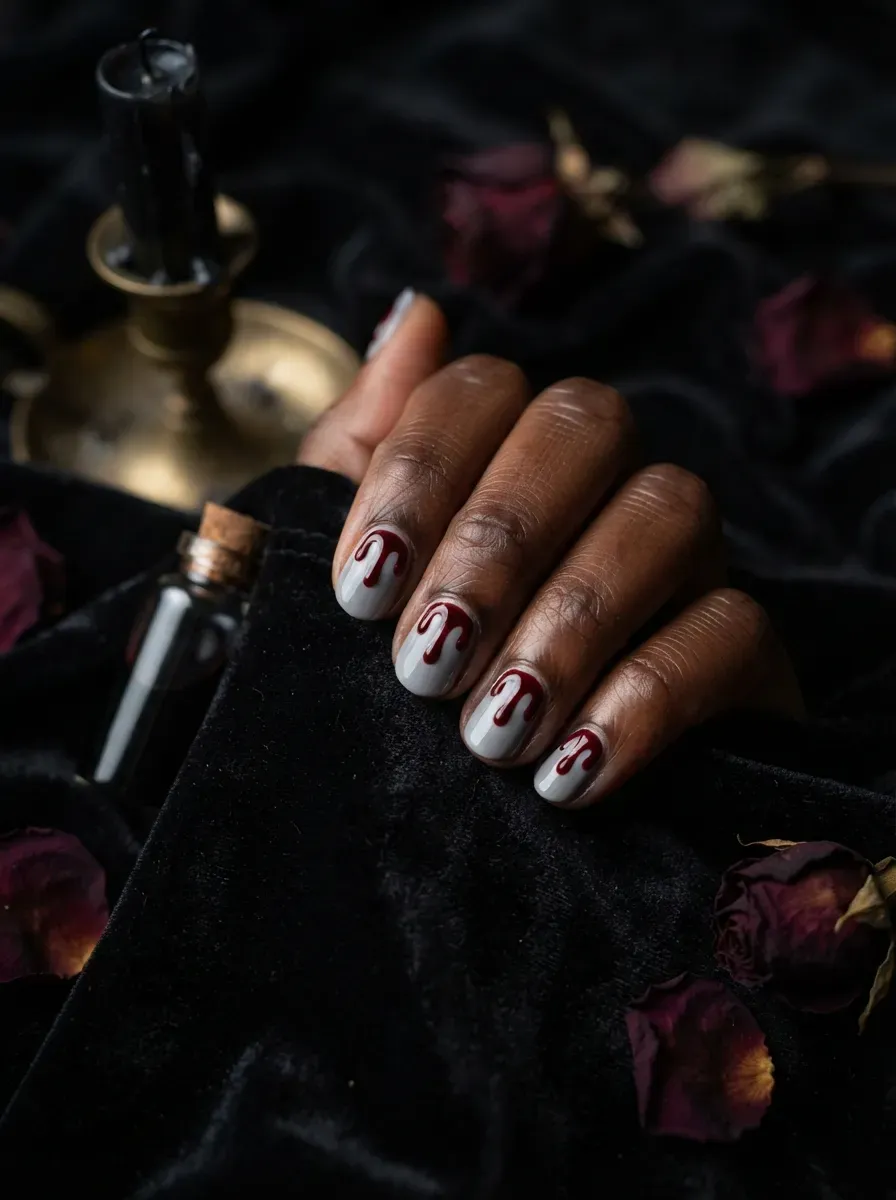
A few irregular red drips, painted from the cuticle downward over a pale grey or white base, give this design its horror leaning edge without needing any figurative imagery at all.
Varying the length and width of each drip keeps the effect looking accidental rather than stamped. Medium to long nails give the drips enough vertical space to actually read as dripping.
This design shows fingerprint smudging fast while wet, so let each drip dry completely before starting the next nail.
Deep Burgundy Velvet Nails

A velvet finish polish dulls the shine on deep burgundy just enough to look like fabric instead of lacquer, which gives the color more texture than a standard glossy red would carry. Short coffin shapes keep the richness from looking severe.
This shade flatters warm undertones especially well, since the burgundy pulls out gold rather than clashing against it.
Matte and velvet top coats are more delicate than glossy gel, so avoid heavy handwashing right after application.
Read more 38 Halloween Toe Nail Designs for Spooky Season
Full Nail Spiderweb Design
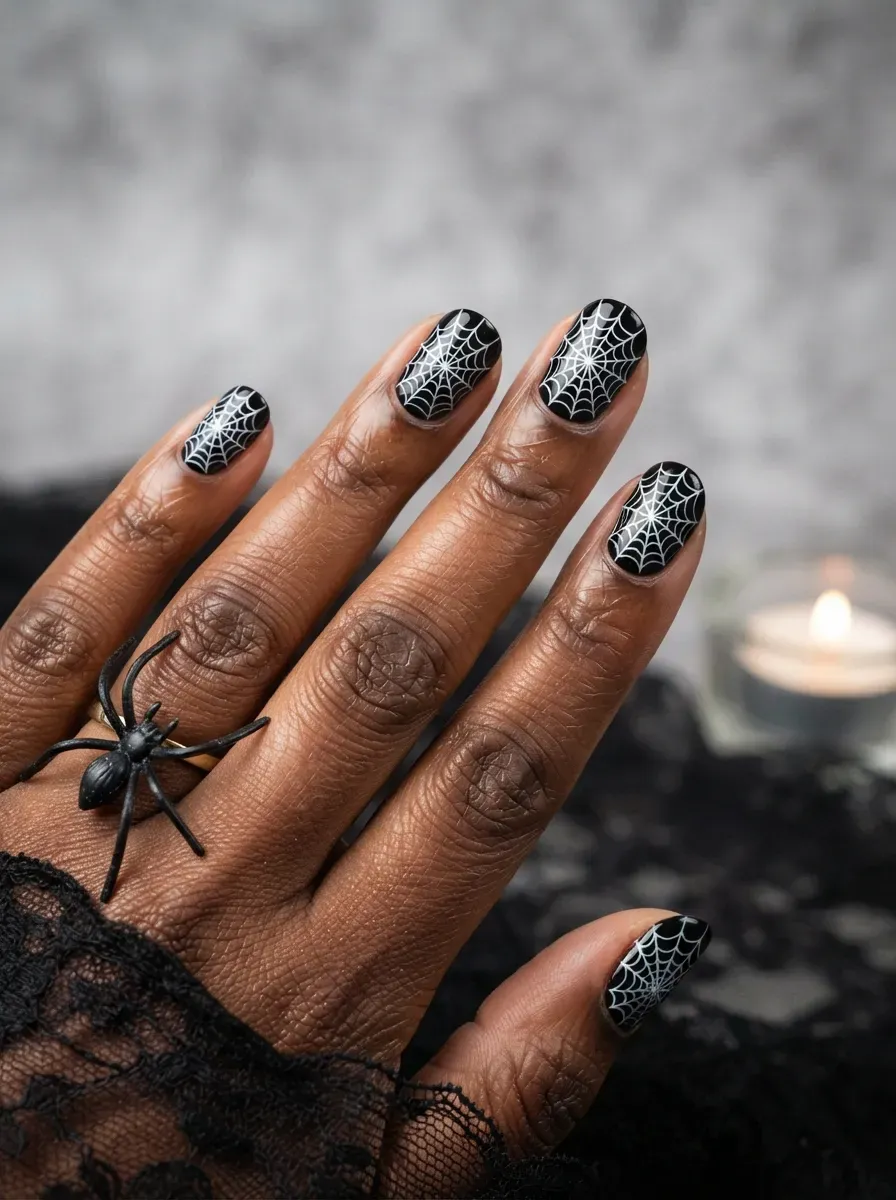
Covering the entire nail in web strands, rather than tucking the pattern into one corner, gives this design a bolder, more committed gothic statement.
Radiating the lines out from a single point near the cuticle keeps the pattern from looking scattered. Square or coffin shapes give the web enough flat surface to actually spread across cleanly.
Ask your tech to draw the strands freehand rather than stamping, since stamped webs look too uniform for a pattern built around irregular spacing.
Chrome Black Mirror Nails
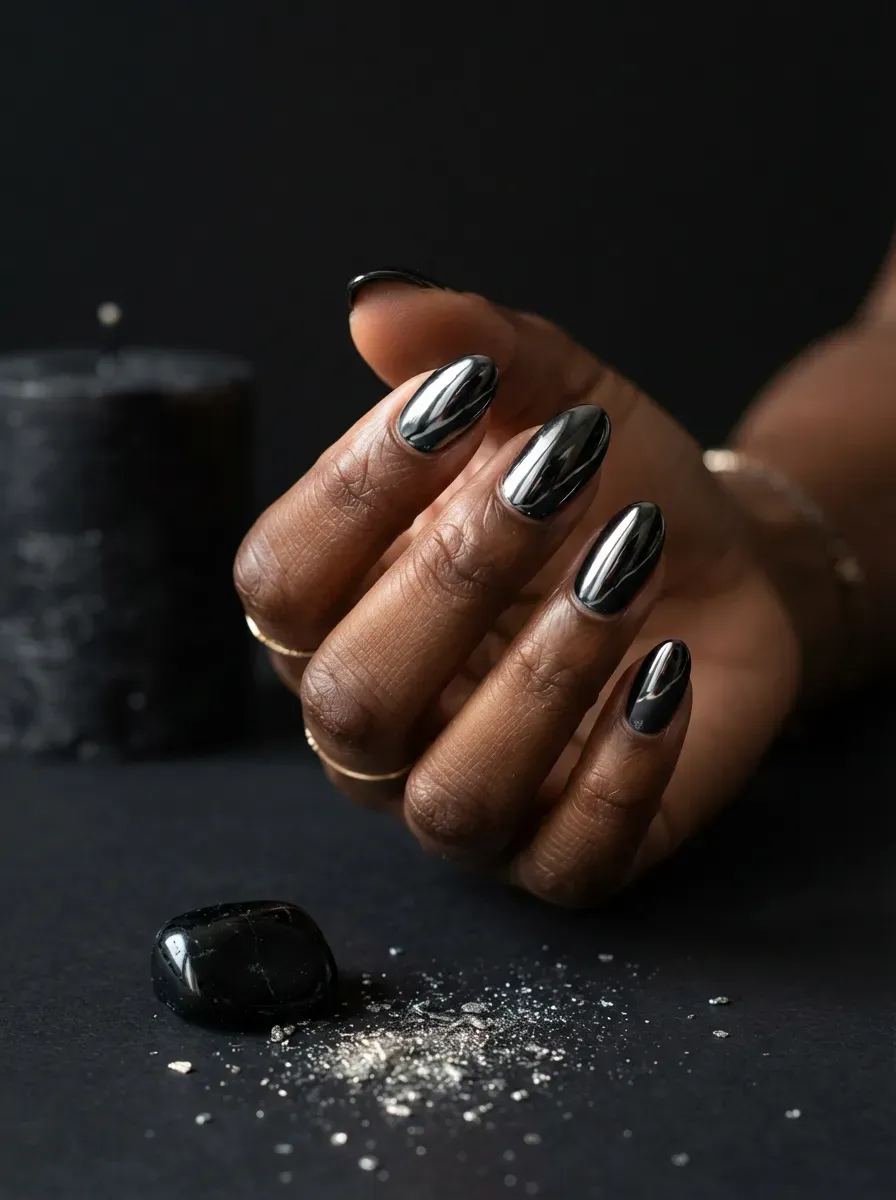
Chrome powder buffed over a black gel base creates a true mirror finish, dark enough to reflect a room back at whoever is looking at it. This is one of the more dramatic finishes on the list, since it needs almost no additional design to make an impression.
The powder needs a completely tack free gel base to bond correctly, so mention chrome specifically when booking.
Chrome shows fingerprints from the application process more than any other finish, so ask your tech to buff gently rather than press hard.
Onyx Stone Inlay Accent
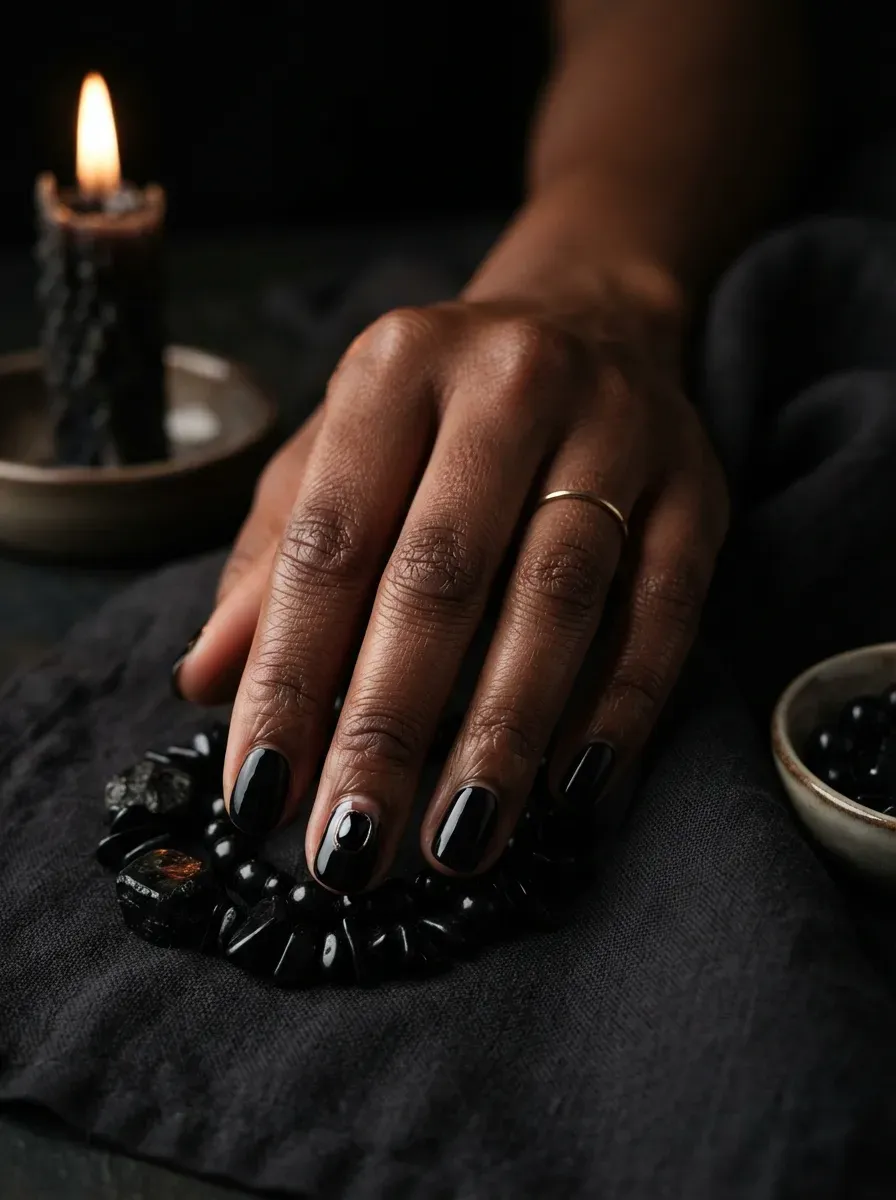
A small polished onyx stone, glued near the base of one accent nail and sealed under builder gel, adds real dimension and a subtle shine against an otherwise matte black set.
Because the stone sits slightly raised, avoid this design on your dominant hand if you type often, since raised stones catch on keyboards more than flat nail art does.
A light buffing at the stone’s edge before top coat keeps it from snagging on sweaters and gloves.
Black French Tip With Silver Edge
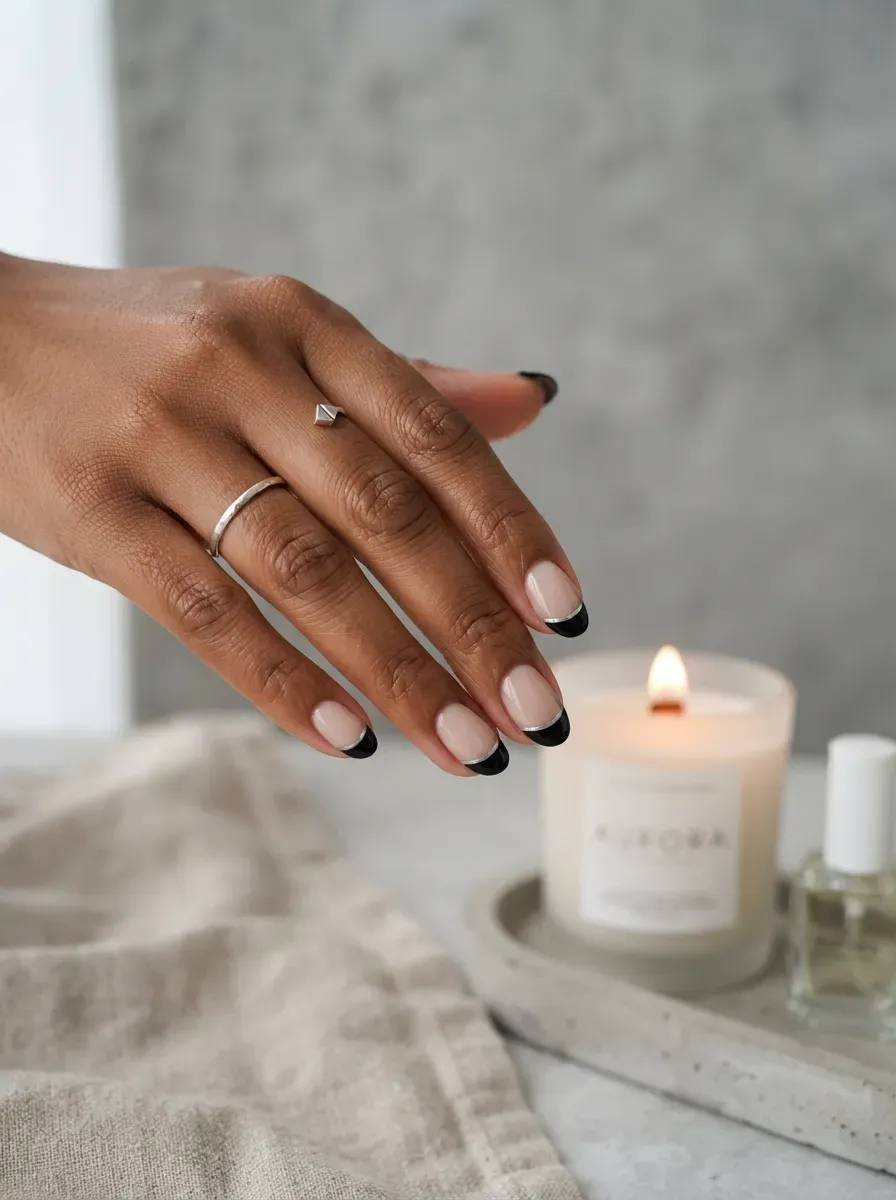
A thin silver line traced along the edge of a black tip gives this French manicure a metallic frame instead of the usual soft white edge.
The silver reads best in a fine striping brush rather than a thick one, since a heavy line overwhelms the black underneath it. Short to medium square nails keep the straight tip line clean.
This design grows out gracefully, since the black portion simply shortens rather than leaving an obvious gap.
Gothic Script Lettering Nails
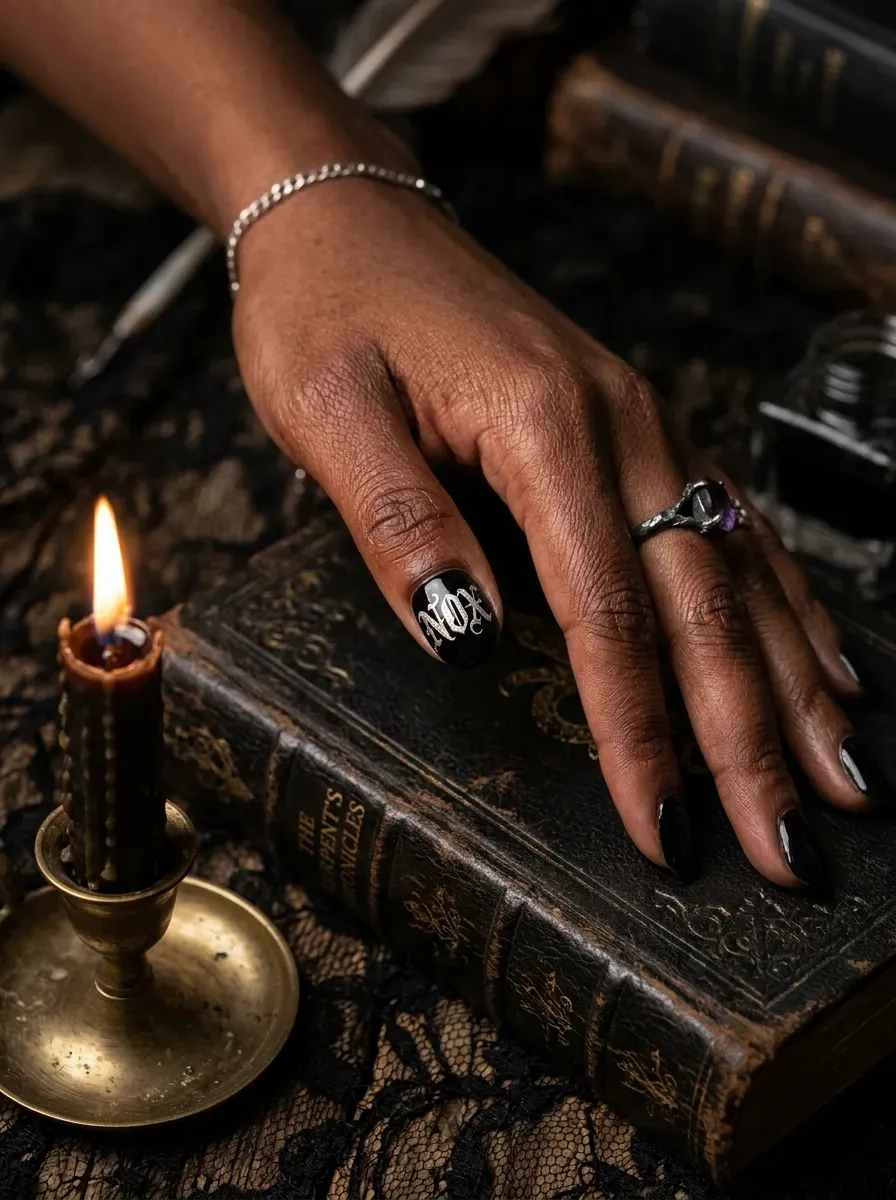
One short word, lettered in an ornate blackletter style rather than plain script, turns a single accent nail into a small personal statement. Silver ink over black gives the lettering enough contrast to stay legible at nail scale.
Keeping the word to four or five letters at most avoids cramming the script past the point of readability.
Practice the lettering on a paper nail wheel first, since gothic script letterforms take more precision than standard cursive.
Raven Silhouette Accent Nail

A raven mid flight, wings spread rather than folded, gives this accent nail a sense of motion that a perched bird silhouette would not have.
Pale grey underneath keeps the black shape sharp and legible. Almond or coffin shapes give the wingspan enough width to actually stretch across the nail.
Keep the wing shapes simple rather than detailing individual feathers, since fine feather lines blur together at this small scale.
Check out 30 Day of the Dead Nail Art Ideas for Halloween
Negative Space Cross Coffin Nails
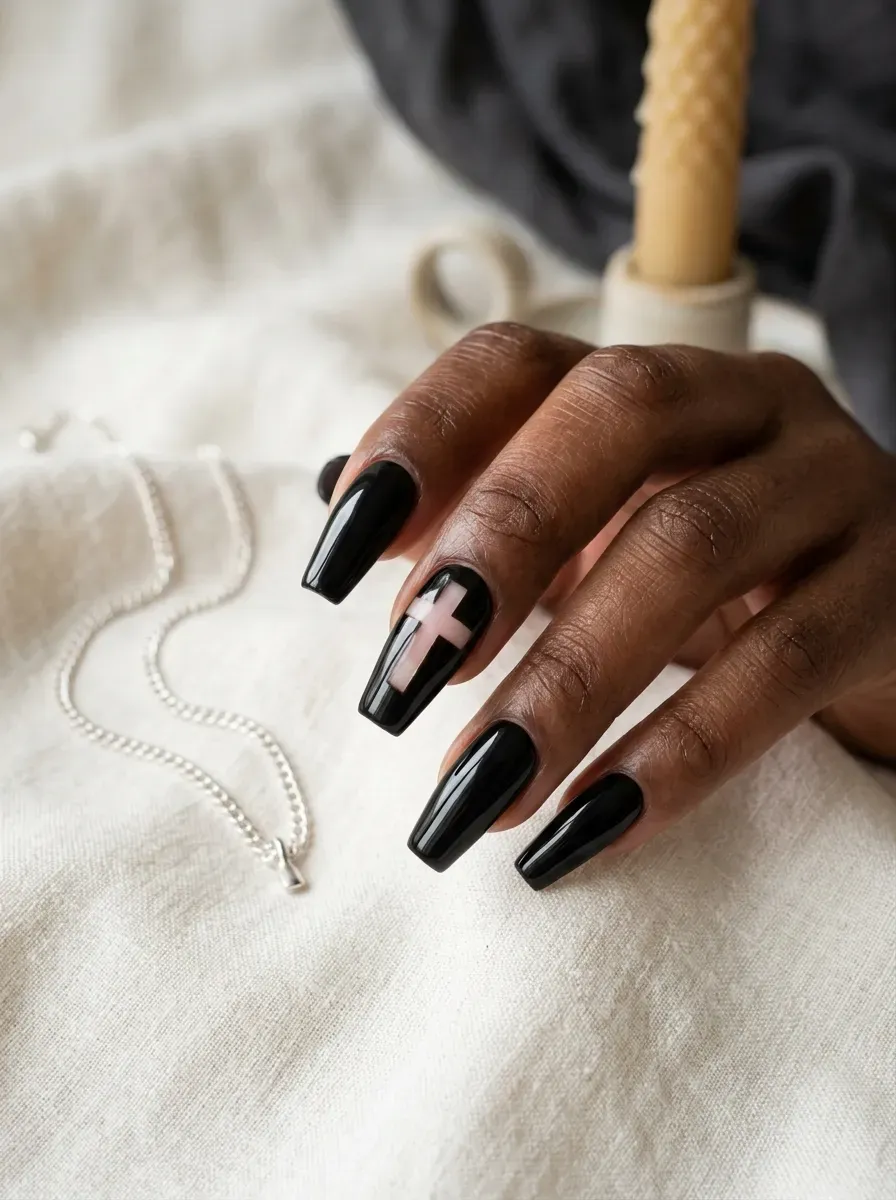
Rather than painting a cross on top of black polish, this design leaves a cross shaped section of the natural nail bare, so the contrast comes from what is missing instead of what is added. Coffin shapes give the cutout a flat, wide surface to sit within cleanly.
A stencil keeps the cutout edges sharp, since freehand negative space work drifts out of proportion easily.
Buff and hydrate the bare section beforehand, since dry nail underneath shows through far more without any polish covering it.
Deep Plum Ombre Nails
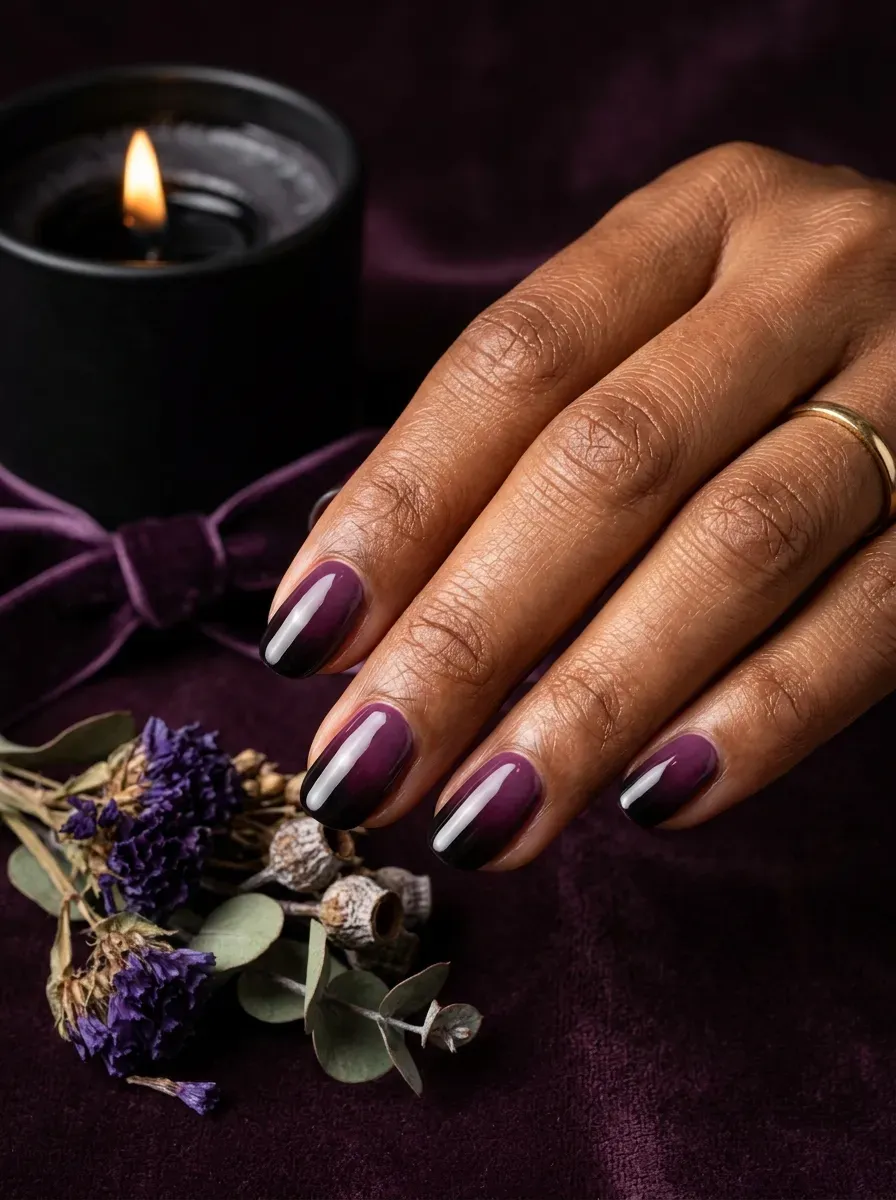
Deep plum fading into black gives nails a coordinated gradient that reads as dramatic without any linework or charm placement to worry about.
This palette suits an evening event better than daytime wear, since the deep tones need direct light to actually show their range. Sponge in thin, even layers so the gradient finishes at a consistent depth of black.
A slightly glossy top coat makes the transition between plum and black look smoother than a matte finish would.
Glossy Obsidian Black Nails
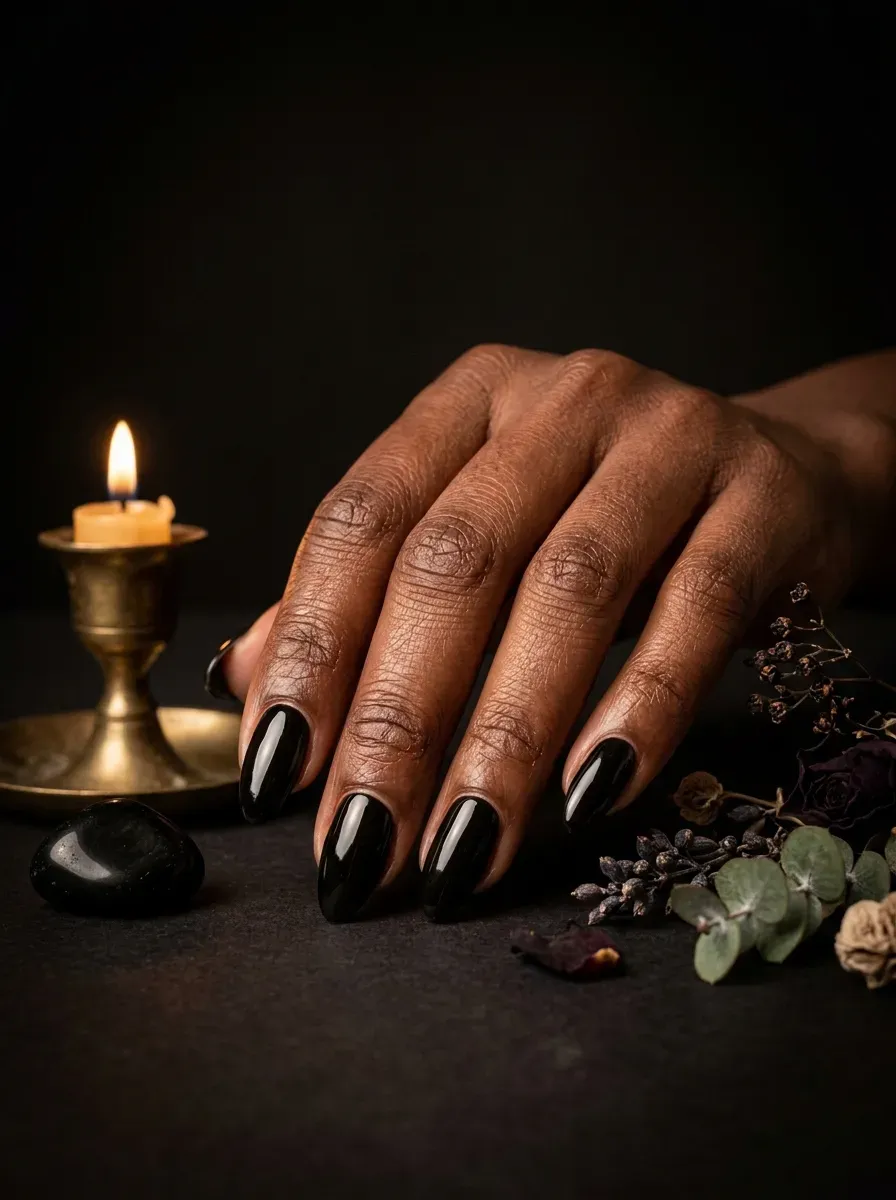
A single glossy coat of true black works for the entire season without needing a single additional design element. High gloss top coat gives the color a wet stone look rather than a flat matte surface. Almond or coffin shapes let the shine catch light along the full length of the nail.
Glossy black shows chips faster than matte does, so a clear top coat refresh every few days keeps the edges looking sharp.
Bat Wing Accent Nail
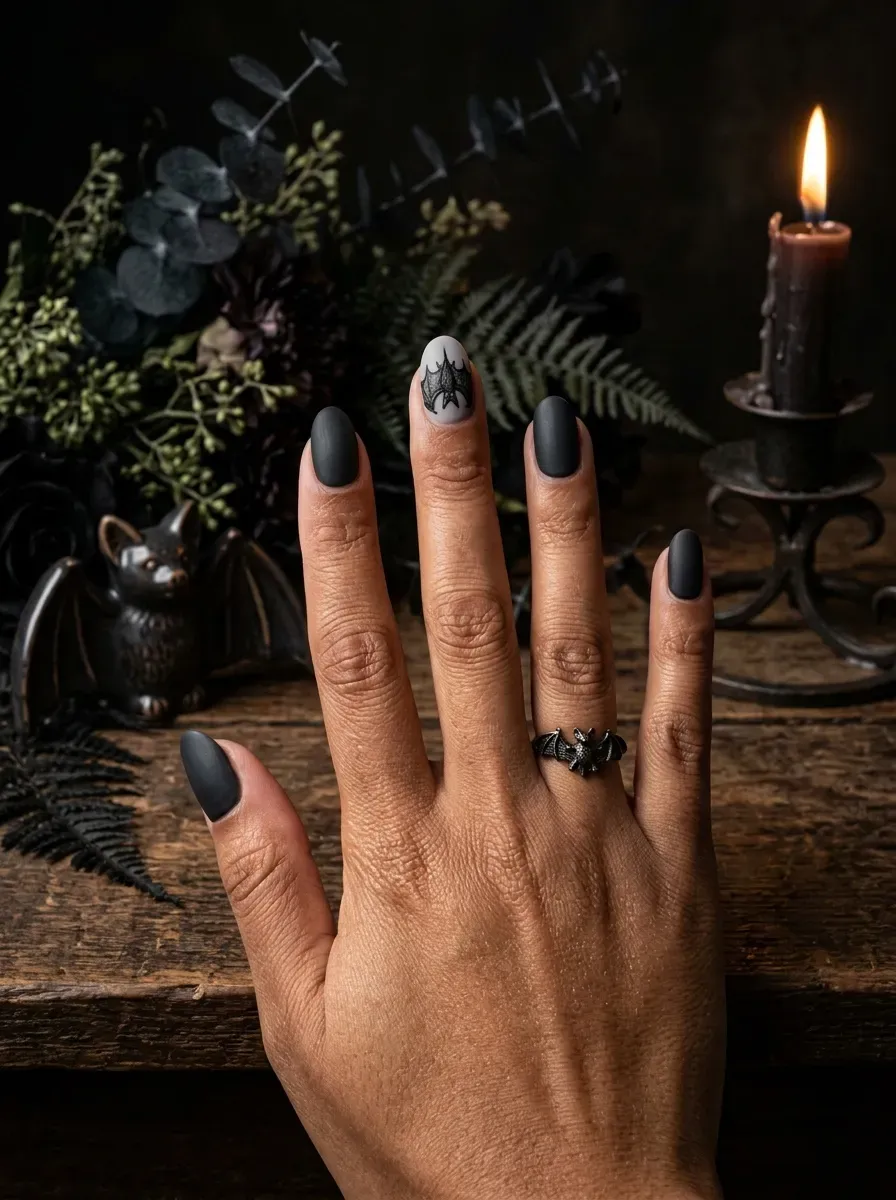
Scaling a single bat wing up to fill most of the nail, rather than shrinking a full bat down small, gives this accent nail more visual weight than a tiny silhouette would carry.
Fine membrane lines running through the wing add texture without needing extra colors. Coffin or long almond shapes give the wing shape enough length to actually stretch out.
This is a design best left to a tech with real freehand experience, since uneven wing proportions read as a mistake quickly.
See now 30+ Matching Halloween Nails for Couples and Best Friends
Gothic Chandelier Charm Nails
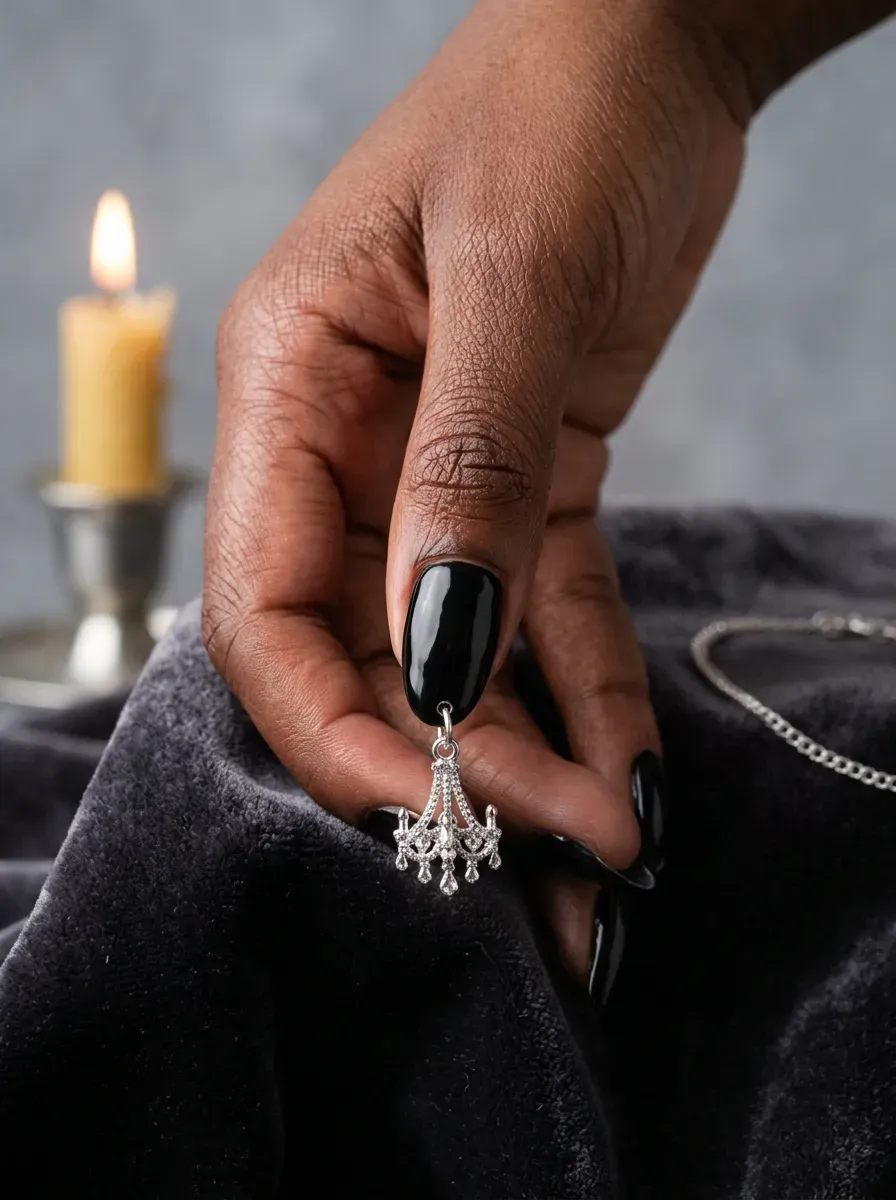
A tiny chandelier shaped charm, sealed under builder gel near the tip rather than dangling freely, gives this accent nail an ornate detail that reads as jewelry more than decoration.
Solid black on the remaining nails lets the silver charm stand out clearly. Longer coffin or almond shapes give the charm enough room to sit without crowding the nail edge.
Avoid this design on your dominant hand if you work with your hands often, since raised charms catch on fabric more than flat nail art does.
Kintsugi Inspired Black And Gold Crack Nails
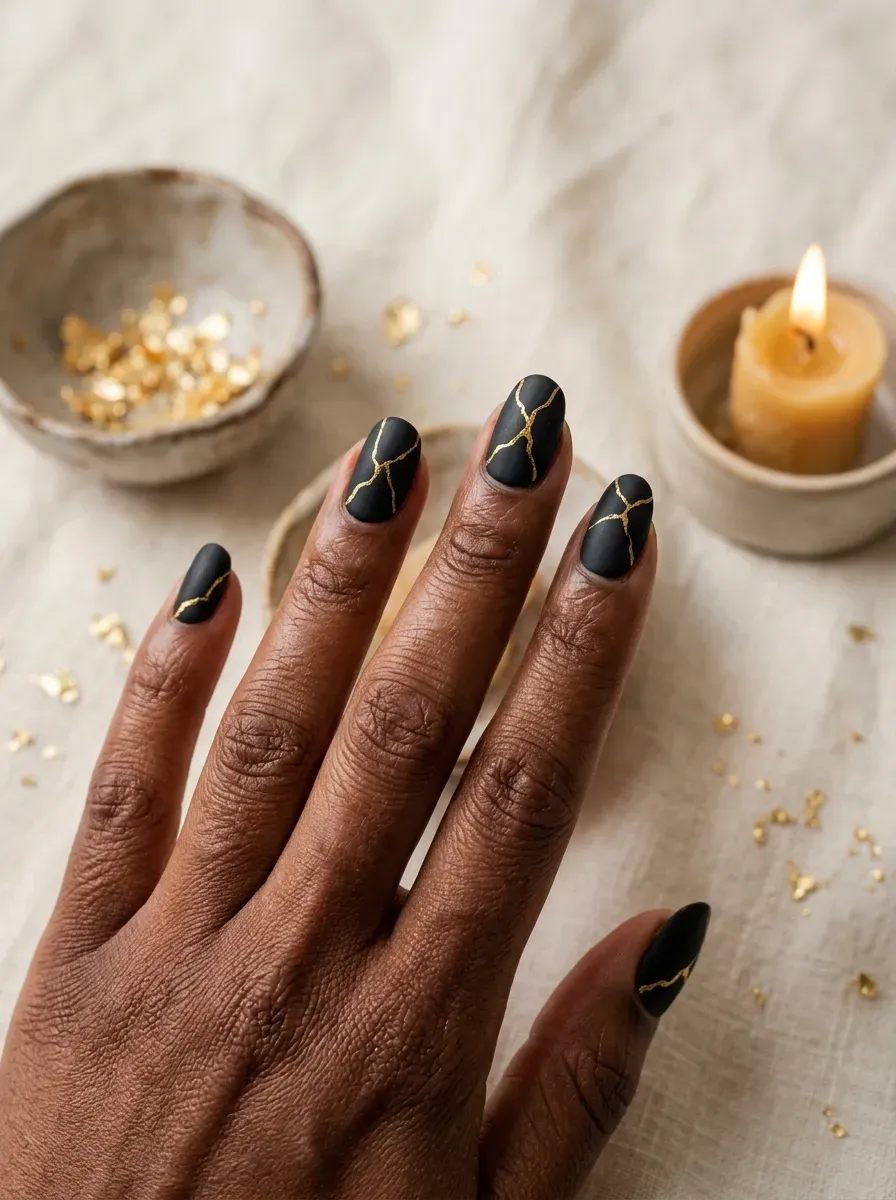
Thin gold lines, painted like repaired cracks running across a matte black base, borrow the kintsugi idea of highlighting a break rather than hiding it.
Keeping the crack lines irregular and branching, rather than straight, sells the repaired pottery effect. Square or coffin shapes give the crack pattern a flat surface to travel across.
Gold leaf foil pressed onto the lines catches more light than painted gold polish does, so ask your tech about that option specifically.
Almost Black Deep Purple Nails
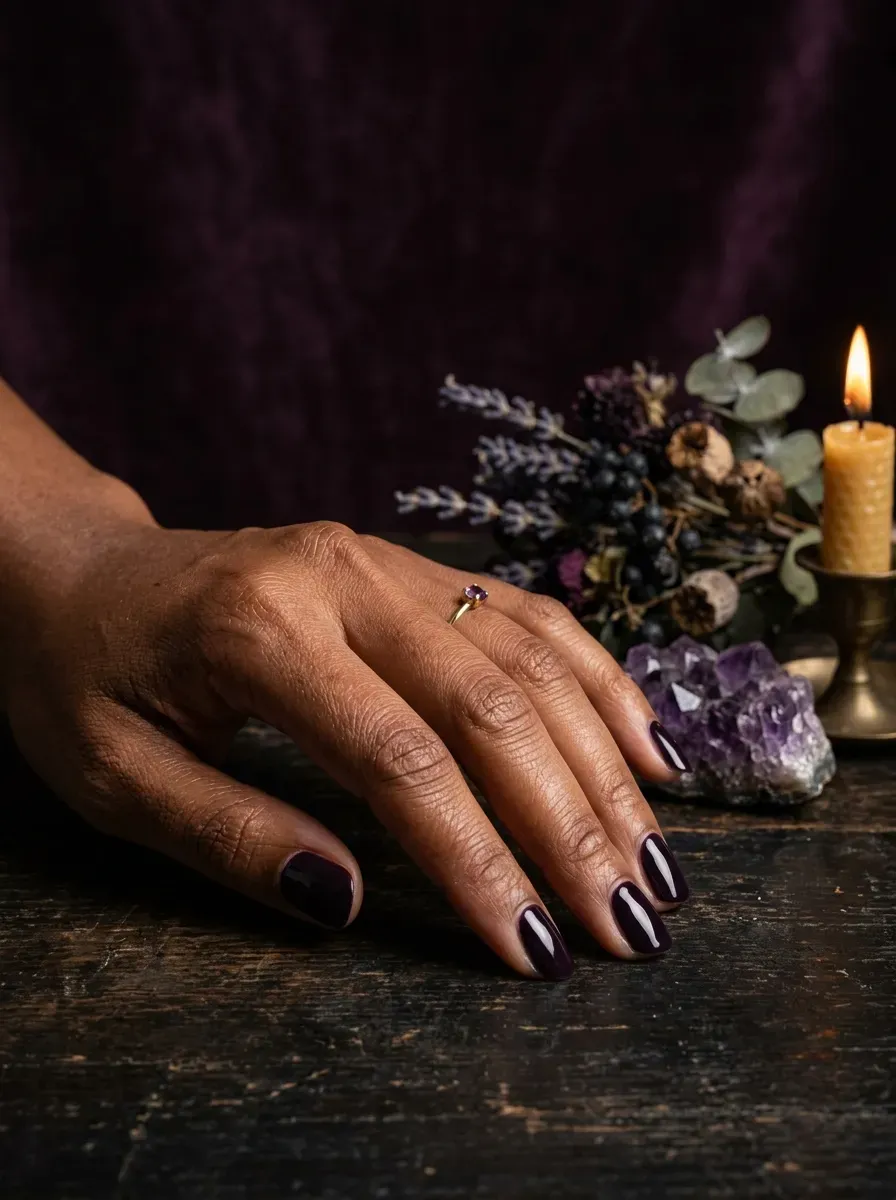
A purple this deep only reveals its actual color under direct light, staying nearly black everywhere else, which gives it a quiet complexity a flat black never has.
This shade flatters most skin tones, since the underlying warmth in the purple keeps it from looking flat against any undertone. Any shape works well here, since the color itself carries the design.
Photograph this shade in natural light if you want the purple undertone to actually show up in pictures.
Silver Skull Ring Charm Accent
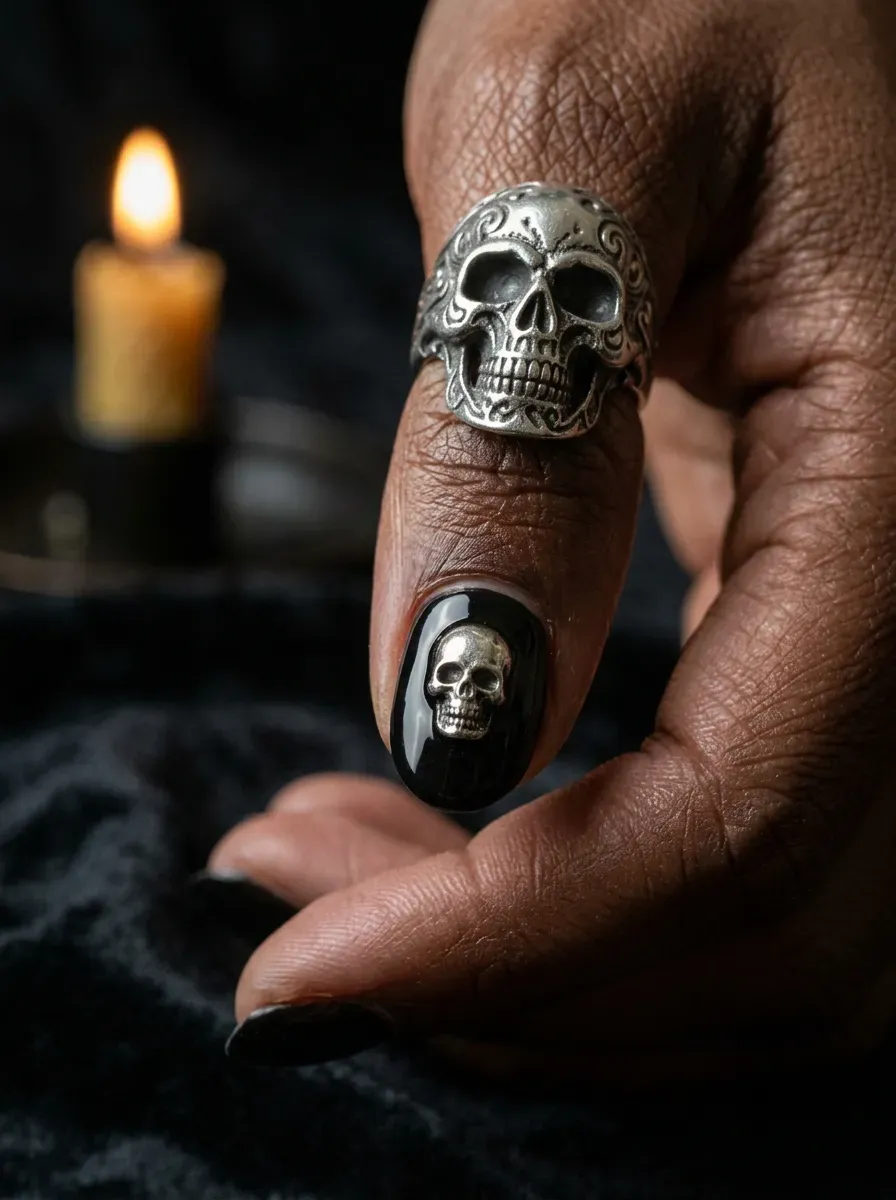
A small silver skull, shaped like the kind of ring often worn on a middle finger, gets sealed onto one accent nail instead of an actual finger. Solid black on the surrounding nails lets the silver detail catch light clearly.
This design references jewelry more than costume imagery, which keeps it wearable outside a themed event.
A light buffing at the charm’s edge before top coat keeps it from catching on sweaters and gloves.
Read more 35+ Thick French Tip Nail Designs for Bold, Statement Nails
Black Lace French Tips
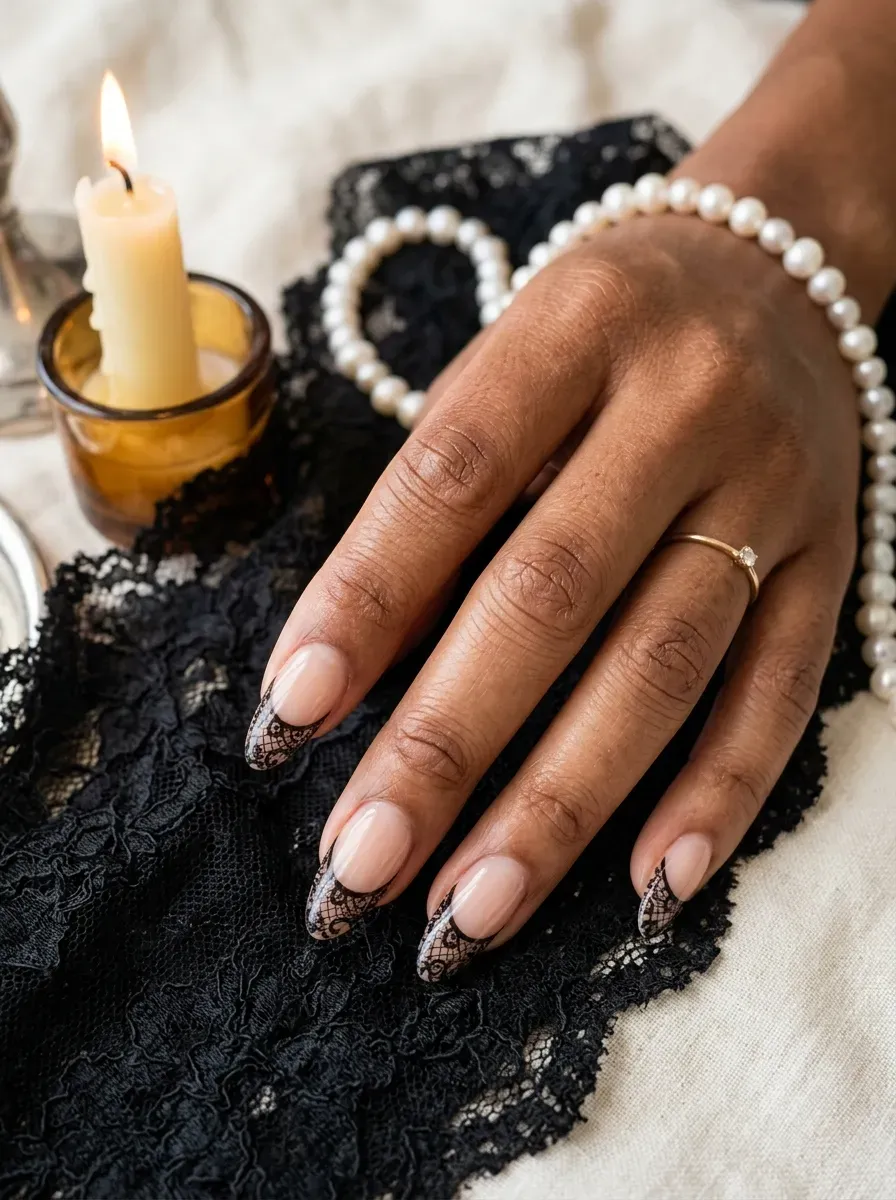
Confining the lace pattern to just the French tip, rather than covering the whole nail, keeps this design wearable in settings where a full lace overlay might read as too much.
A fine detail brush and thinned black polish give the cleanest lace lines within the smaller tip space. Short to medium square nails keep the tip line straight and even.
This design suits a workplace that tolerates subtle seasonal detail but not a full themed manicure.
Stained Glass Inspired Nail Art

Thin black outlines separating jewel toned sections of red, emerald, and purple mimic the leaded panels of a cathedral window rather than a traditional Halloween palette.
Keeping the color sections irregular in shape rather than uniform squares sells the stained glass reference. Coffin or square shapes give the pattern the most flat surface to work with.
A glossy top coat catches light through the color sections the way real stained glass does, so choose gloss over matte here specifically.
Wine Red Velvet Nails
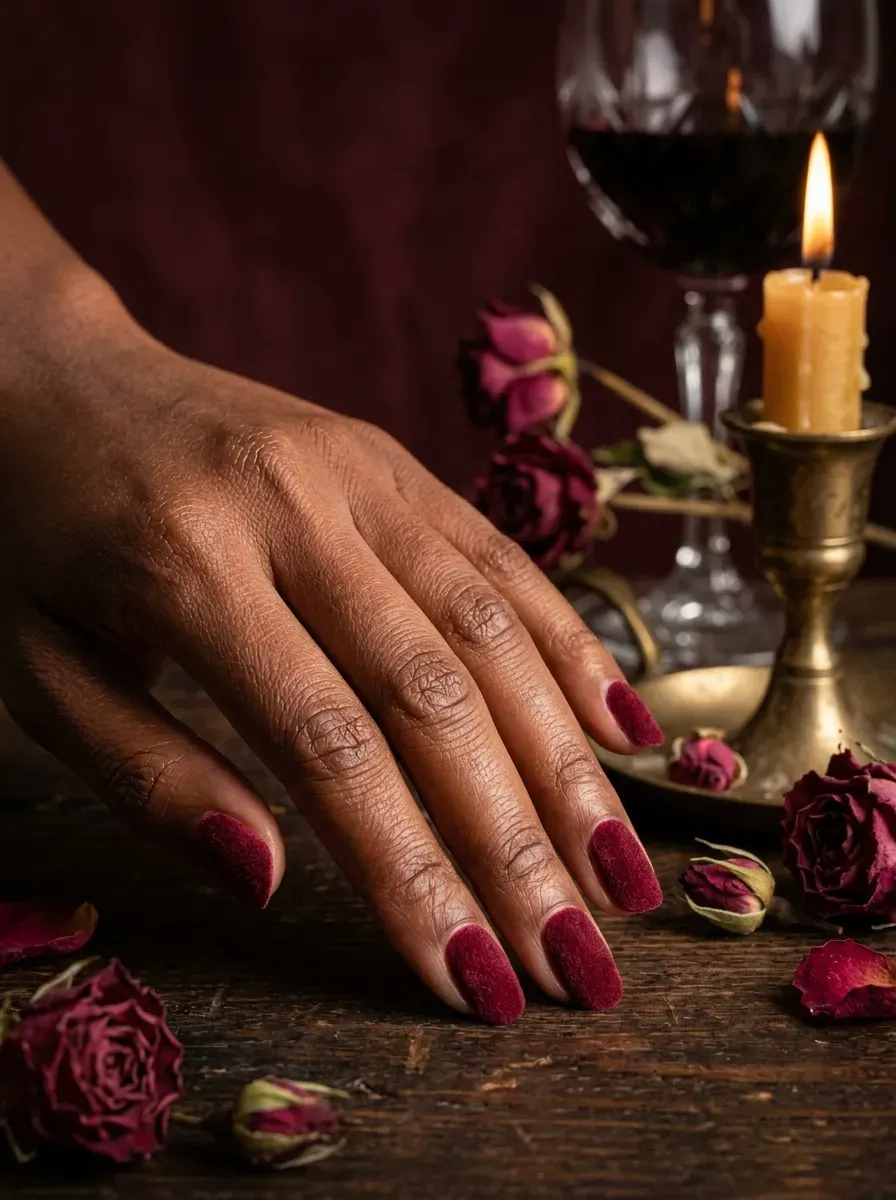
Wine red sits slightly brighter than oxblood, keeping some brightness in the red rather than pushing it fully toward brown.
The velvet matte finish gives the color a fabric like texture that pairs naturally with an evening event. Almond or coffin shapes let the color stretch across a longer surface without looking severe.
Velvet top coats pick up water spots faster than glossy gel, so avoid dish soap and heavy handwashing right after application.
Midnight Blue Black Duochrome Nails
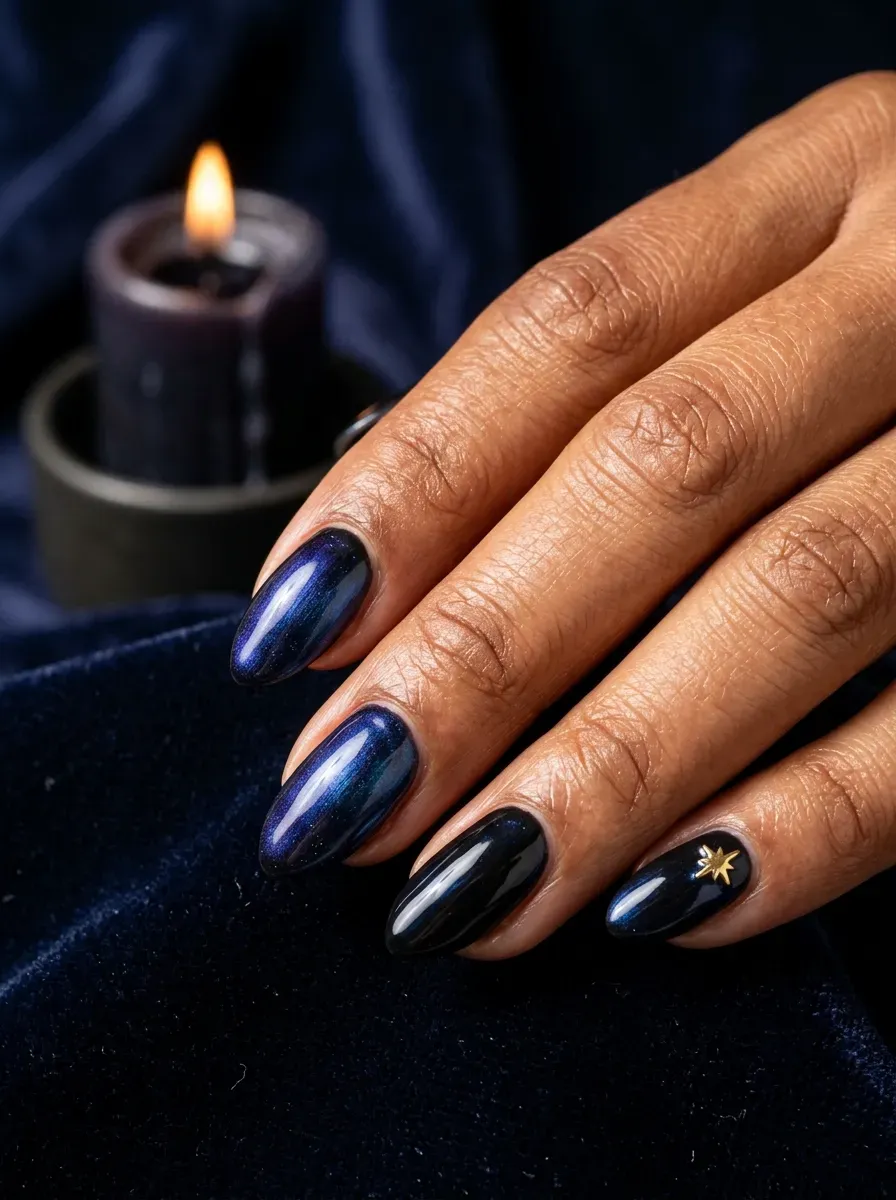
Duochrome pigment shifts between black and midnight blue depending on the angle it catches light from, giving this finish more depth in person than it ever fully captures in a single photo.
Two thin coats over a black base give the shift the most visible range. Any nail shape works here, since the color effect carries the design without needing linework.
Photograph this finish from a few different angles if you want to actually capture the color shift for reference.
Black Glitter Ombre Nails
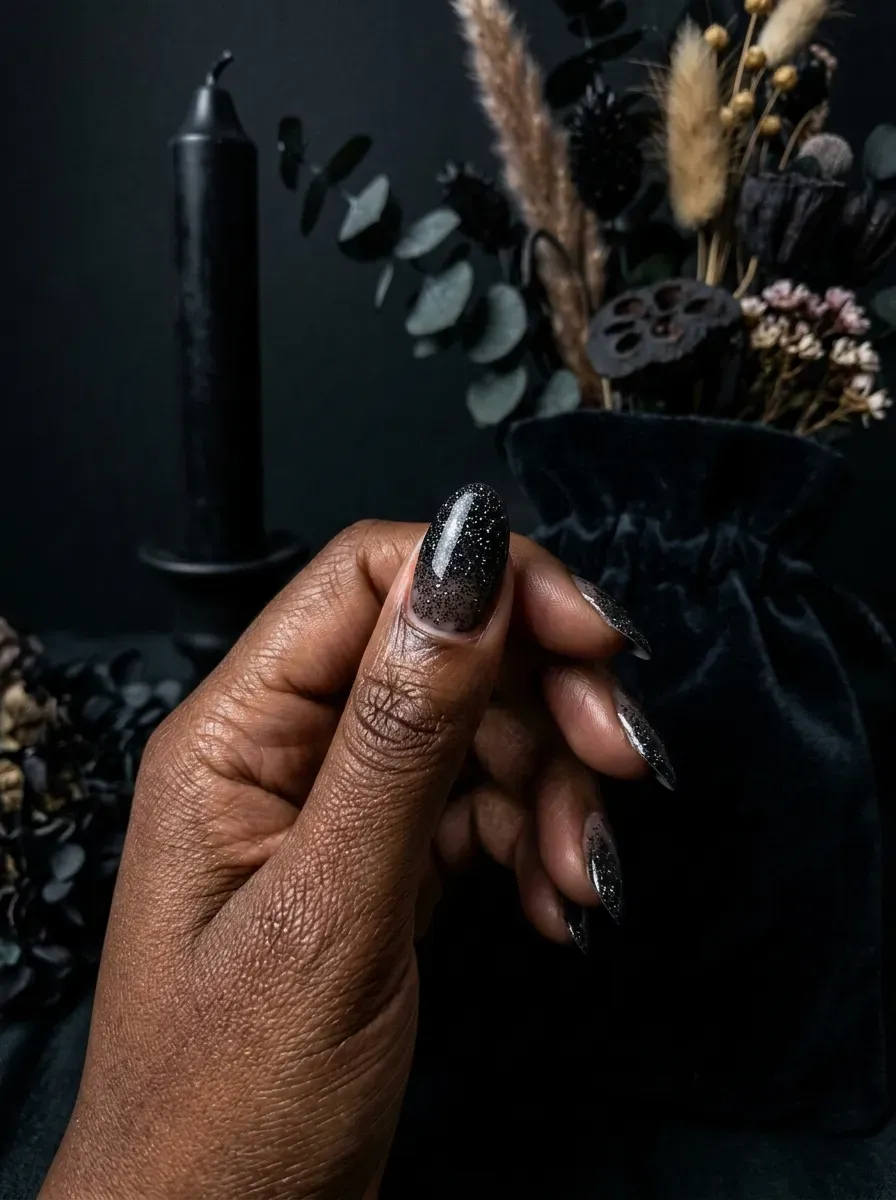
Layering black glitter so it thins out toward the cuticle rather than stopping abruptly gives this gradient a smoky, fading effect instead of a hard edge. A clear base coat underneath keeps individual glitter flecks from sinking unevenly.
This design needs direct light to actually show its texture, so it suits an evening event better than daytime wear.
Ask for a foil wrap soak off rather than scraping, since dense glitter removal can thin the natural nail if rushed.
Continue reading 35 Lavender Floral Nail Ideas for a Dreamy Look
Thorn Vine Accent Nails
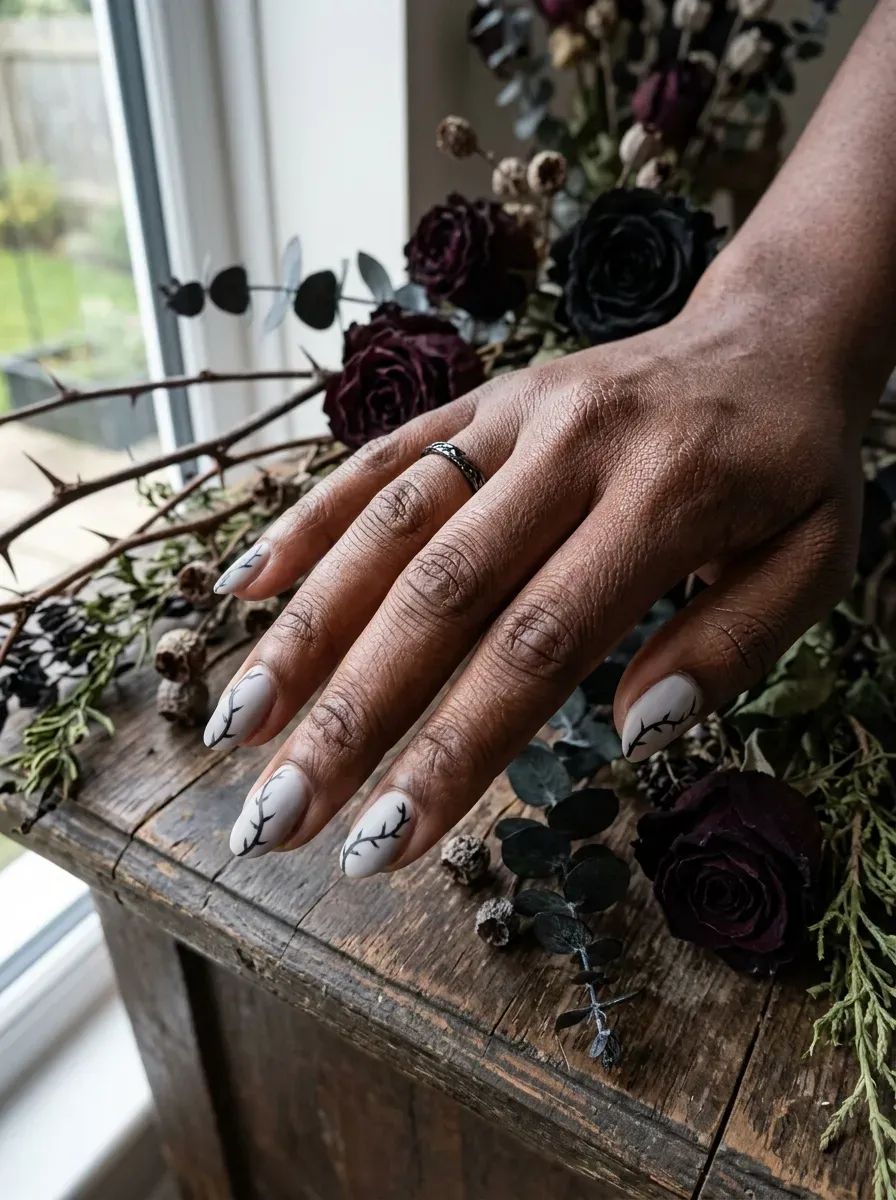
A thin black vine, lined with small thorns rather than flowers, treats the whole hand as one continuous gothic garden instead of ten separate nails.
A pale grey or white base lets the black vine stand out clearly against the surrounding polish. Long or medium nails give the vine enough length to actually curve and branch.
Sketch the vine’s path in pencil or dotting tool before committing to paint, since the pattern needs to line up reasonably well from nail to nail.
Gothic Moon Phase Accent Nail
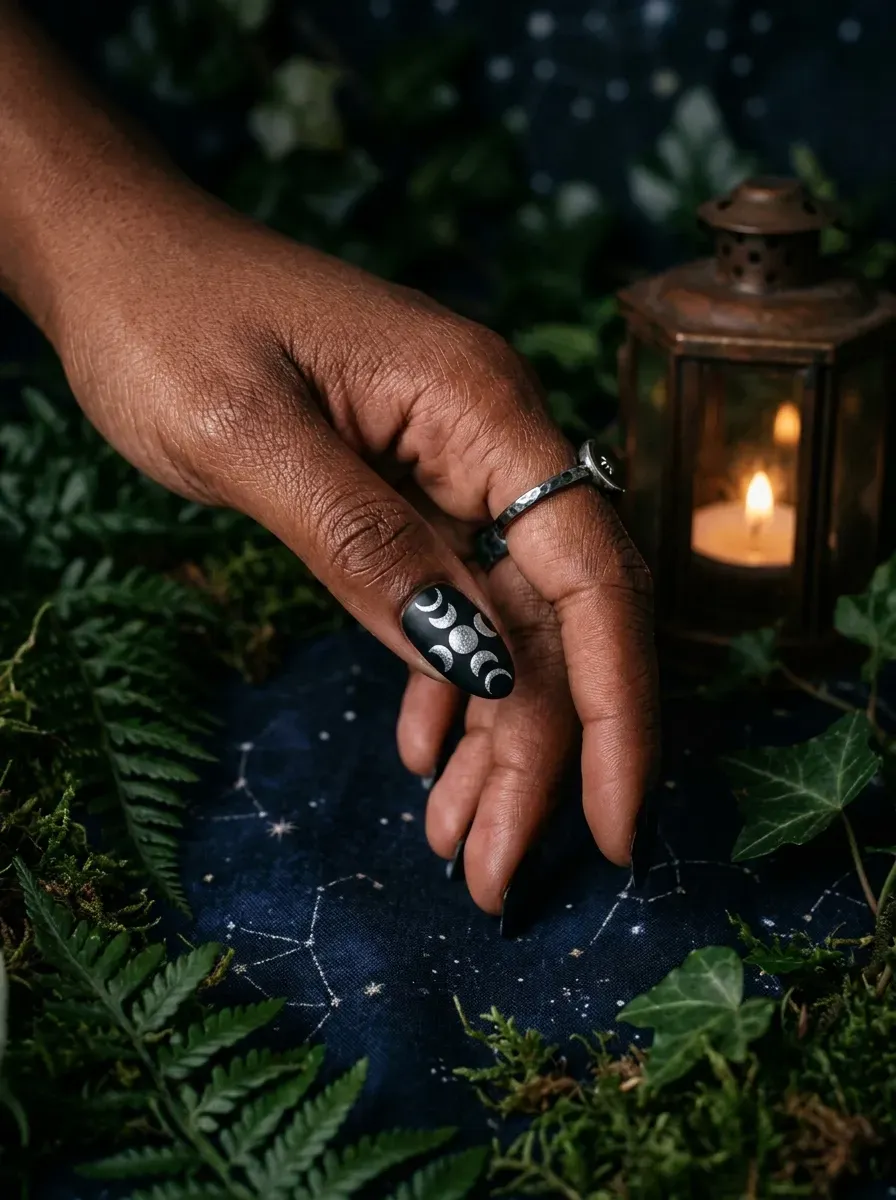
A full moon phase sequence, from crescent to full and back again, arcs across one accent nail in fine silver detail against solid black.
This is a busier design than a single crescent moon, so it works best confined to one nail rather than repeated across the set. Longer coffin or almond shapes give the arc enough room to actually curve.
A dotting tool creates the small crescent shapes more cleanly than a brush does at this scale.
Dagger Silhouette Accent Nail
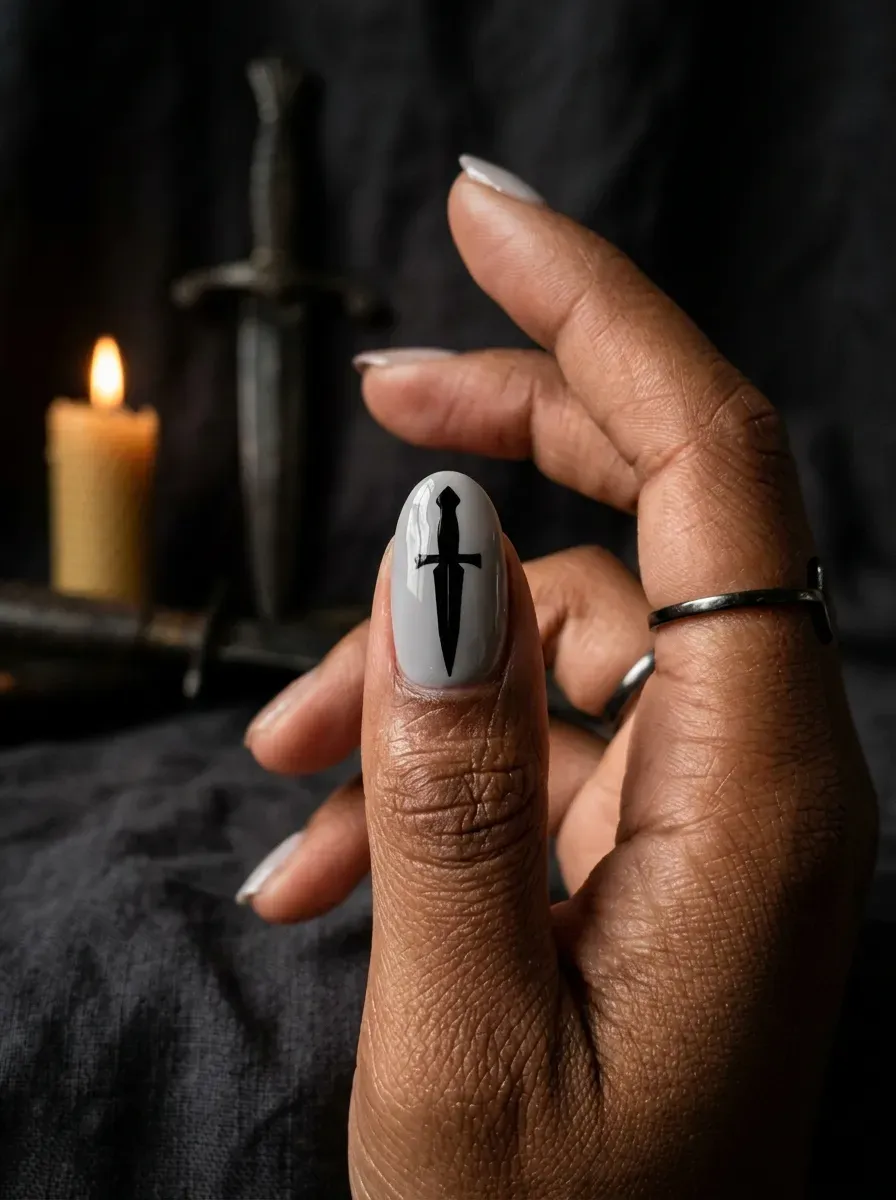
A dagger silhouette, pointed toward the tip rather than the cuticle, gives one accent nail a sharp graphic detail without needing any color beyond black and grey.
Longer coffin or stiletto shapes echo the dagger’s own pointed shape, which ties the design to the nail form itself. A stencil keeps the blade edges straight, since freehand daggers tend to warp slightly at the point.
Seal the accent nail with a slightly higher gloss than the rest of the set to make the silhouette pop.
Black Pearl Accent Nails
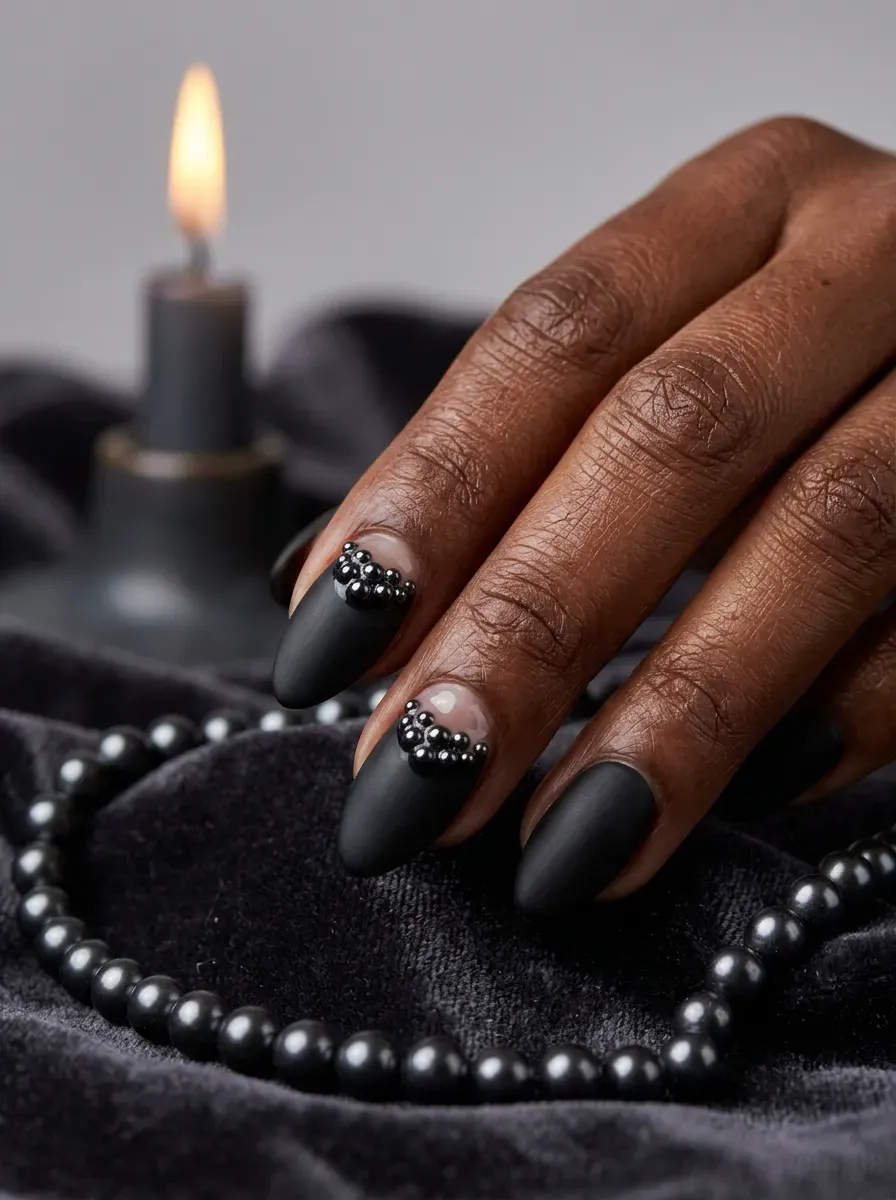
Small black pearls, sealed just above the cuticle rather than scattered across the nail, give this design a jewelry like finish that reads as elegant rather than costume themed.
Matte black underneath lets the subtle sheen of the pearls stand out without competing for attention. This is a low maintenance option for anyone who wants texture without freehand painting.
Pearls sit flatter than raised charms, so they hold up well even for people who type frequently.
See also 30+ Burgundy September Nails for Early Fall
Dark Red Marble Nails
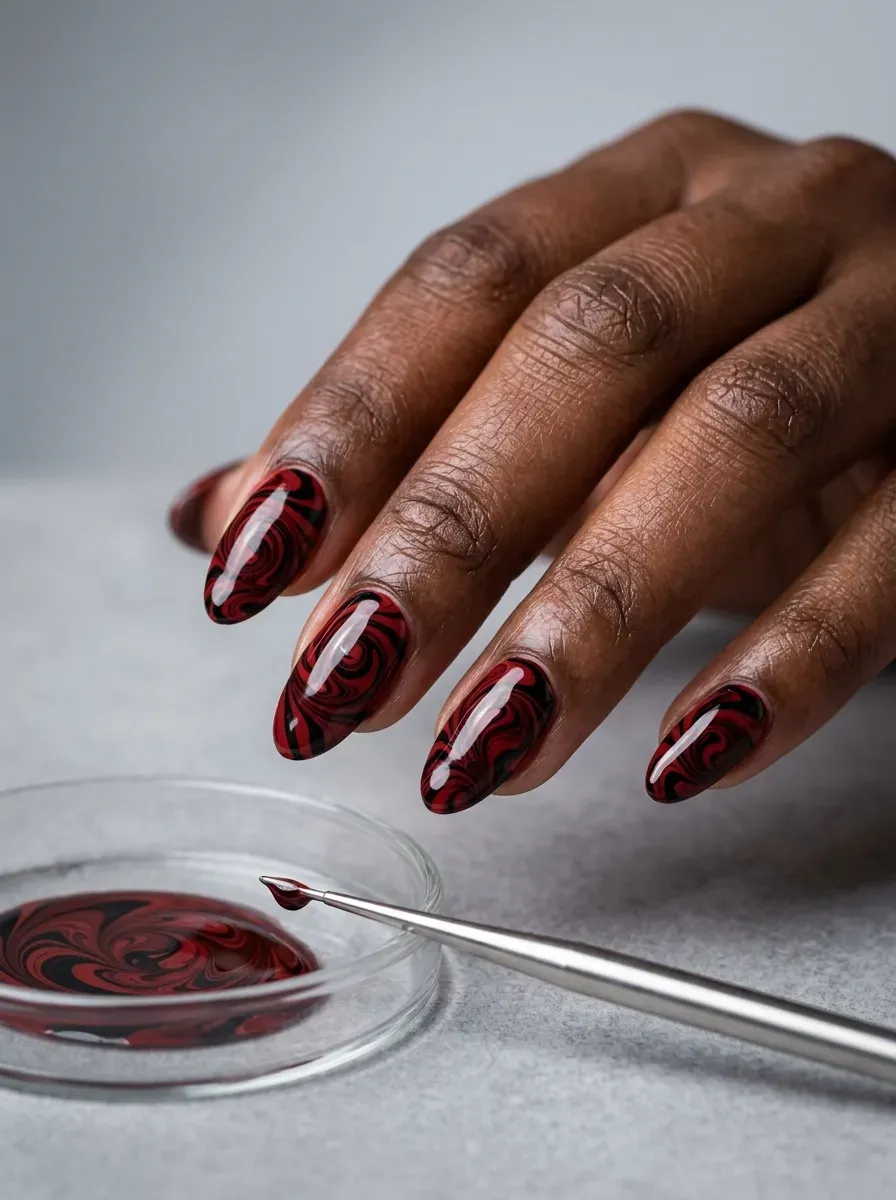
A water marbling technique pulls dark red and black into loose swirls that never look identical from nail to nail, which makes this design forgiving even for a first attempt at marbling. Medium length nails give the swirl pattern enough space to actually curve rather than compress into a tight blob.
Marbling works better in a slightly cooler room, since polish that dries too fast loses its swirl before it fully sets.
Seal quickly once the swirl looks right, since the pattern keeps moving in the water until it is lifted onto the nail.
Blackout Tips With Subtle Shimmer
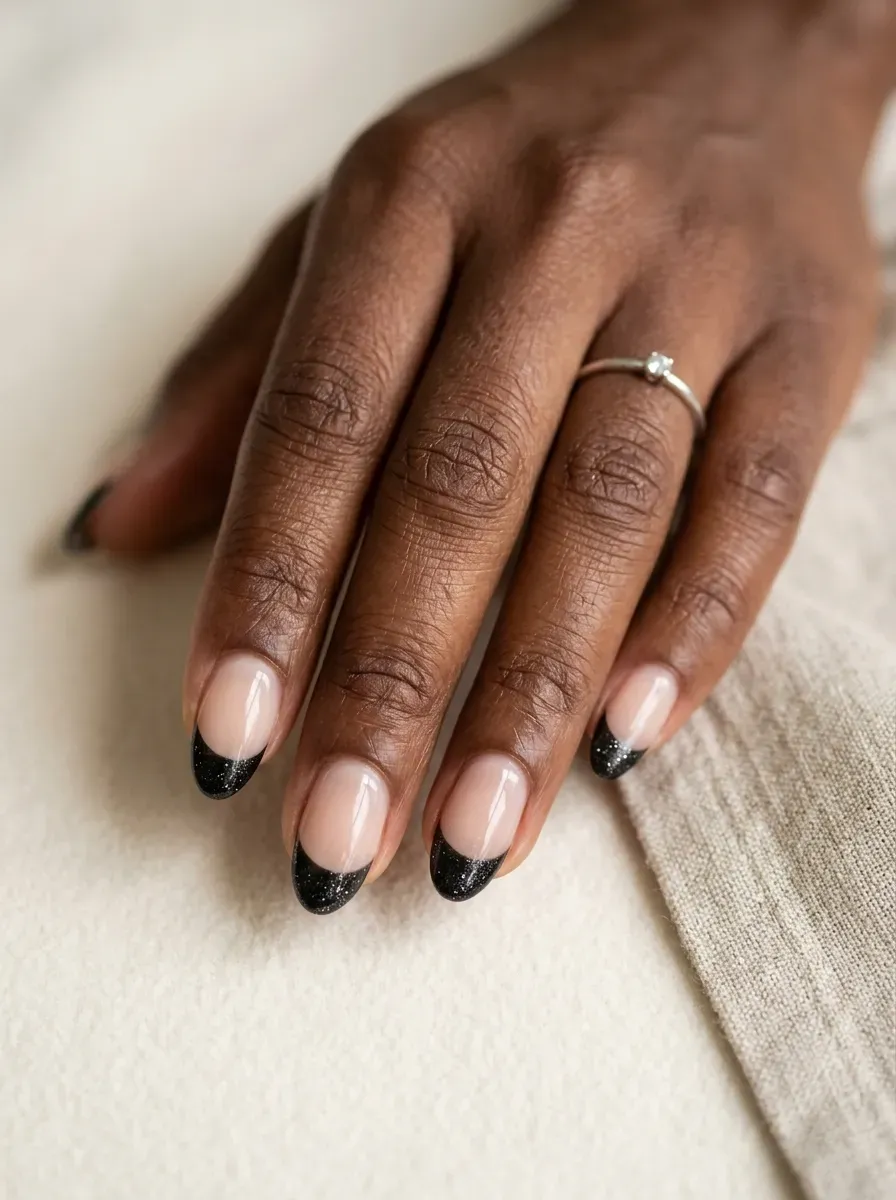
Mixing fine shimmer particles into an otherwise solid black tip gives this design a quiet sparkle that only shows up under direct light instead of a loud glitter finish. Sheer nude underneath keeps the design office appropriate. Short to medium square nails keep the straight tip line clean.
This finish photographs differently depending on the light source, so check both indoor and outdoor lighting if event photos matter.
Victorian Gold Filigree On Black Nails

Fine gold filigree lines, curling and looping the way antique jewelry engraving does, give one accent nail an ornate detail that takes real patience to paint well.
Solid black on the remaining nails lets the gold detail read clearly without competing colors nearby. A fine detail brush and thinned gold gel paint give the cleanest curling lines.
Practice the filigree pattern on paper first, since the curling lines take more control than straight linework does.
Obsidian Glass Fleck Nails
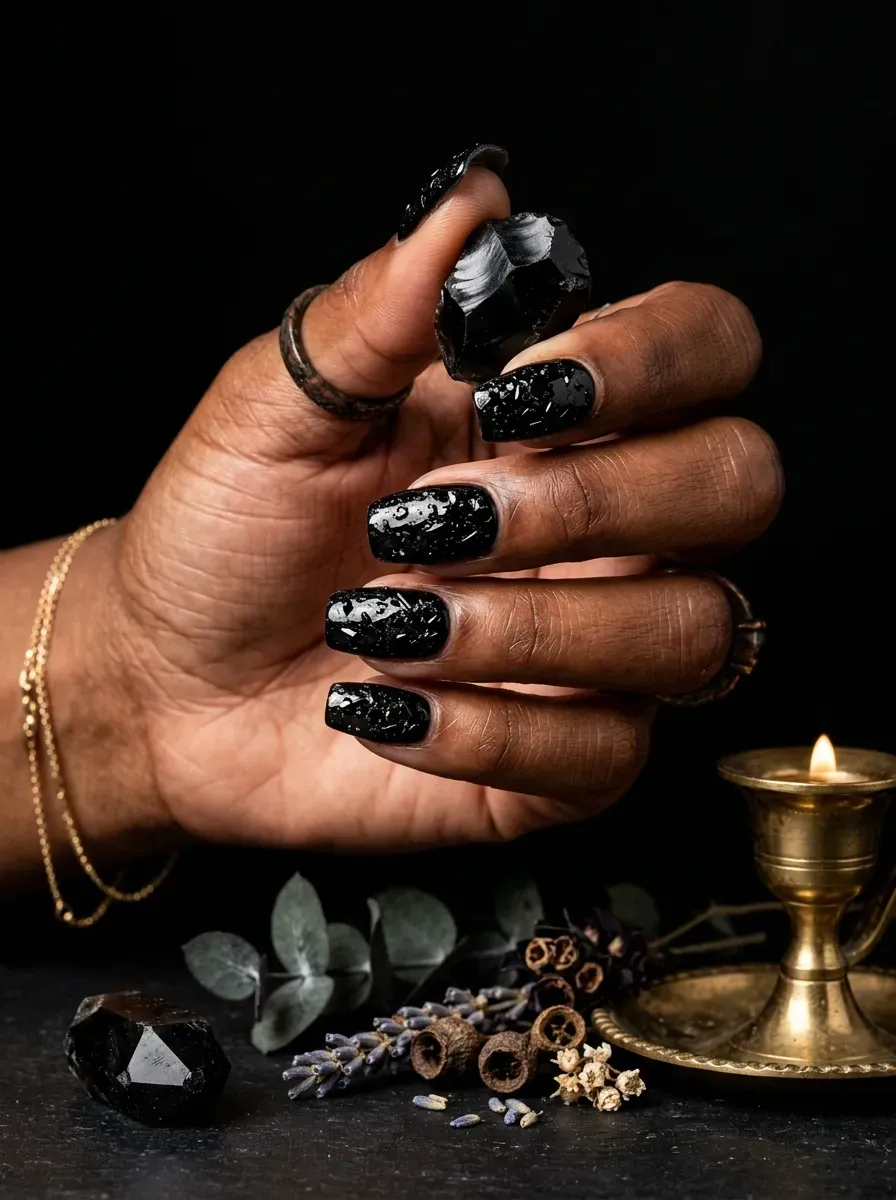
Scattered black glass flecks, layered over glossy black polish, catch and scatter light the way real obsidian does rather than sitting flat like standard glitter.
This texture reads as more expensive and considered than a straightforward glitter set. Almond or coffin shapes let the flecks catch light across the fullest surface.
Ask your tech about a dedicated glass fleck top coat rather than mixed in glitter polish, since the flecks sit more evenly that way.
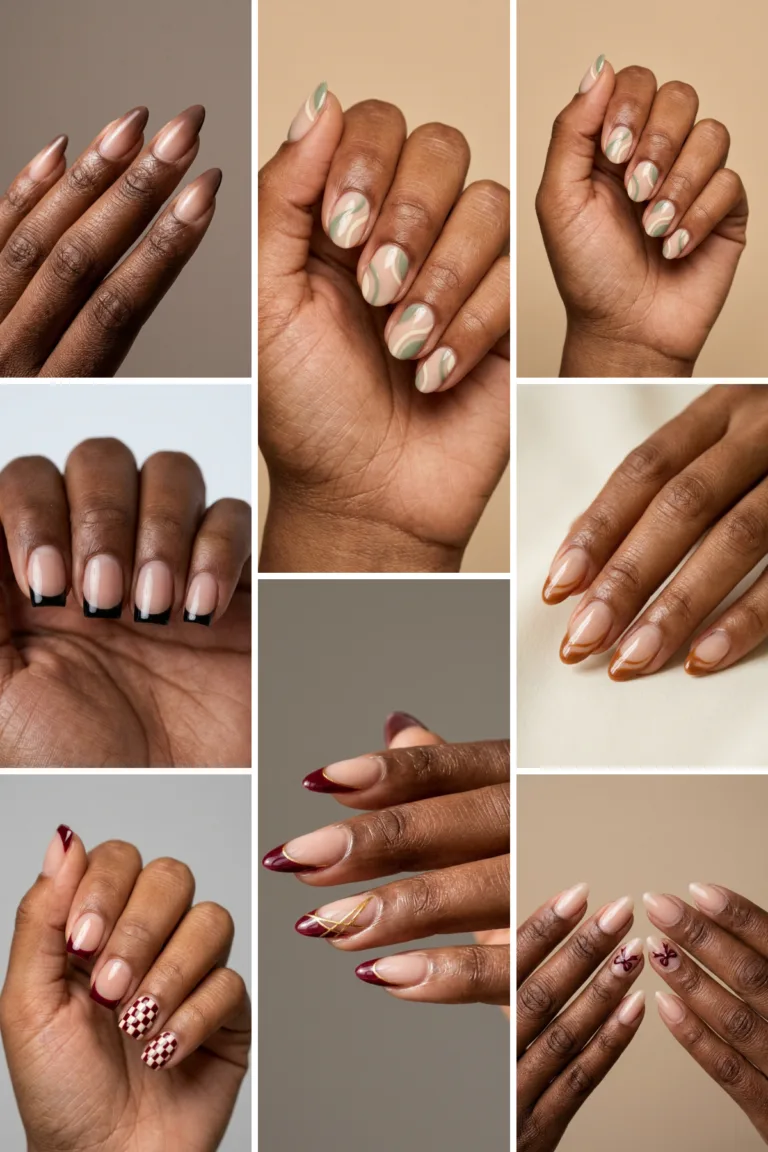
Deep Burgundy French Tips
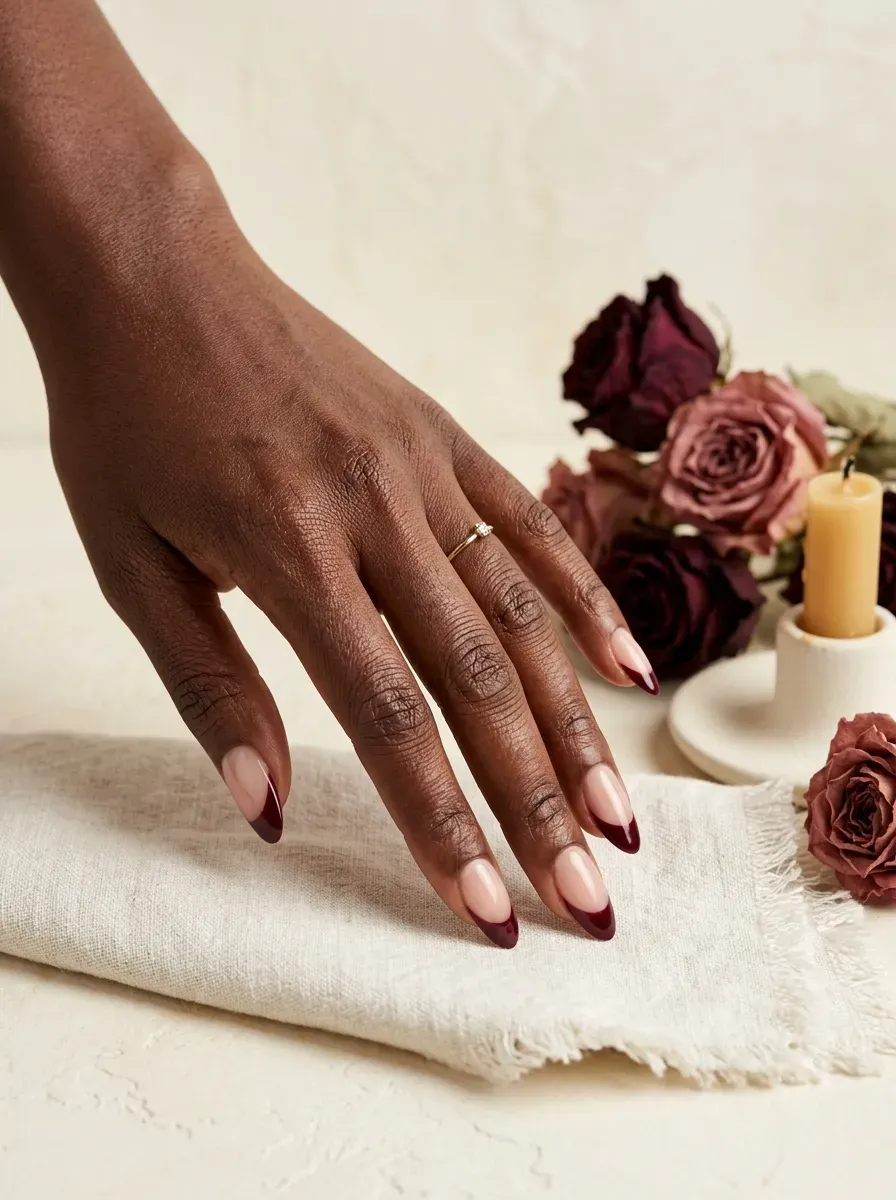
Swapping the classic white tip for deep burgundy keeps this design wearable in a professional setting while still leaning noticeably darker than a standard French manicure.
The sheer nude base underneath keeps the natural nail looking healthy rather than stark. Short to medium square shapes give the tip a clean straight edge.
Two thin coats of burgundy cover more evenly than one thick coat, so budget the extra drying time.
See more French Tip Nail Ideas for a Summer Wedding
Spiderweb Lace Glove Style Nails
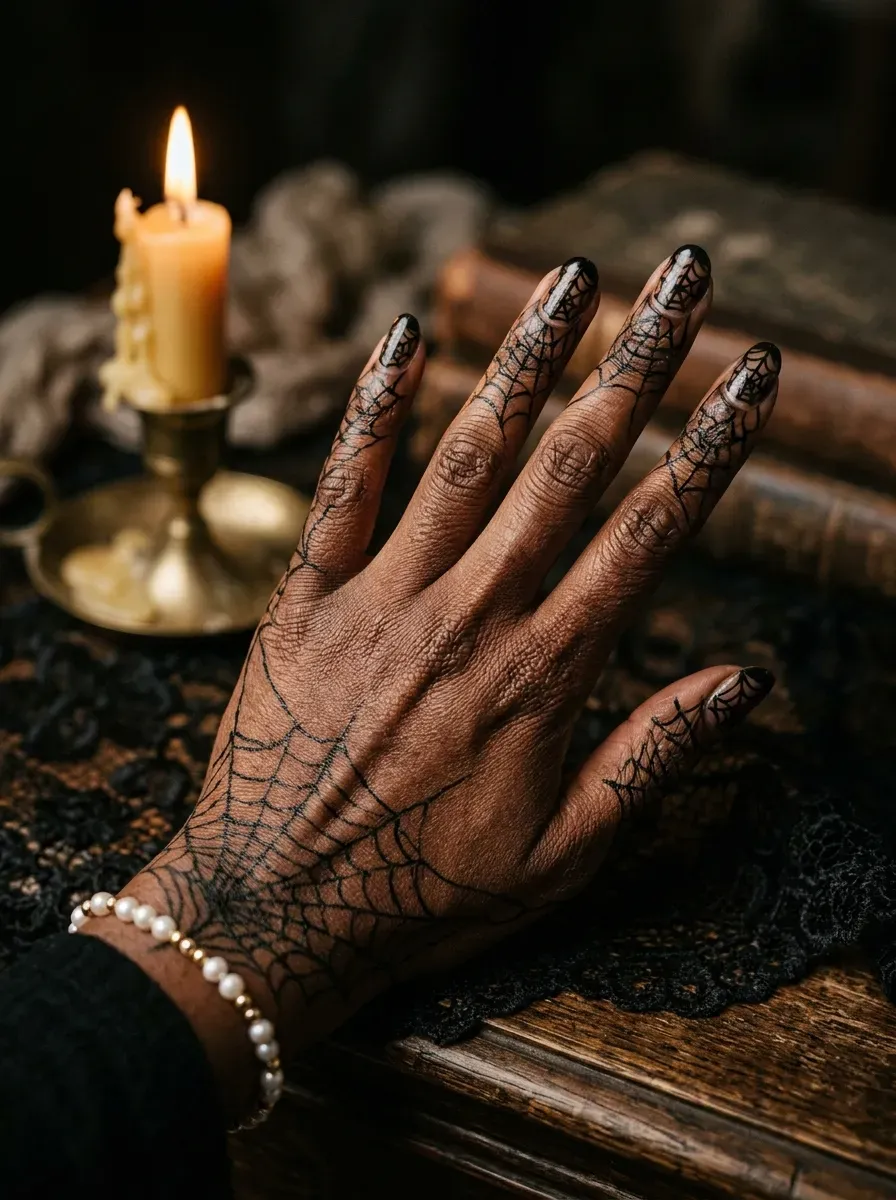
Painting a web pattern across all ten nails so the lines visually continue from finger to finger creates the illusion of a lace glove rather than ten separate manicures.
This design asks for real planning before the first nail gets painted, since each web section needs to align with its neighbor. Almond or coffin shapes give the web the most consistent surface to travel across.
Photograph the whole hand together rather than one nail at a time, since the continuous effect only reads correctly as a full set.
Matte Black Coffin With Glossy Tip
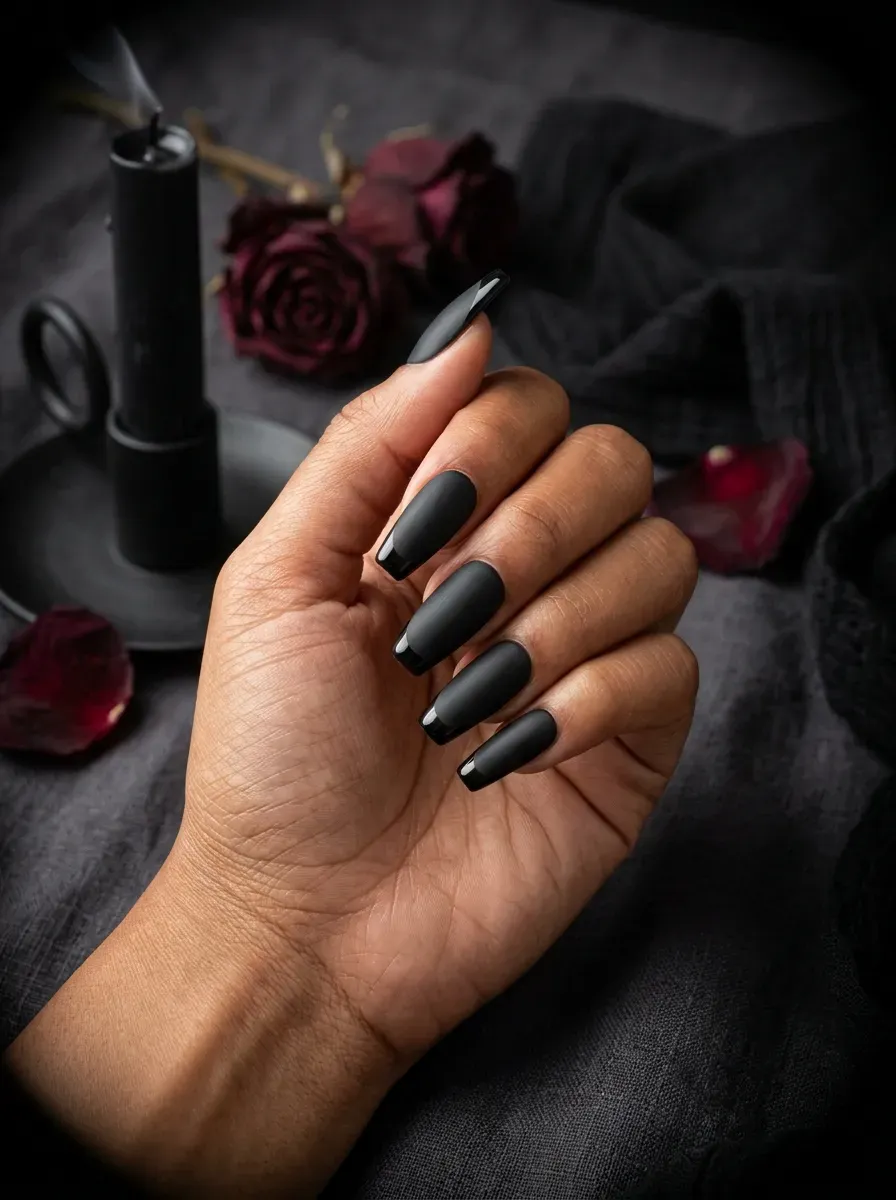
Pairing matte and glossy in the same shade of black gives this design contrast without needing a second color at all.
The glossy tip catches light while the matte body of the nail stays flat, which reads as more intentional than a single finish across the whole nail. Coffin shapes give the tip line a clean, straight edge to define.
Ask your tech to seal the two finishes with separate top coats, since a single top coat over both flattens the contrast.
Gothic Rosary Bead Charm Accent
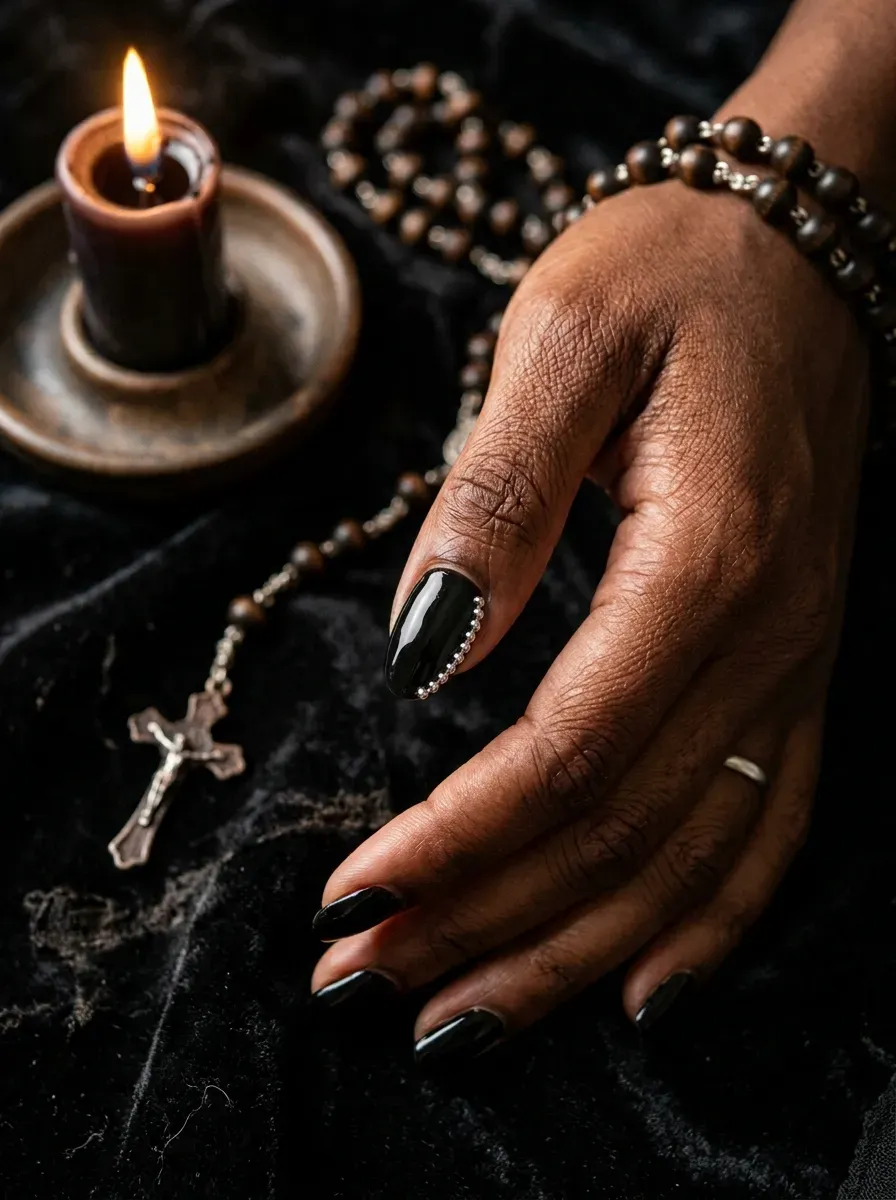
Small silver beads, arranged along the side edge of one accent nail rather than across the top, reference rosary jewelry without needing a full cross or religious image. Solid black on the remaining nails keeps the beads as the clear focal point.
This design sits close enough to the nail edge that it rarely catches on fabric the way a raised center charm might.
A light buffing along the bead line before top coat keeps the edge smooth against gloves.
Black Cherry Ombre Nails
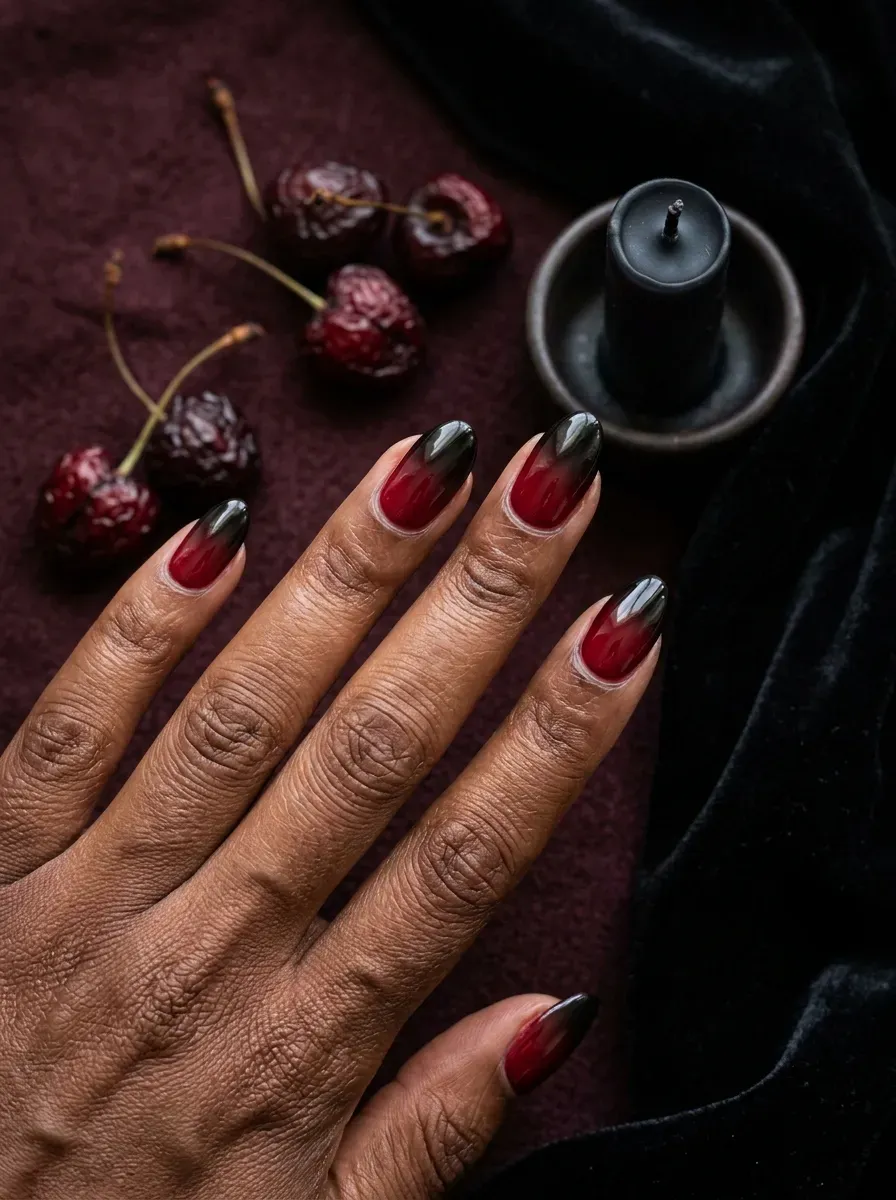
Cherry red fading into black gives this gradient a fruit toned warmth that oxblood and plum both lack, while still reading as deep and seasonal.
Sponge in thin, even layers so the two colors blend smoothly rather than showing a harsh line. Medium to long nails give the gradient enough surface to fully develop.
A glossy top coat over this particular gradient makes the cherry tone look more saturated than a matte finish would.
Widow’s Veil Lace Accent Nail
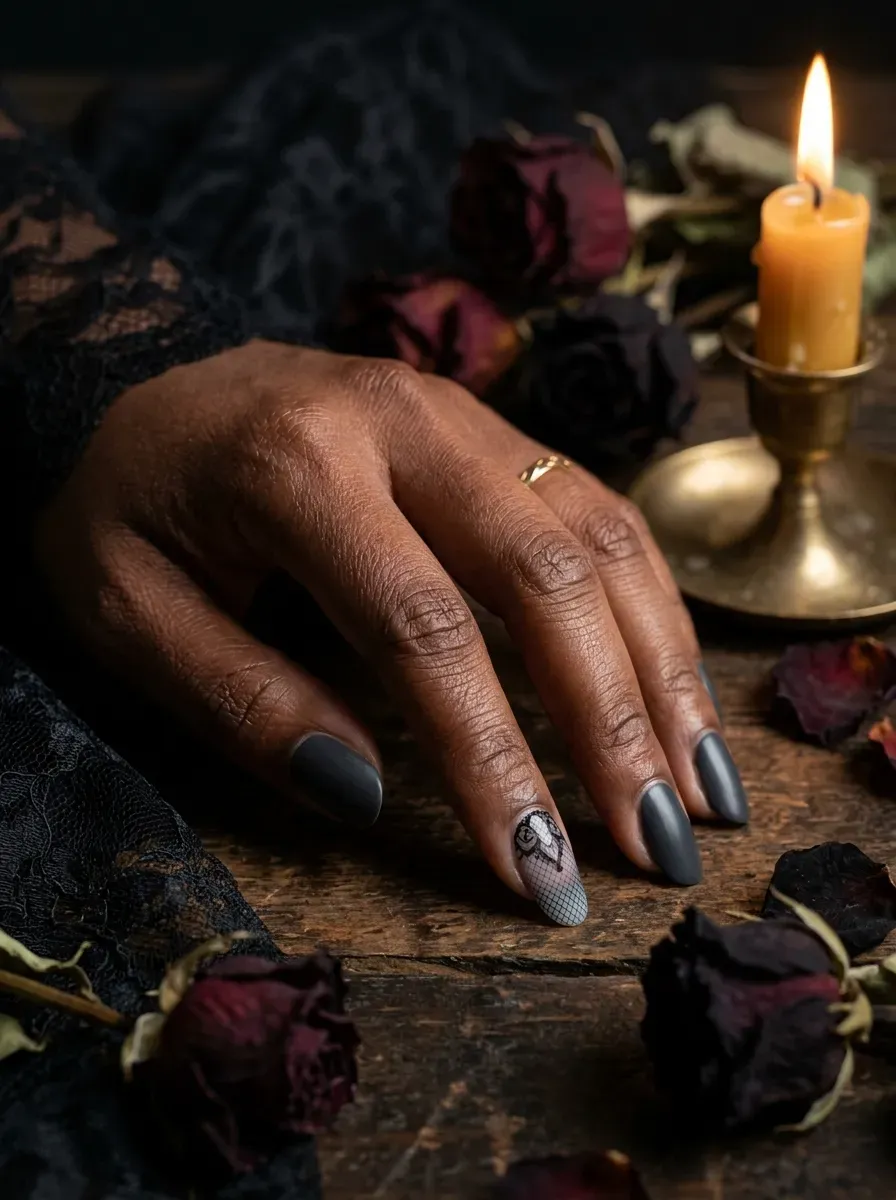
Fading the lace pattern from dense near the cuticle to sheer near the tip mimics the way a veil thins out toward its edge rather than staying uniformly opaque. Pale grey underneath keeps the fading black lace visible even at its sheerest point.
This design works best as a single accent nail, since the fading effect gets harder to control across a full set.
Thin the black polish more than usual for the sheer sections, since standard consistency stays too opaque even in a single light layer.
Deep Garnet Chrome Nails
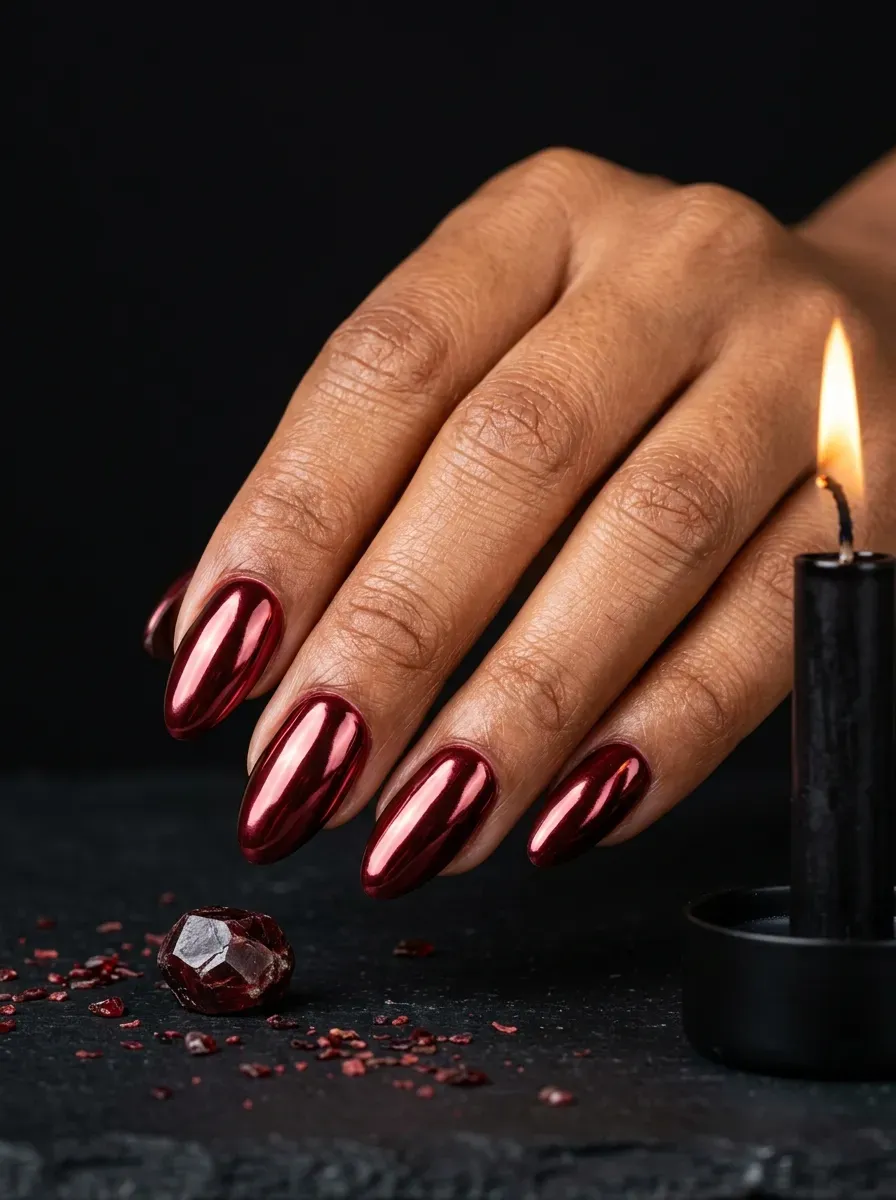
Chrome powder buffed over a deep garnet red base creates a jewel toned mirror finish that reads as rich rather than flashy the way orange or silver chrome often does. Almond or coffin shapes let the reflective surface catch light along the full nail length.
The powder needs a completely tack free gel base to bond correctly, so mention chrome specifically when booking.
This finish photographs warmer under indoor lighting than under daylight, so keep that in mind for event photos.
See also 16 Poetcore Graduation Party Ideas That Make Your Celebration Feel Like Poetry
Gothic Cathedral Window Accent Nail
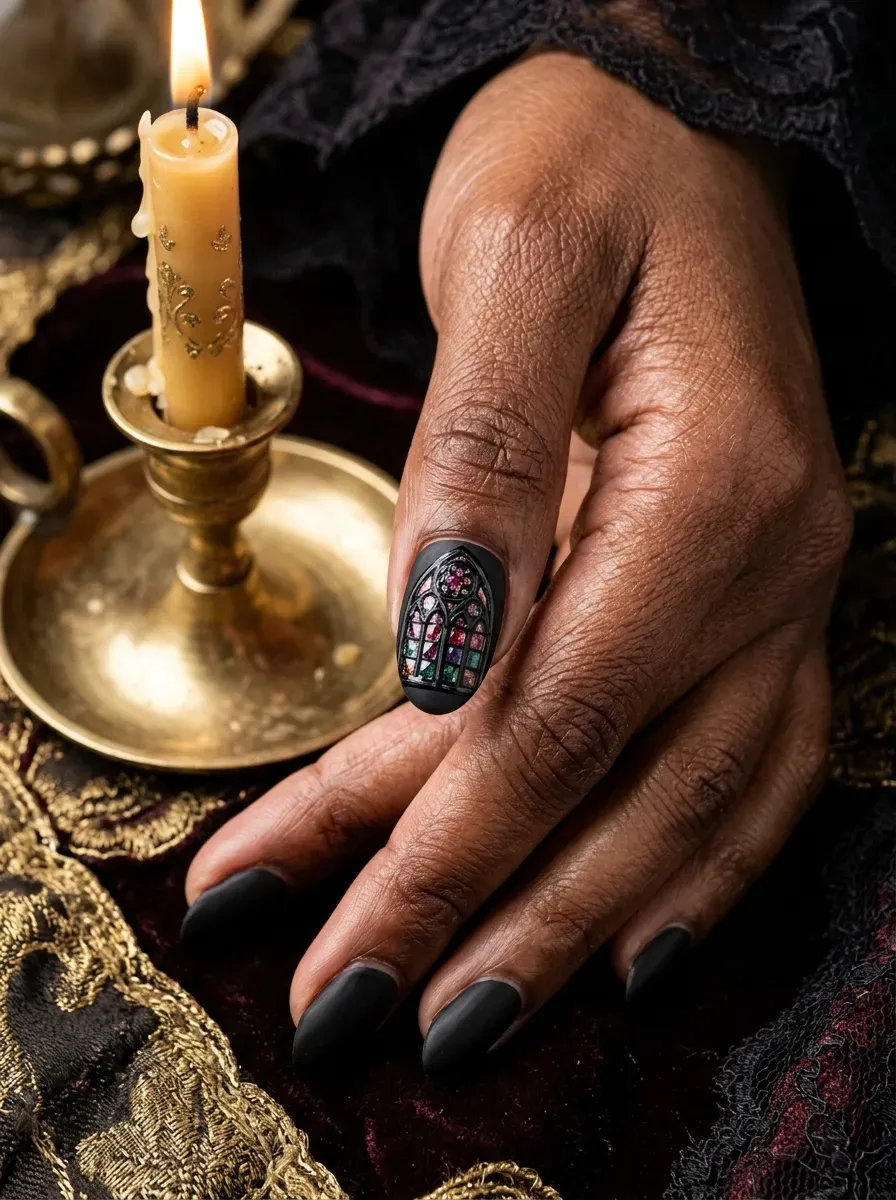
An arched window frame, painted in black with small jewel toned glass sections inside it, condenses the full stained glass design down to a single detailed accent nail.
Coffin or long almond shapes give the arch enough height to actually read as a window rather than a rounded blob. Keep the arch symmetrical, since an uneven curve breaks the architectural reference quickly.
This design pairs well with plain black on the remaining nails, since the accent needs contrast free space to actually stand out.
Why Deep Colors Chip Differently Than Bright Ones
Dark polish has a reputation for hiding wear, but the truth runs the opposite direction on close inspection.
Black, oxblood, and deep plum actually show chips more clearly than a mid tone color does, since the contrast between the dark polish and the pale natural nail underneath is sharper than it would be against a lighter shade.
A small chip in coral blends into the surrounding pink undertone of the nail bed, while the same chip in true black stands out immediately under any light.
Glossy dark finishes chip visibly faster than matte ones do, since the shine draws the eye directly to any break in the surface.
If you know your week involves a lot of hand washing, typing, or manual work, lean toward a matte topcoat rather than glossy for anything solid black or deep red.
A weekly clear coat refresh at the tips extends the life of any dark manicure by a few extra days, and it costs far less time than a full redo.
Choosing Between Freehand Detail And Charm Placement
A lot of the designs on this list split into two camps: fine freehand painting, lace, script, filigree, raven wings, or physical additions like charms, stones, and pearls. Both routes get you a detailed, gothic looking nail, but they age and wear in genuinely different ways worth knowing before you book.
Freehand linework holds up well as long as it stays sealed under an even top coat, and it never catches on fabric the way a raised element can.
Its risk is entirely in the execution, since a shaky line or uneven filigree curl is visible immediately and cannot really be fixed without redoing the nail.
Charms and stones remove that skill risk almost completely, since placement is more forgiving than freehand art, but they introduce a physical snag risk instead.
If you type constantly, cook often, or wear gloves regularly, charm placement toward the base of the nail rather than the center reduces how often it catches on things. If your hands stay relatively still most of the day, a raised charm near the tip reads more dramatically in photos.
What A Gothic Manicure Actually Costs In Chair Time
Detailed dark nail art takes longer than people expect walking in, mostly because dark polish itself needs more coats to look even than a lighter shade does. Black, oxblood, and deep plum usually need a minimum of two full coats to avoid streaking, sometimes three if the base color underneath is significantly lighter.
Add freehand detail on top of that, lace, script, filigree, and the appointment easily runs forty five minutes to an hour longer than a solid color set.
Charm and stone placement adds less time than painted detail, usually ten to fifteen minutes total across a full set, since the technique itself is faster once the gel base is cured.
If your appointment window is tight, ask your tech which of the designs on this list can be scaled down to a single accent nail rather than a full set, since nearly all of them translate that way.
A single detailed accent nail against nine solid black nails still reads as intentional and gothic, and it cuts the appointment time roughly in half compared to detailing every nail.
Somewhere between a full lace covered set and a single accent nail sits the version that fits how much time and detail you actually want.
Short square shapes suit anyone who wants a quiet, low maintenance dark manicure, while long coffin or almond shapes carry the bolder charm and freehand work better than anything shorter.
Color intensity matters too, since true black reads differently than a deep plum or oxblood that only shows its actual hue in direct light.
If maintenance time is limited, favor a solid dark color or a simple gradient over anything with fine linework, since detail chips first. Pick the mood, romantic, severe, or ornate, and let that decide the rest.