Not every Halloween manicure has to be cute pumpkins and cat silhouettes. Some years call for something with real bite, the kind of nail art that makes people take a second look before they realize what they’re actually seeing.
Zombie nail art leans into decay, texture, and unsettling detail in a way regular Halloween nails don’t attempt.
Getting it right takes more than grey polish, since the difference between spooky and sloppy usually comes down to technique, not color choice.
Whether you want a full set of rotted, textured horror or a single accent nail hinting at something wrong, there’s a version built for your comfort level. Here are thirty-seven ways to bring the undead to your fingertips.
How Much Commitment Your Zombie Manicure Actually Requires
Zombie nail art works on a sliding scale, and figuring out where you land on it before your appointment saves both time and money.
A full set of heavy texture, sculpted accents, and multiple design elements takes significantly longer in the chair and costs more than most standard manicures, so it’s worth deciding upfront whether you want that level of commitment.
Bringing reference photos matters more here than with typical nail art, since terms like decay or rot mean different things to different technicians.
Specify whether you want gore-heavy realism or a more stylized, comic take on the theme, since those require different techniques and products entirely.
If this is your first time wearing anything this detailed, starting with one or two accent nails on an otherwise simple base is the easiest way to test how the look feels before going all in.
Nails with heavy texture or 3D elements also need slightly more aftercare, so ask your technician what that involves for whatever technique they use.
Bookmark for later 39 Halloween Party Nail Ideas That Turn Heads
1. Rotting Flesh Textured Nail Art
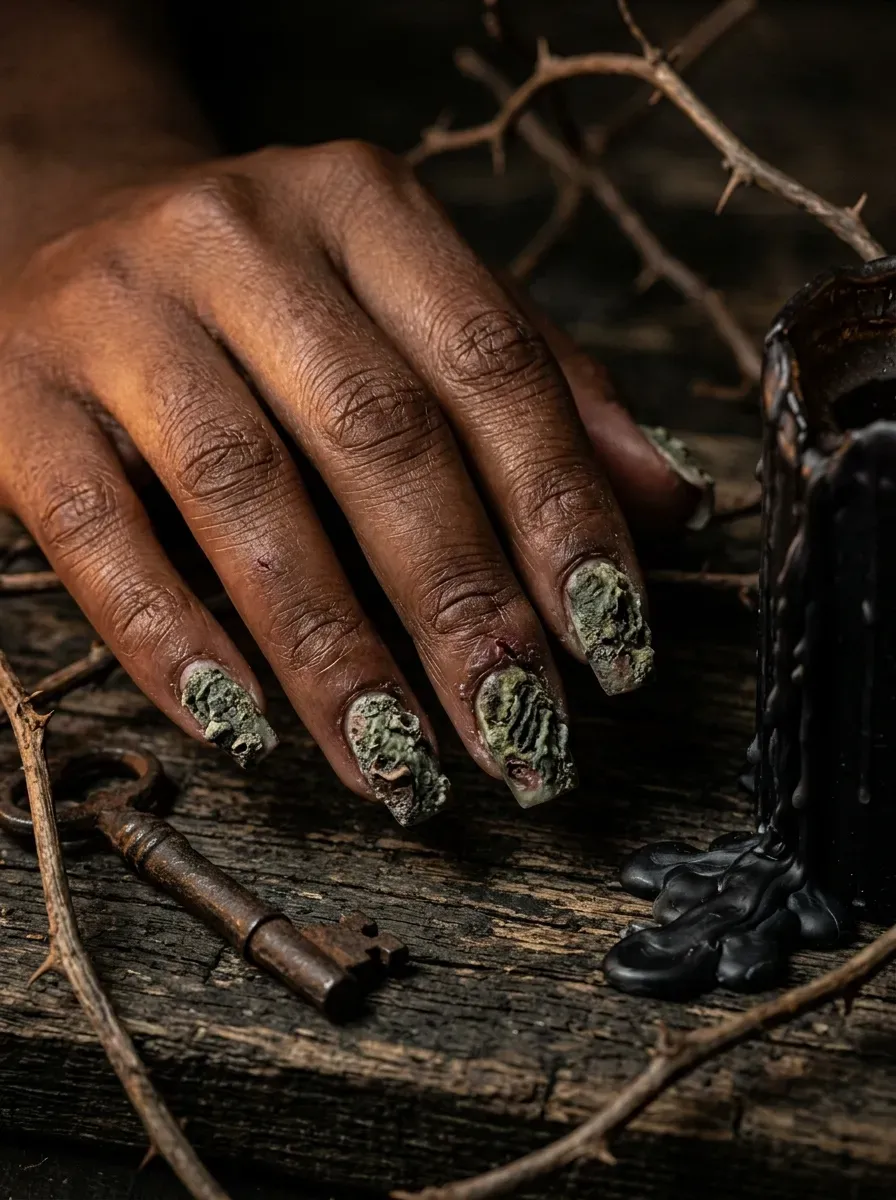
Rotting flesh texture uses a raised, dimensional gel technique to mimic decayed skin, built up in uneven layers. Grey-green and muddy brown blend together for a believable decay effect.
This design works best on longer nails, giving the texture more surface to read clearly. Request a matte topcoat, since gloss makes the texture look wet instead of decayed.
2. Exposed Bone Fragment Accent Nails
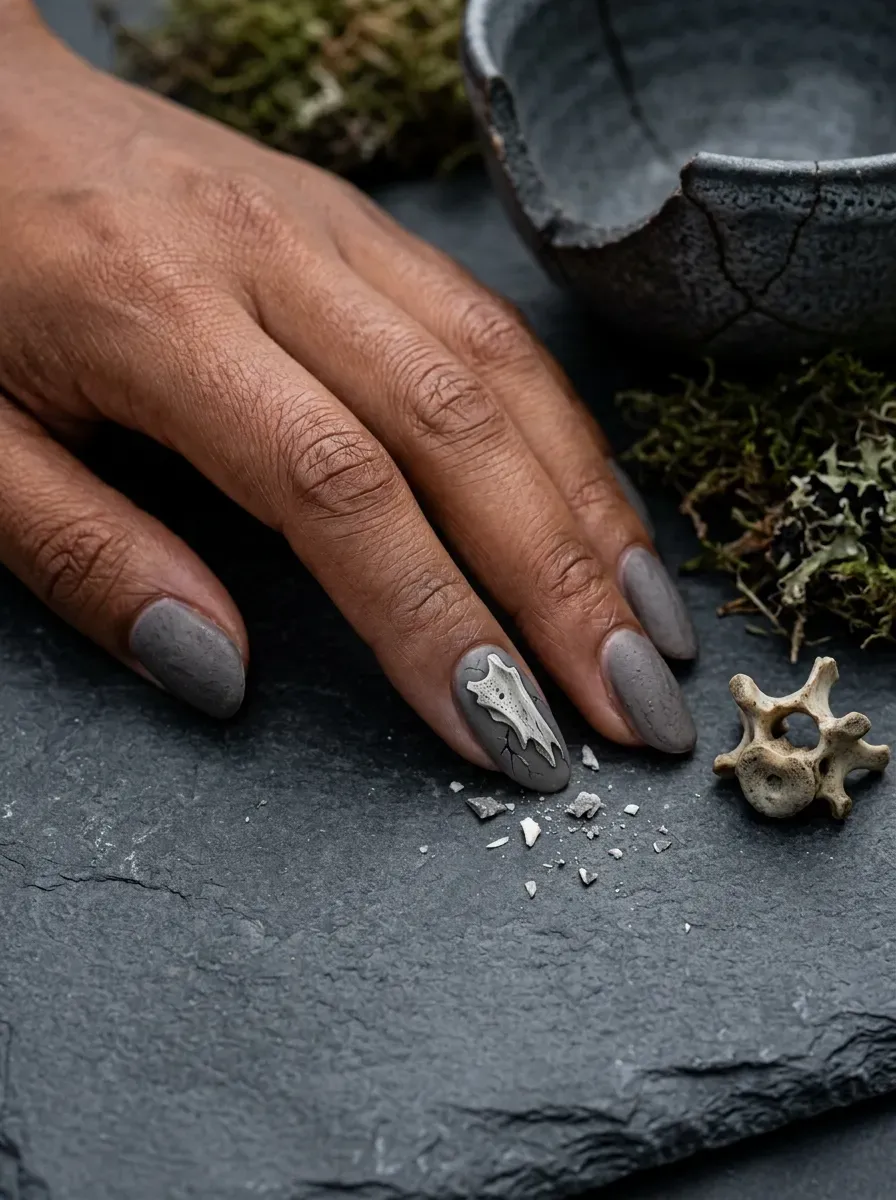
Exposed bone fragment accents paint small white, jagged shapes breaking through a grey or flesh-toned base, suggesting bone peeking through torn skin. Shading the edges with pale yellow adds realism instead of a flat look.
Limiting this detail to one or two accent nails keeps the rest of the set wearable. Pair it with a plain matte base elsewhere.
3. Blood-Splatter French Tips
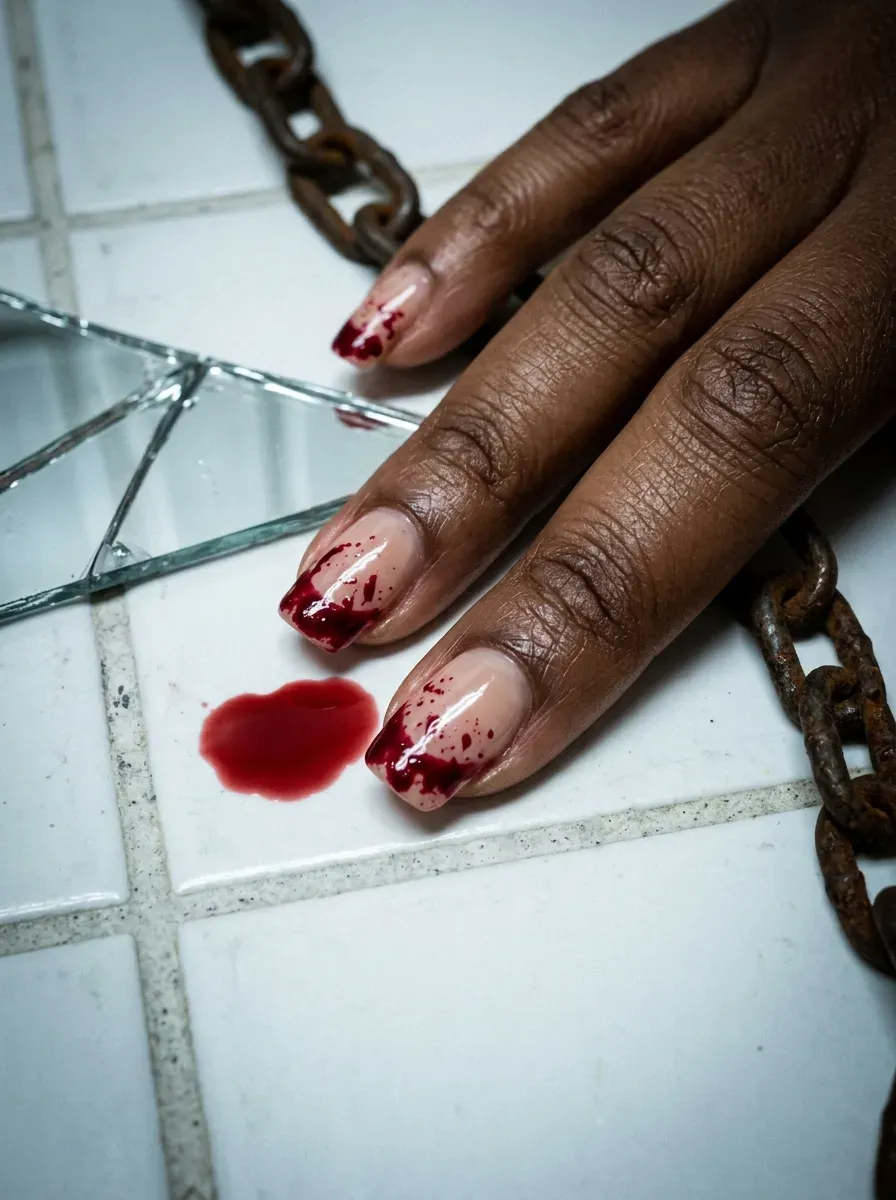
Blood-splatter French tips replace the classic white line with irregular red splatter marks along the tip edge. Varying splatter size across each nail avoids a repetitive, stenciled look.
This style reads dramatic even at short to medium length. Choose deep red over bright red, since the darker shade looks more like dried blood.
4. Stitched Wound Nail Art
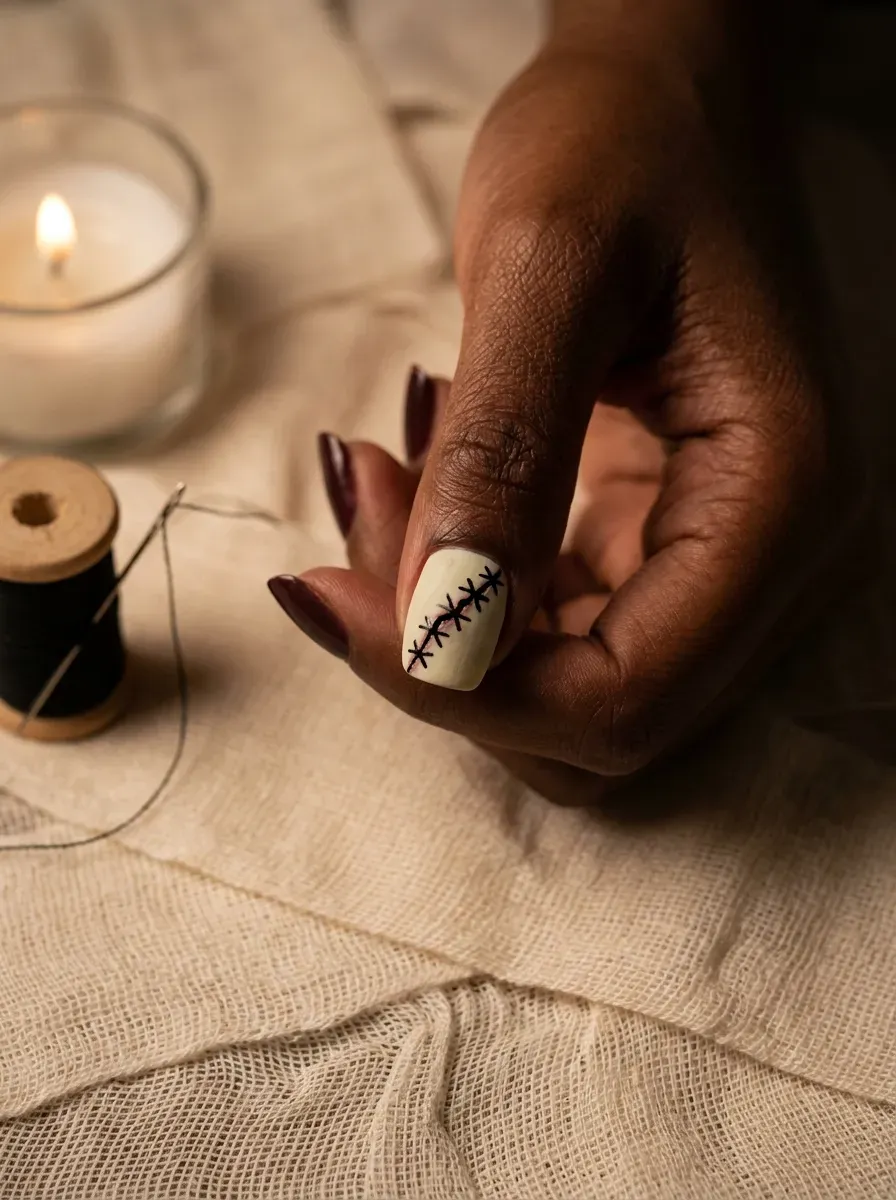
Stitched wound nail art paints a jagged, closed gash with small black X marks running down the center like surgical stitches. Fine black liner work matters, since sloppy stitch lines lose the effect.
This design suits a single accent nail, keeping the impact concentrated. Pair with a pale, sickly base color so the wound stands out clearly.
See more 40 Short Halloween Nail Ideas That Still Look Fun
5. Toxic Green Decay Ombré Nails
Toxic green decay ombré blends sickly yellow-green into deep olive from cuticle to tip, mimicking decomposing skin tone. Blending with a makeup sponge instead of a brush keeps the gradient smooth rather than streaky.
This design suits any length since the fade scales naturally. A slightly murky, desaturated green reads more convincingly toxic than a bright, clean green.
6. Cloudy Zombie Eye Accent Nails
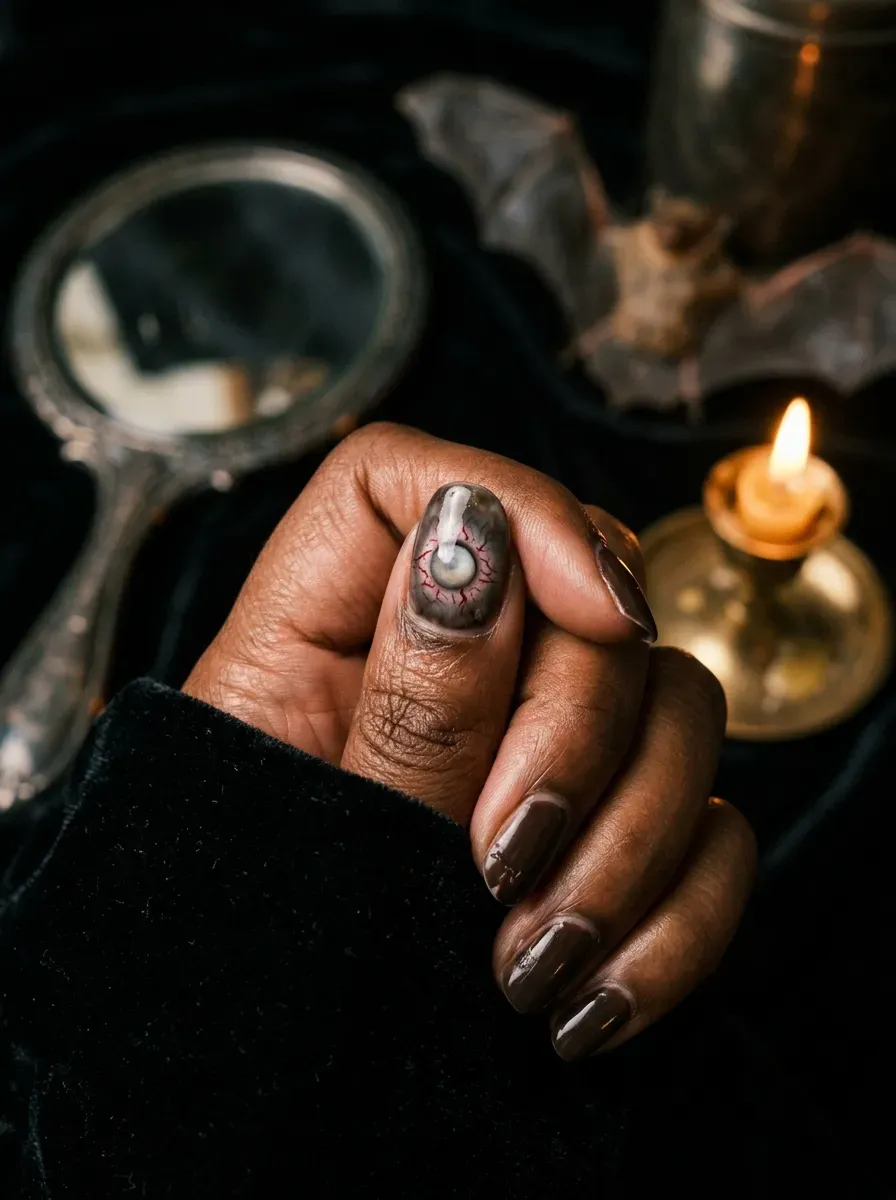
Cloudy zombie eye accents paint a small, unfocused eye with a milky white iris and thin red veins branching outward.
This detail needs a steady hand for the veins, so practice on a nail wheel first. One accent nail is plenty, since two eyes across ten nails gets cluttered fast. Keep the rest muted so the eye stays the focus.
7. Crackle Polish Cracked Skin Nails
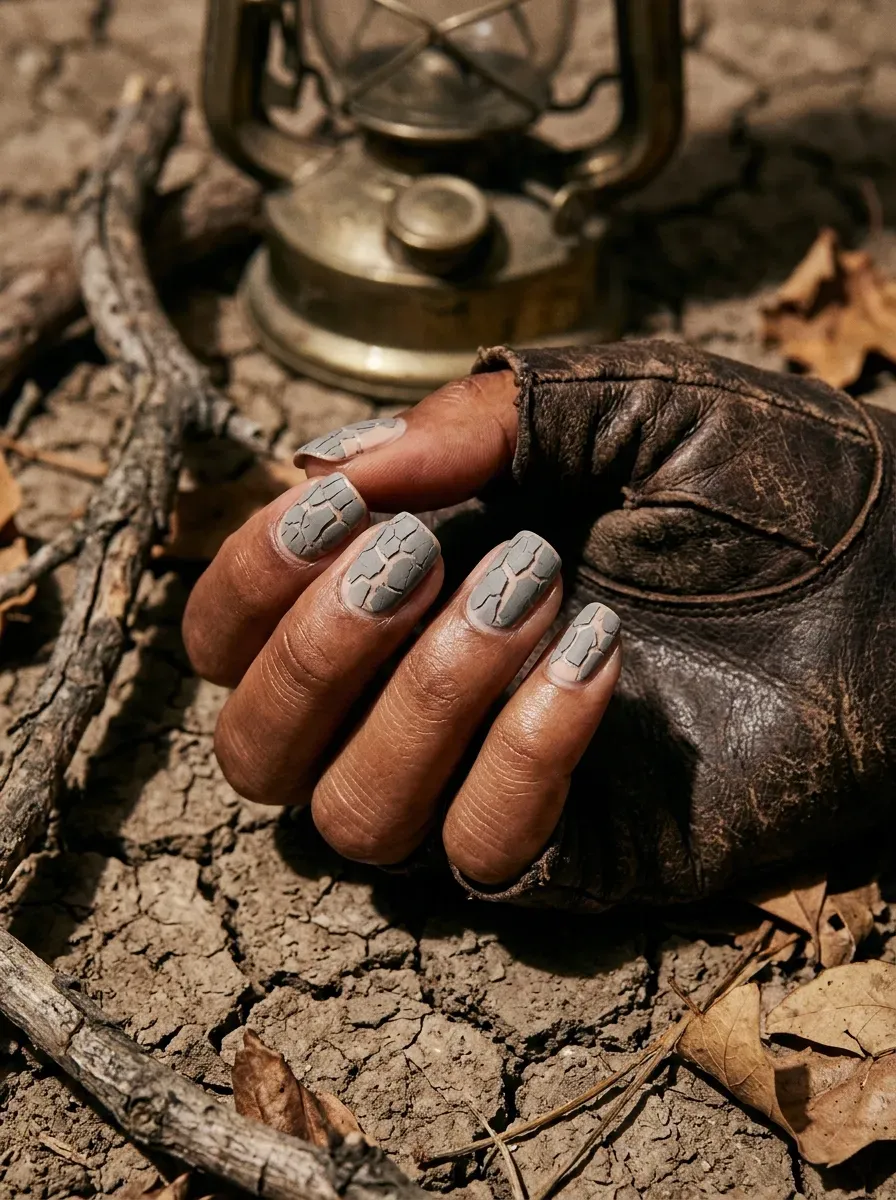
Crackle polish creates a naturally cracked, weathered texture in a single coat, splitting apart as it dries to reveal the color underneath. Layering a grey crackle top coat over pale skin-toned polish gives the most convincing decayed-skin effect.
This technique works faster than hand-painted cracks. Apply crackle polish thickly for wider, more dramatic cracks.
8. Matte Grave Dirt Nails
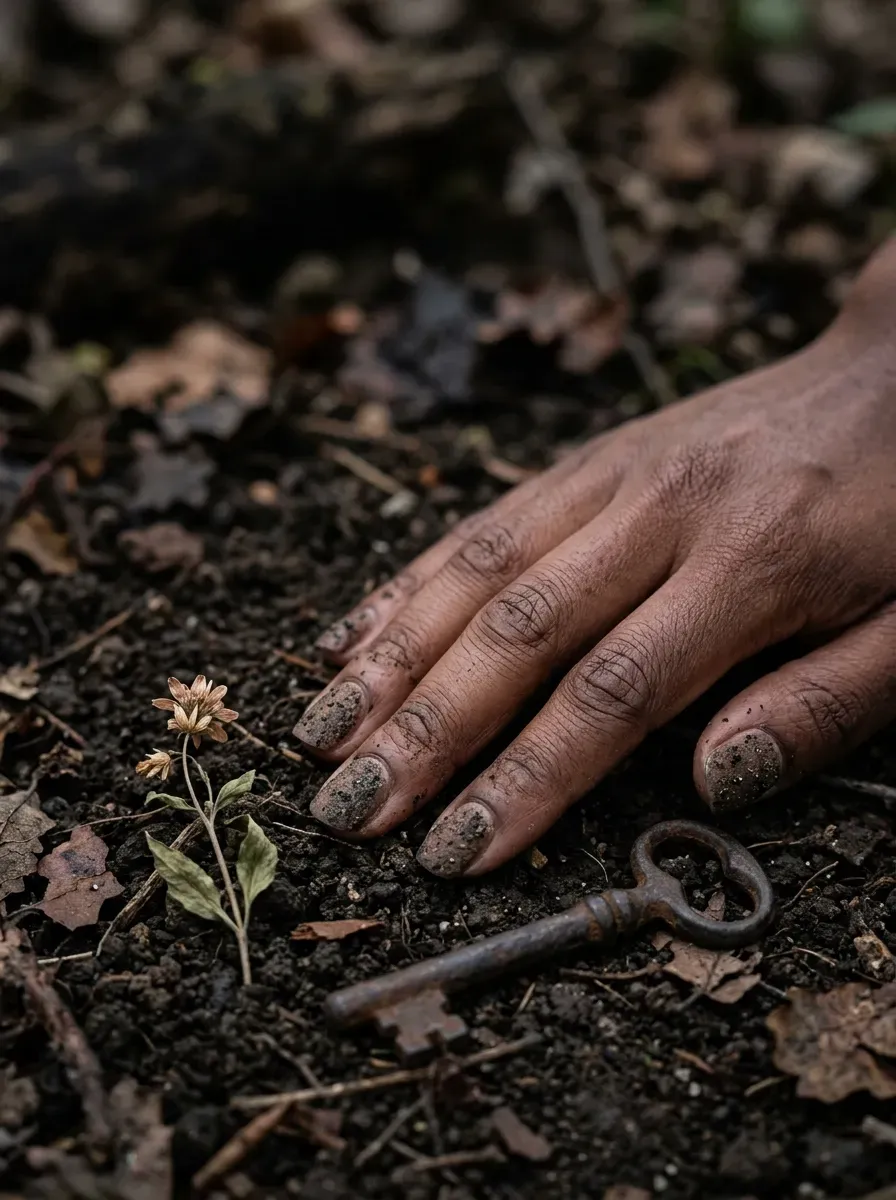
Matte grave dirt nails use gritty top coat mixed with brown and black polish to mimic packed soil. Sprinkling fine matte powder into wet polish before it dries adds real grit instead of a flat look.
Short to medium nails keep the texture from looking too heavy. This finish pairs well with one glossy red accent nail for contrast.
Check out 30+ Matching Halloween Nails for Couples and Best Friends
9. Rotted Bandage Wrap Nail Art
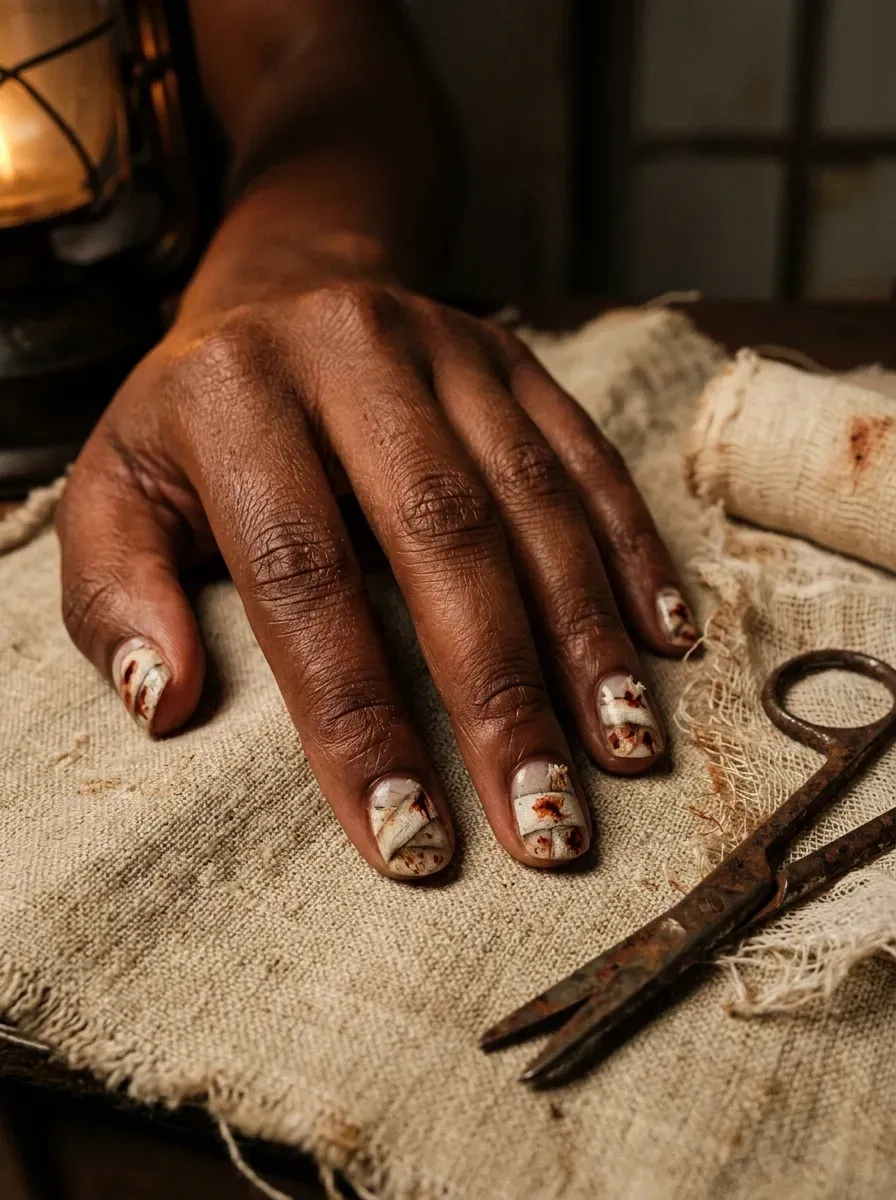
Rotted bandage wrap nail art paints thin, overlapping strips in dingy off-white, with small rust-colored stains bleeding through in spots. Leaving gaps between strips lets a darker base color peek through, suggesting wounds underneath.
This design suits medium length nails, giving the wrap pattern room to read clearly. Add tiny frayed edges at the strip ends for realism.
10. Maggot and Fly Detail Accent Nails
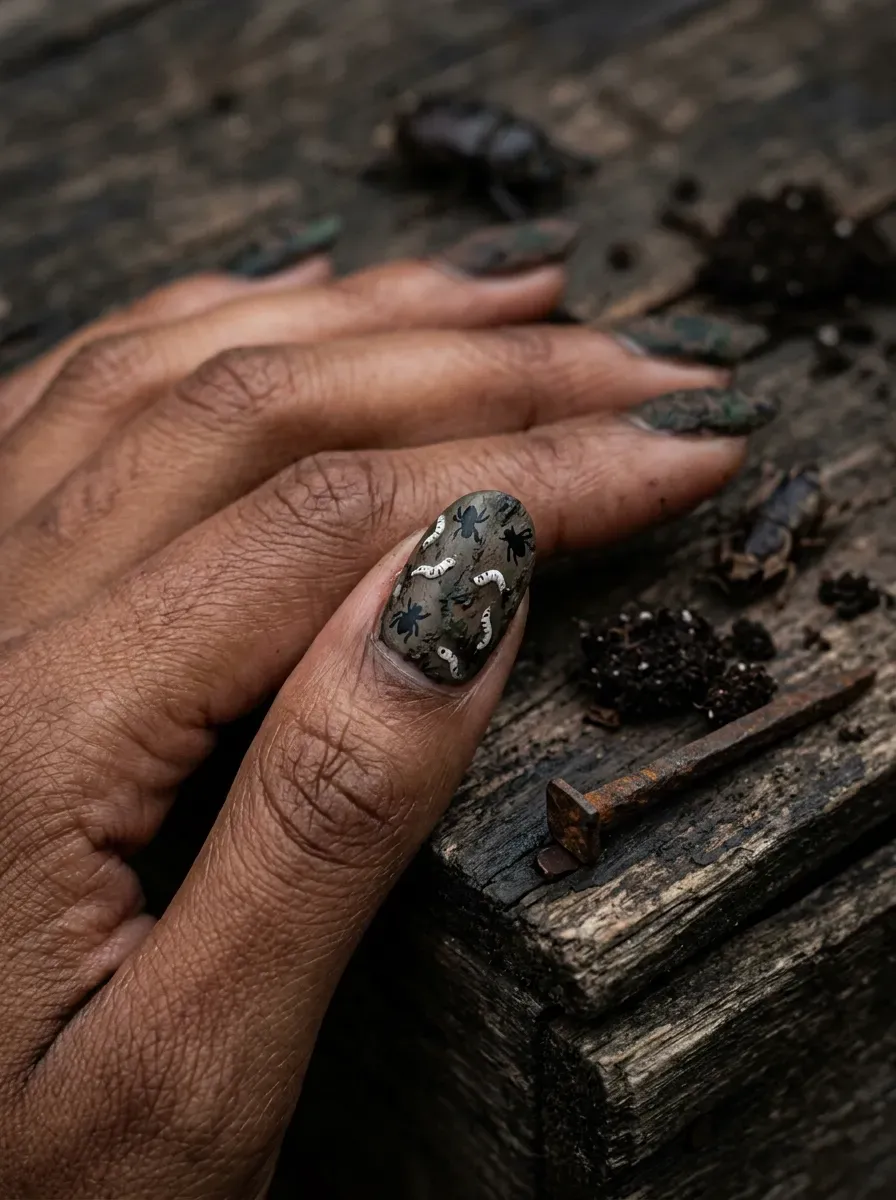
Maggot and fly detail accents paint tiny white grubs and small black fly silhouettes scattered across a decayed-looking base. Keeping details small and slightly off-center feels more unsettling than a symmetrical placement.
This works best on just one or two nails, since overuse tips the look from creepy into cartoonish. A matte, muddy base sells the decay better than gloss.
11. Intentionally Chipped Decay Nails
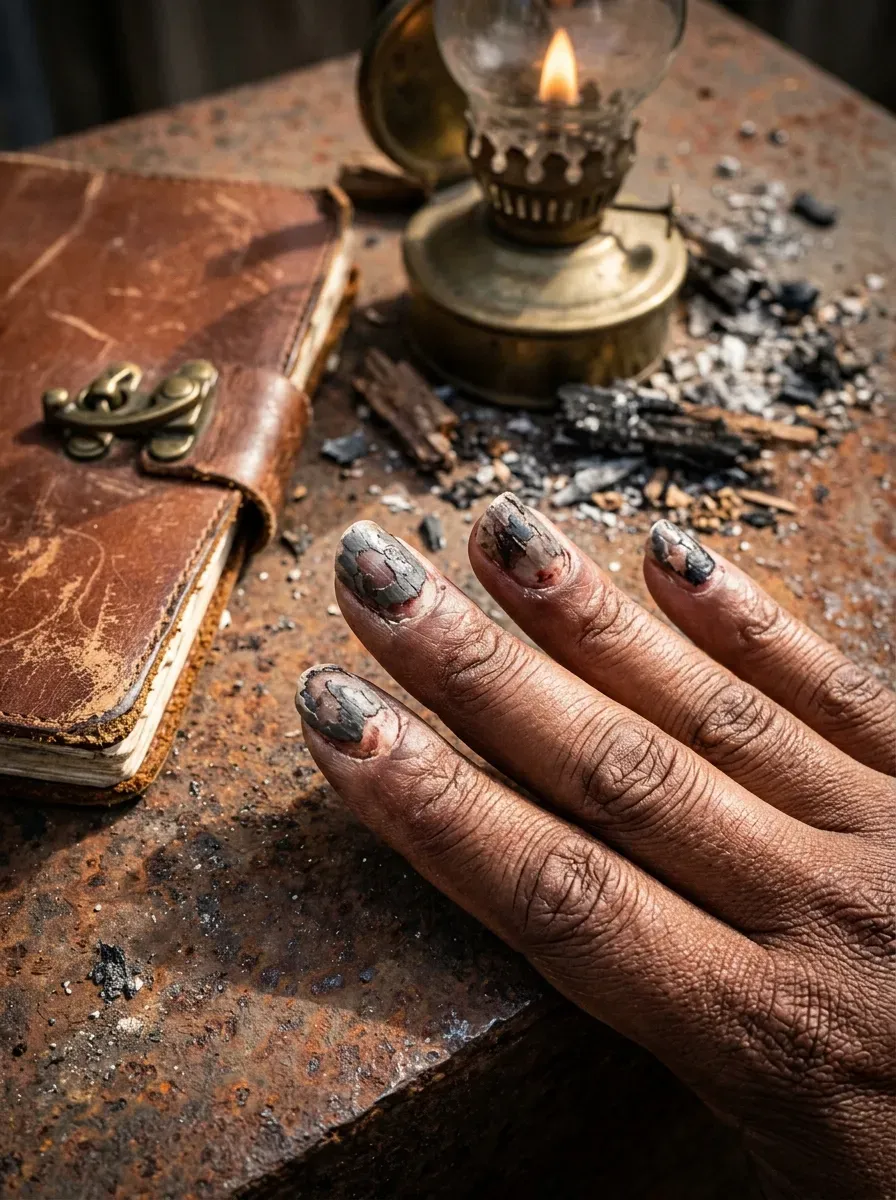
Intentionally chipped decay nails use a technique where polish is deliberately applied unevenly and partially removed in spots, mimicking neglected, decaying nails.
This requires more restraint than skill, since overdoing the chips looks messy rather than intentional. Grey, brown, and black layered polish creates the most believable decayed base. This style photographs better in slightly harsh lighting.
See also 38 Gothic Halloween Nail Ideas for a Dark Aesthetic
12. Apocalypse Newsprint Nail Art
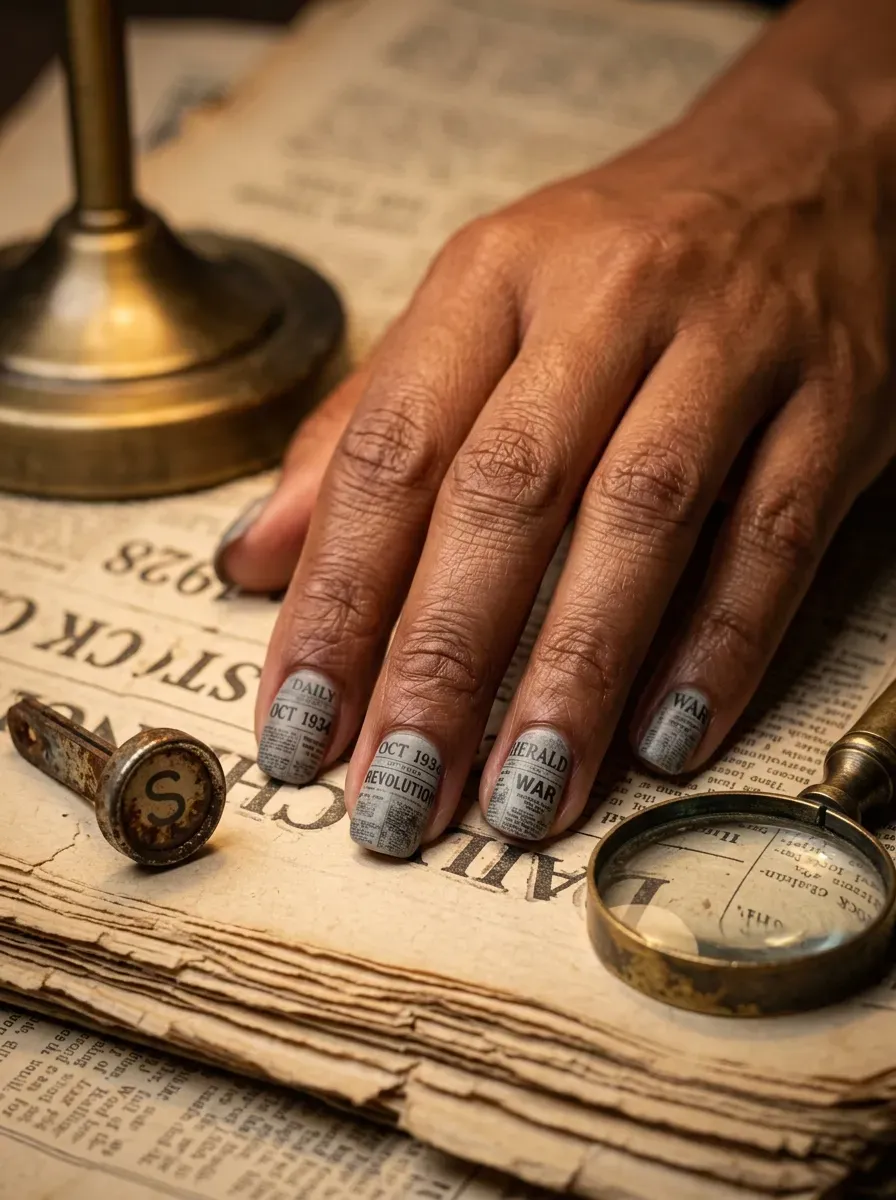
Apocalypse newsprint nail art transfers tiny newspaper-style text and headlines using a water decal technique, then ages the print with a grey wash. Real newspaper transfers read more authentic than pre-made nail decals.
This design suits shorter nails, since small text needs a flatter surface to stay legible. Seal with matte topcoat so the newsprint doesn’t look glossy.
13. Glow-in-the-Dark Toxic Green Nails
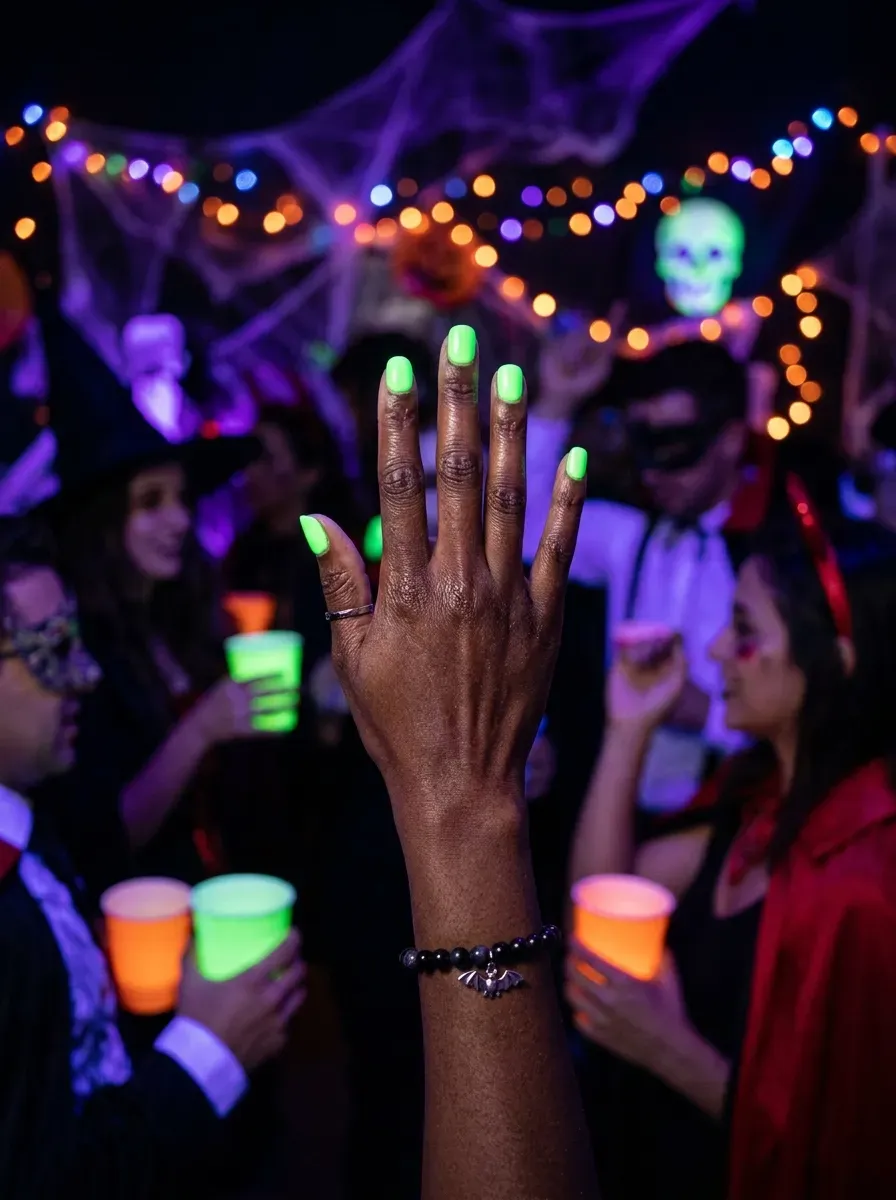
Glow-in-the-dark toxic green nails use a phosphorescent top coat over green base polish, so nails glow faintly under blacklight or in the dark. Charging the polish under direct light before an event keeps the glow strongest.
This design suits parties and dark venues over daytime wear, since the glow disappears in bright light. Reapply the topcoat every few wears.
14. Rusted Chrome Zombie Nails
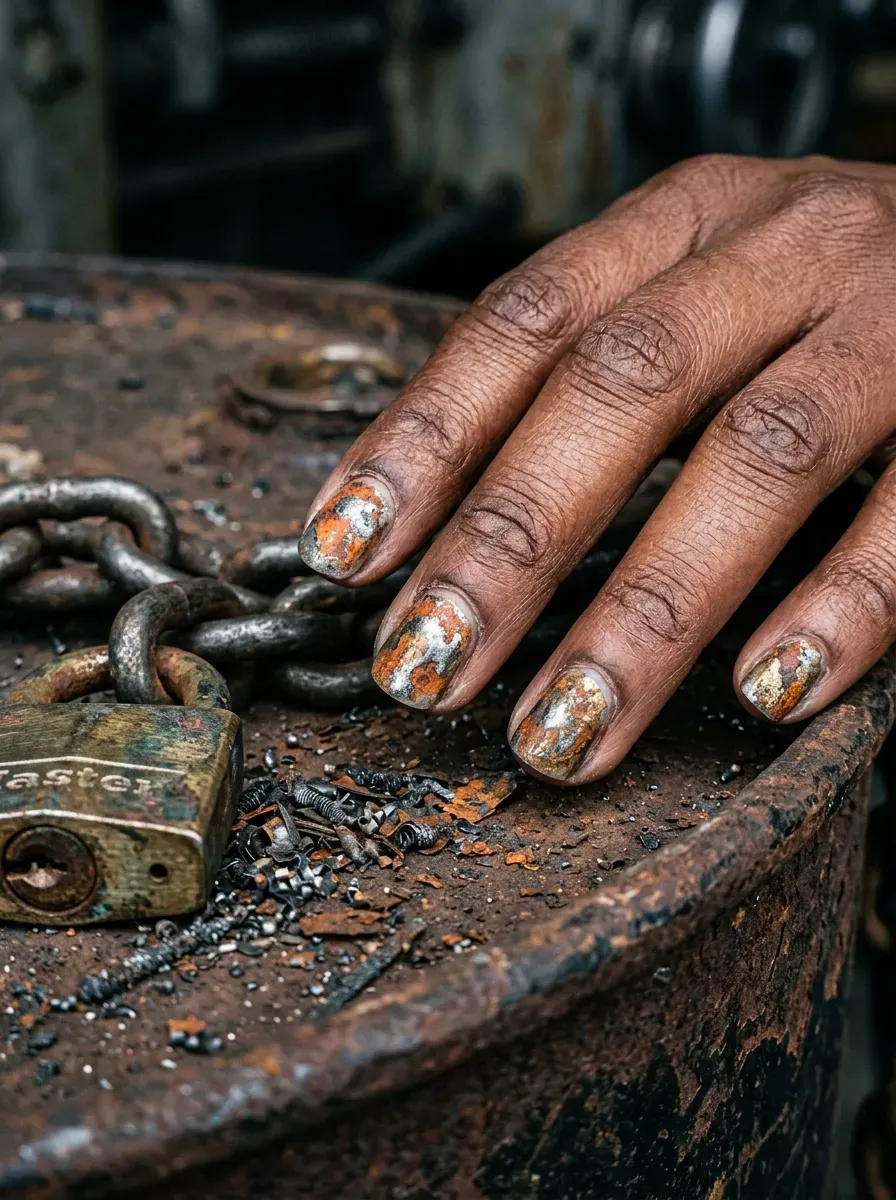
Rusted chrome zombie nails apply chrome powder unevenly over a rust-orange and grey base, creating a corroded metallic finish. Buffing the powder only partially, rather than fully, keeps the corroded texture intact.
This finish catches light dramatically under party lighting. Avoid full chrome coverage, since a patchy application sells the rusted effect.
15. Black Vein Marbling Nail Art
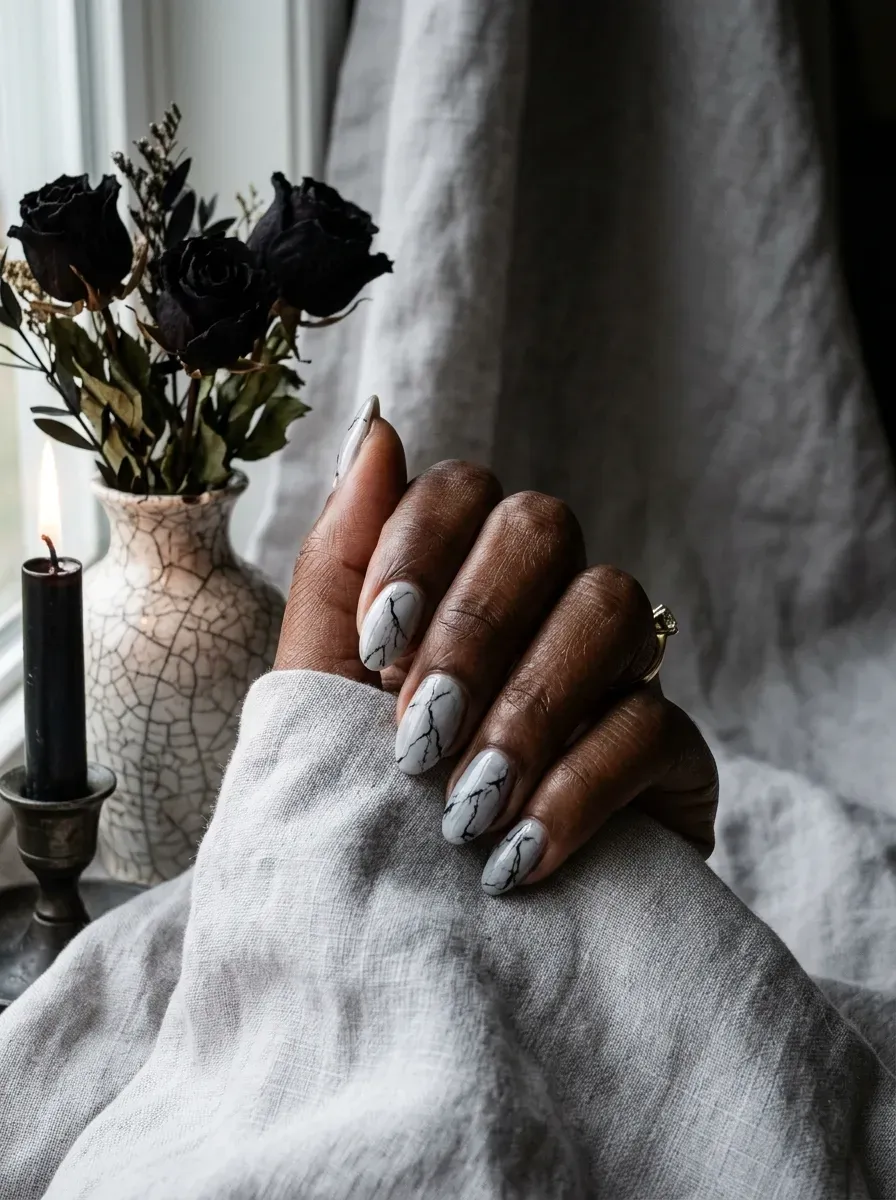
Black vein marbling drags thin black lines through a pale grey base, mimicking veins visible under decaying skin.
Dragging lines with a thin brush while the polish is still wet creates natural, branching movement instead of straight lines.
This design suits longer nails, giving veins more room to spread convincingly. Keep lines thin, since thick ones look like cracks.
16. Negative Space Torn Skin Nails
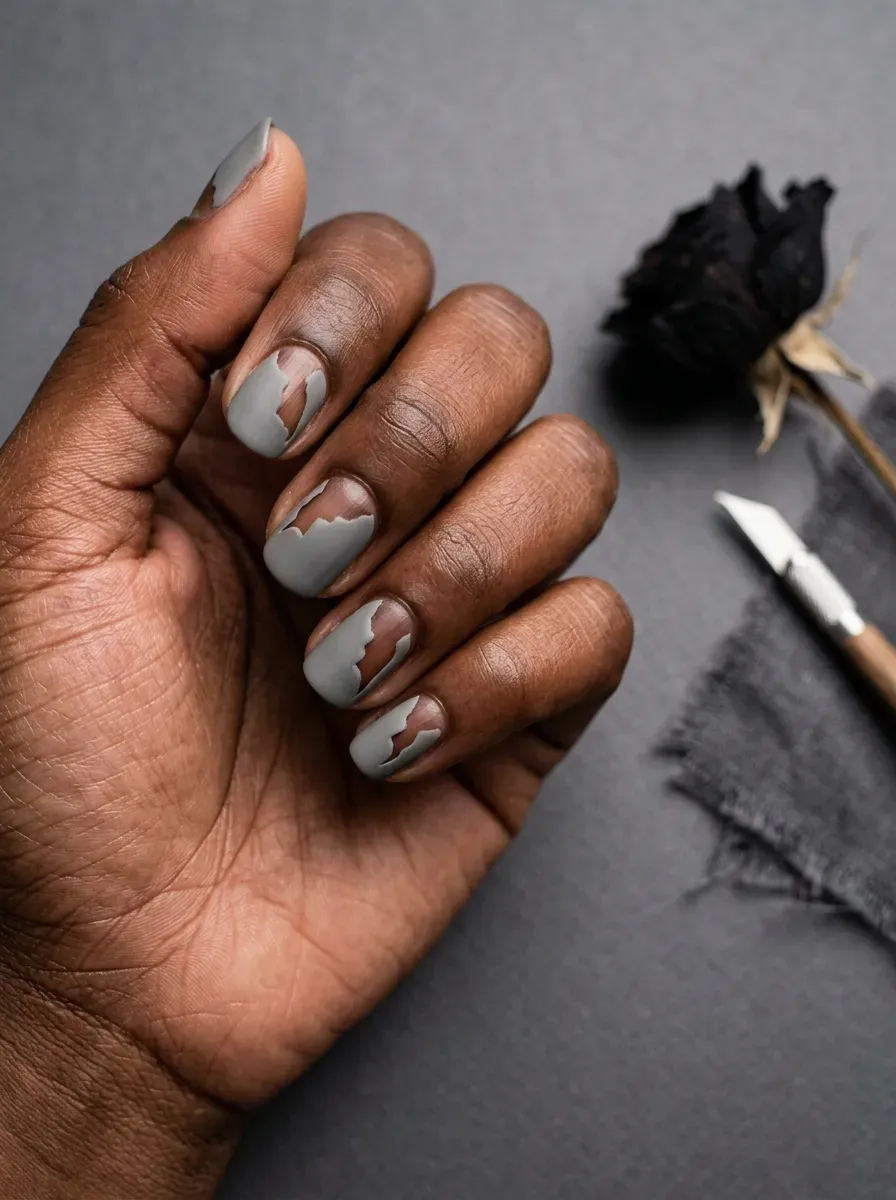
Negative space torn skin nails leave bare, unpainted sections shaped like jagged tears across a grey-toned base, suggesting skin ripped away.
This technique relies on clean, precise edges, since a sloppy line reads as a mistake rather than an effect.
Sealing the exposed nail with clear topcoat protects it from staining. It reads graphic and modern rather than heavily textured.
17. Zombie Bite Mark Accent Nails
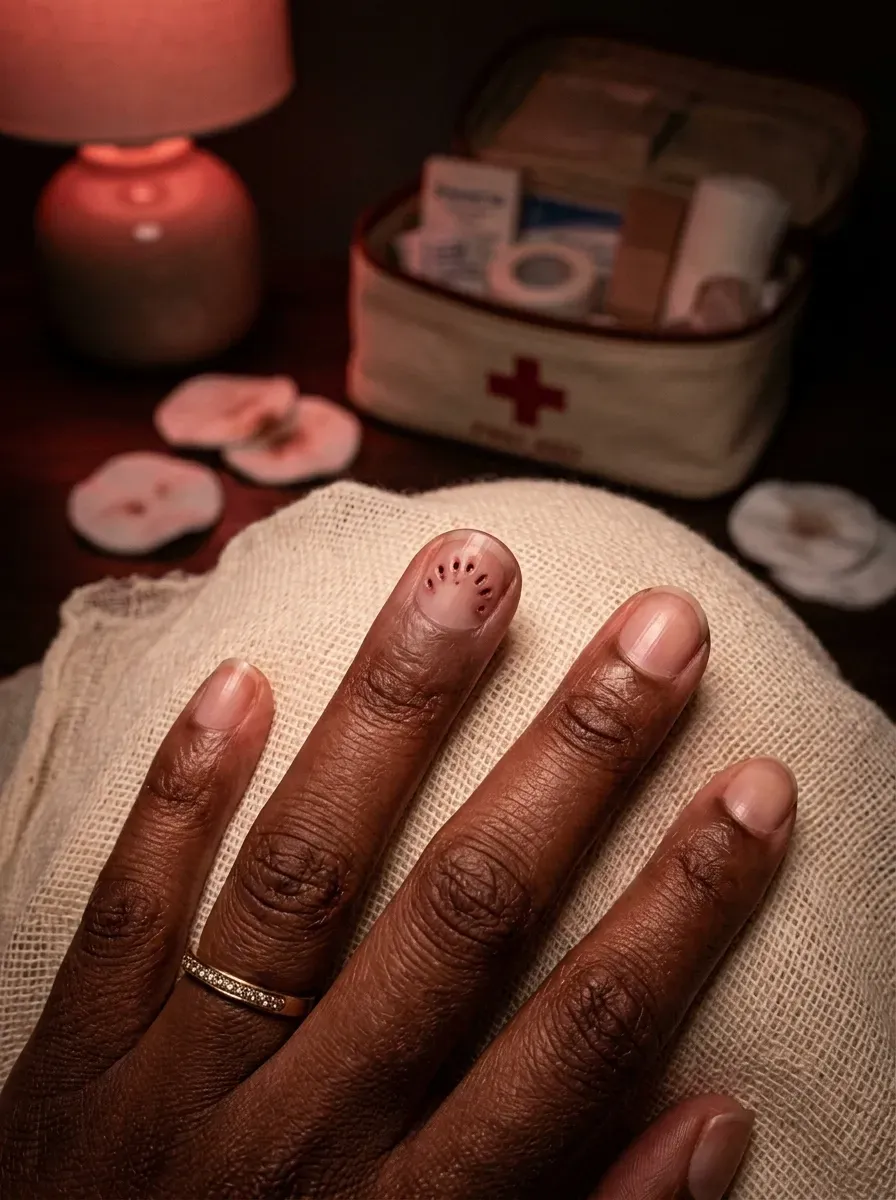
Zombie bite mark accent nails paint a curved row of small red puncture marks across one nail, referencing an actual bite wound. Curving the marks rather than placing them in a straight line makes the bite look realistic.
This detail suits a single accent nail on an otherwise plain, muted set. Add a red halo around the marks for bruising.
18. Skeletal X-Ray Nail Art
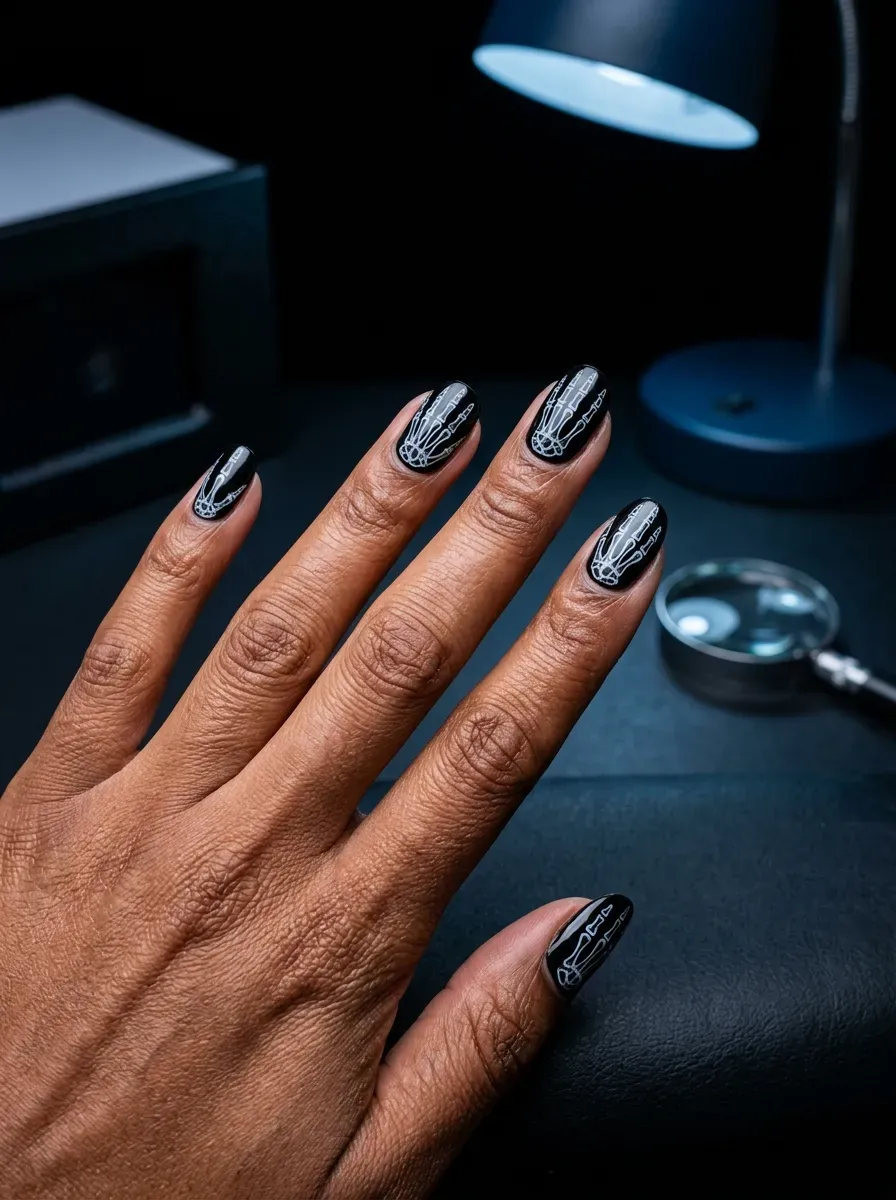
Skeletal X-ray nail art paints fine white bone structures over a solid black base, mimicking an actual X-ray of the hand. Fine detail brushes matter, since bone joints need precise, thin linework to read correctly.
This design suits any length; longer nails give more room for bone detail near the tip. Slightly blue-white tones read more clinical than stark white.
Check out 35 Witch-Themed Nail Art Ideas for Halloween
19. Moldy Green Splotch Nail Art
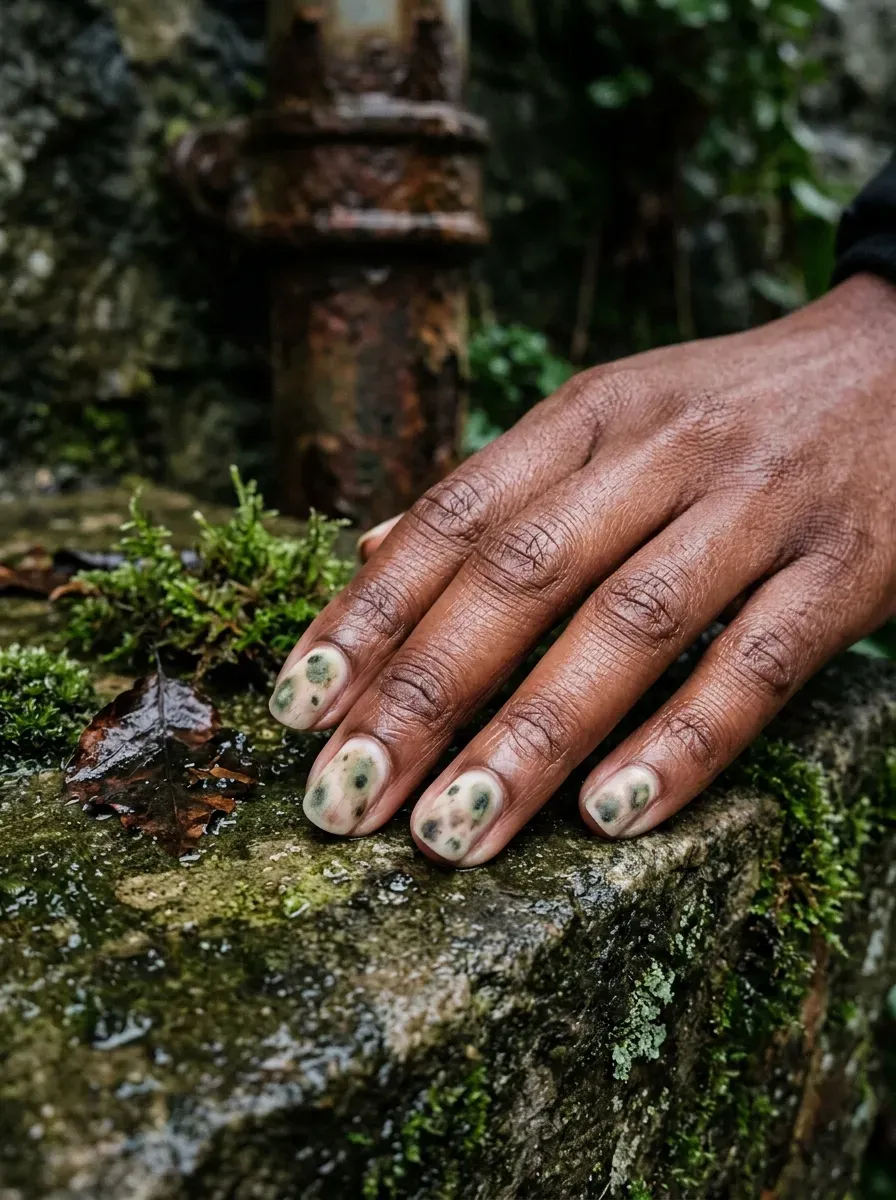
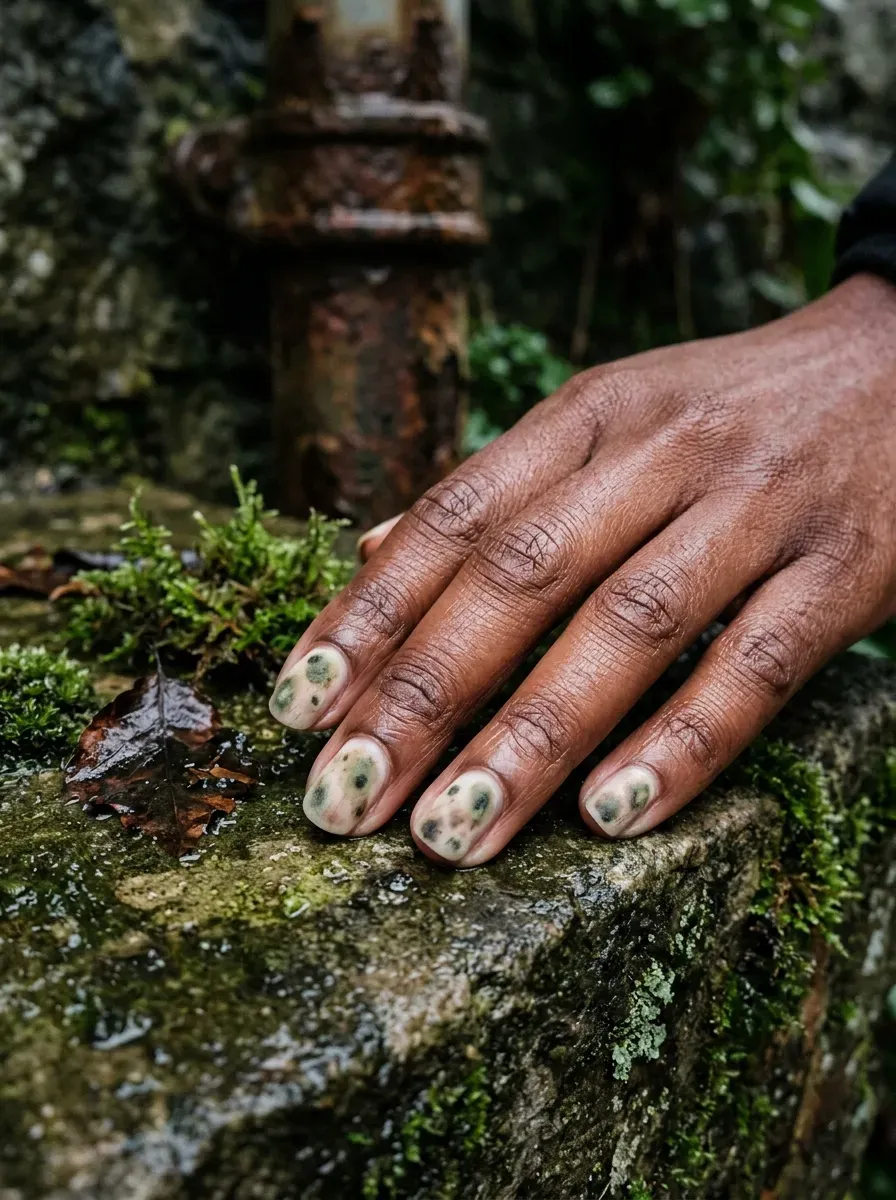
Moldy green splotch nail art dabs uneven circles of muted green and black across a pale, decayed base using a sponge or dotting tool.
Varying splotch size and softening edges avoids a polka-dot pattern that reads decorative instead of decayed.
This suits readers wanting texture without fine detail work. A soft-edged splotch looks more like mold than a hard circle.
20. Barbed Wire Wrap Accent Nails
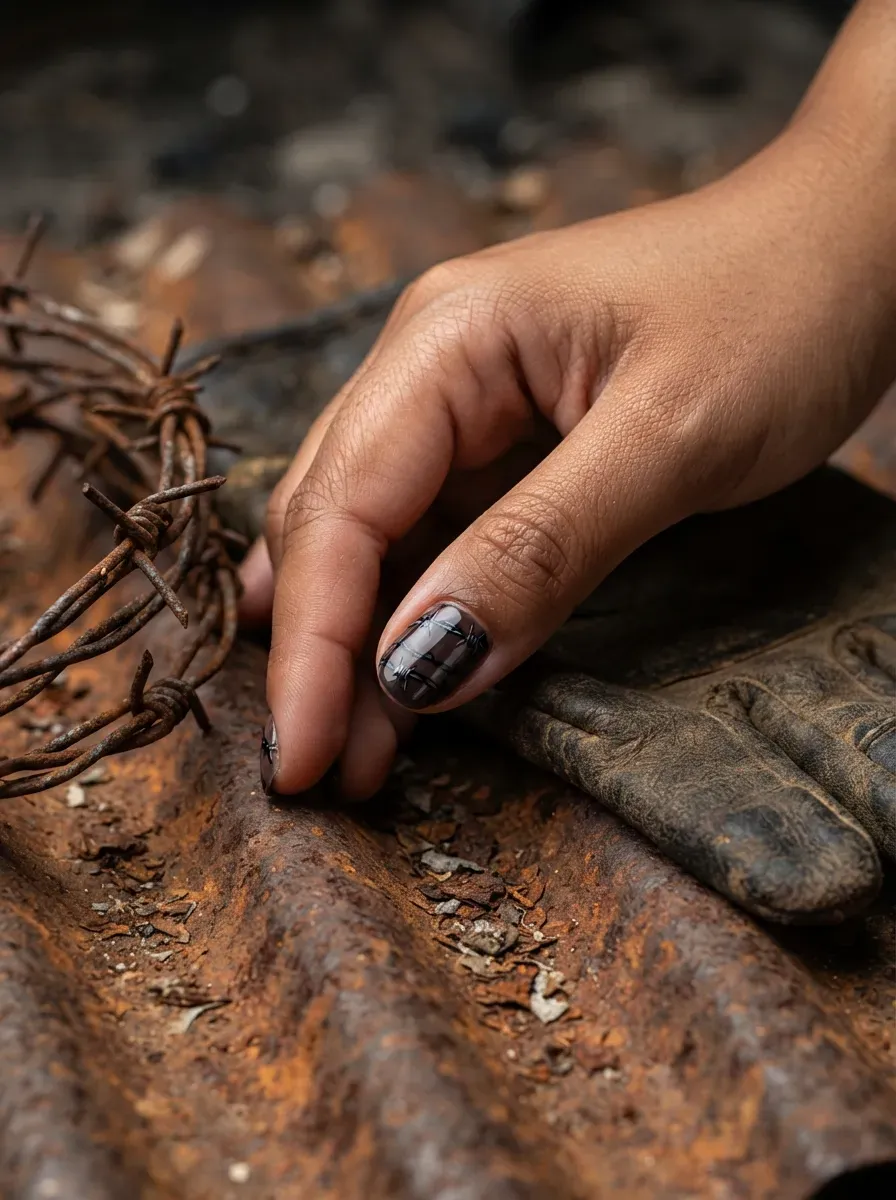
Barbed wire wrap accent nails paint a thin black wire winding around the nail with small angled barbs, suggesting a post-apocalyptic aesthetic. Keeping the wire line consistent in width matters more than adding detail to each barb.
This design suits longer nails, giving the wire enough length to wrap convincingly. Pair with a solid black or rust-toned base.
21. Coffin Shape Zombie Nails
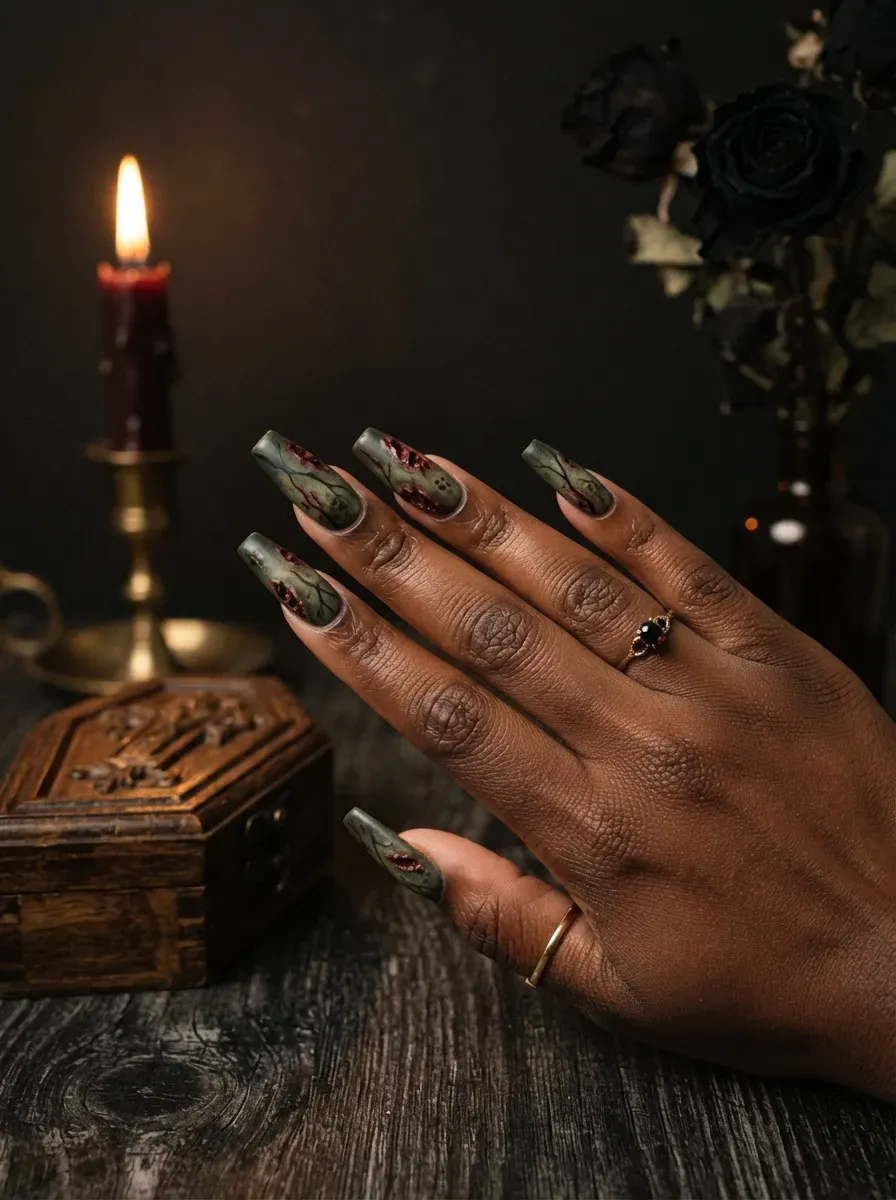
Coffin shape zombie nails use the long, squared-off tip because the shape itself echoes the theme, giving any design an extra layer of horror styling.
This shape provides more surface for detailed art like veins or bite marks than shorter shapes. Coffin length needs more maintenance, since the flat tip chips more easily. It suits gore-heavy designs needing visual space.
22. Long Stiletto Claw Zombie Nails
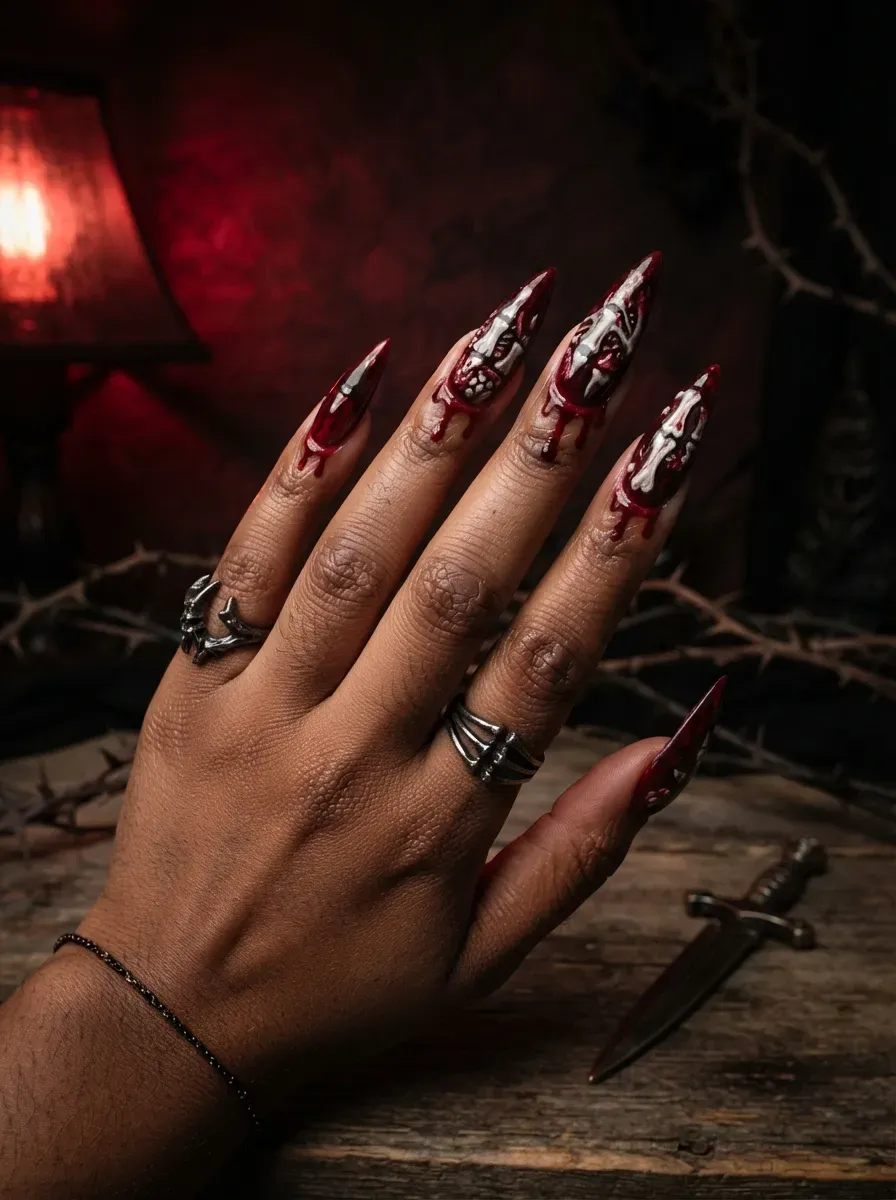
Long stiletto claw zombie nails use a sharply pointed shape to read as claw-like, leaning into a feral, aggressive take on the theme.
This shape suits bold, high-contrast designs like blood drips or exposed bone better than delicate detail work. Stiletto length needs more care daily, since the pointed tip snags easily. This style photographs dramatically from a side angle.
23. Subtle Everyday Zombie Nail Art

Subtle everyday zombie nail art uses muted grey and olive polish with just one tiny detail, like a small crack or vein, rather than full decay coverage.
This lets the wearer enjoy the theme at work or school without drawing attention. Short, rounded nails keep the look understated and easy to maintain. It works especially well leading into Halloween itself.
24. Matte Black-to-Grey Rot Ombré
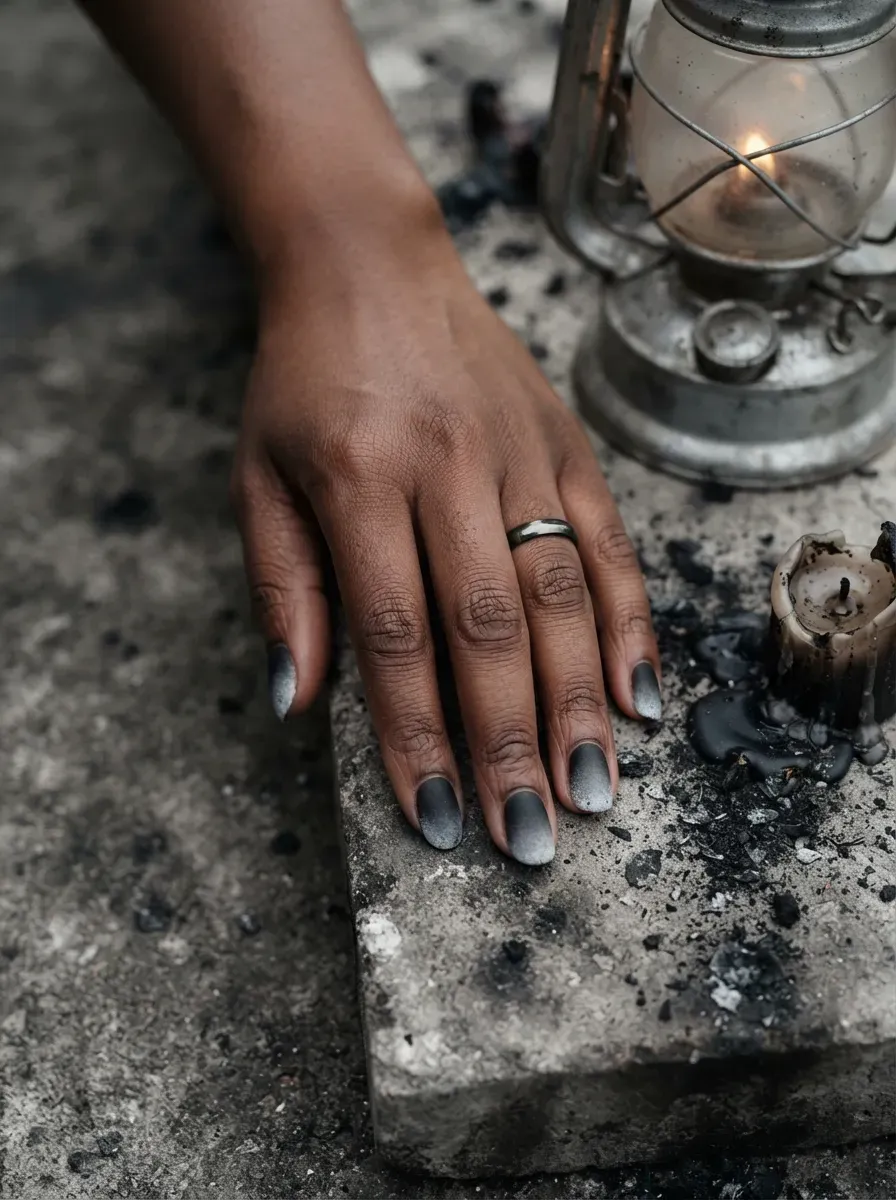
Matte black-to-grey rot ombré blends deep black at the cuticle into a chalky, decayed grey at the tip, using a fully matte finish. Matte polish reads dustier and more decayed than the same gradient in gloss.
This suits medium to long nails, giving the gradient room to transition smoothly. A slightly uneven blend helps, since smooth gradients look too polished.
Check out 38 Halloween Toe Nail Designs for Spooky Season
25. Biohazard Warning Sign Nail Art
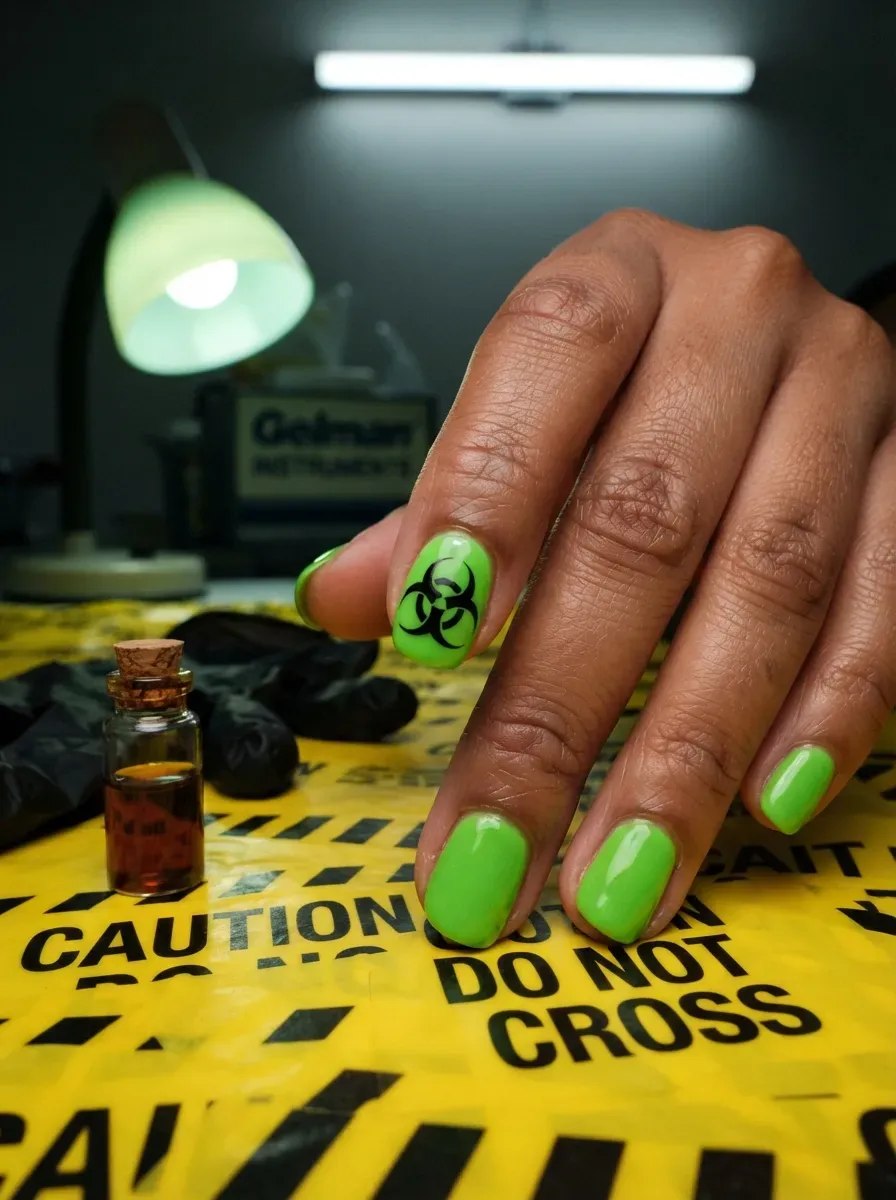
Biohazard warning sign nail art paints the three-circle hazard symbol in black over a bright yellow or toxic green base, referencing outbreak themes. Stencils keep the symbol’s angles clean, since freehand versions come out lopsided.
This suits one or two accent nails, since the symbol is bold enough to carry the look alone. Pair with a solid black base elsewhere.
26. Deep Red Gore French Tips
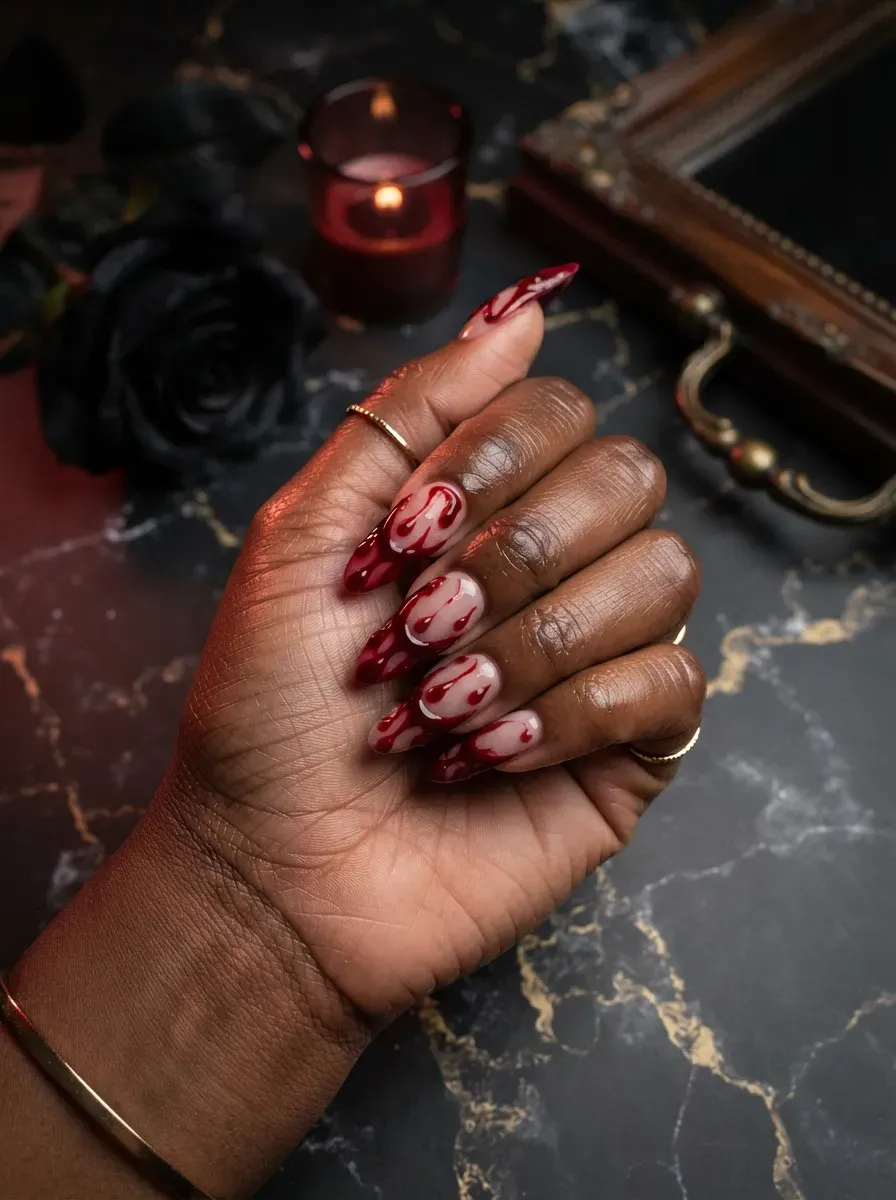
Deep red gore French tips replace the classic white line with a thick, dripping red tip extending further down the nail than a standard French manicure.
Layering two shades of red, one darker underneath, gives the tip more depth than a single color. This works at any length but reads more dramatic on longer nails. Matte reads drier than gloss.
27. Cracked Porcelain Doll Nails
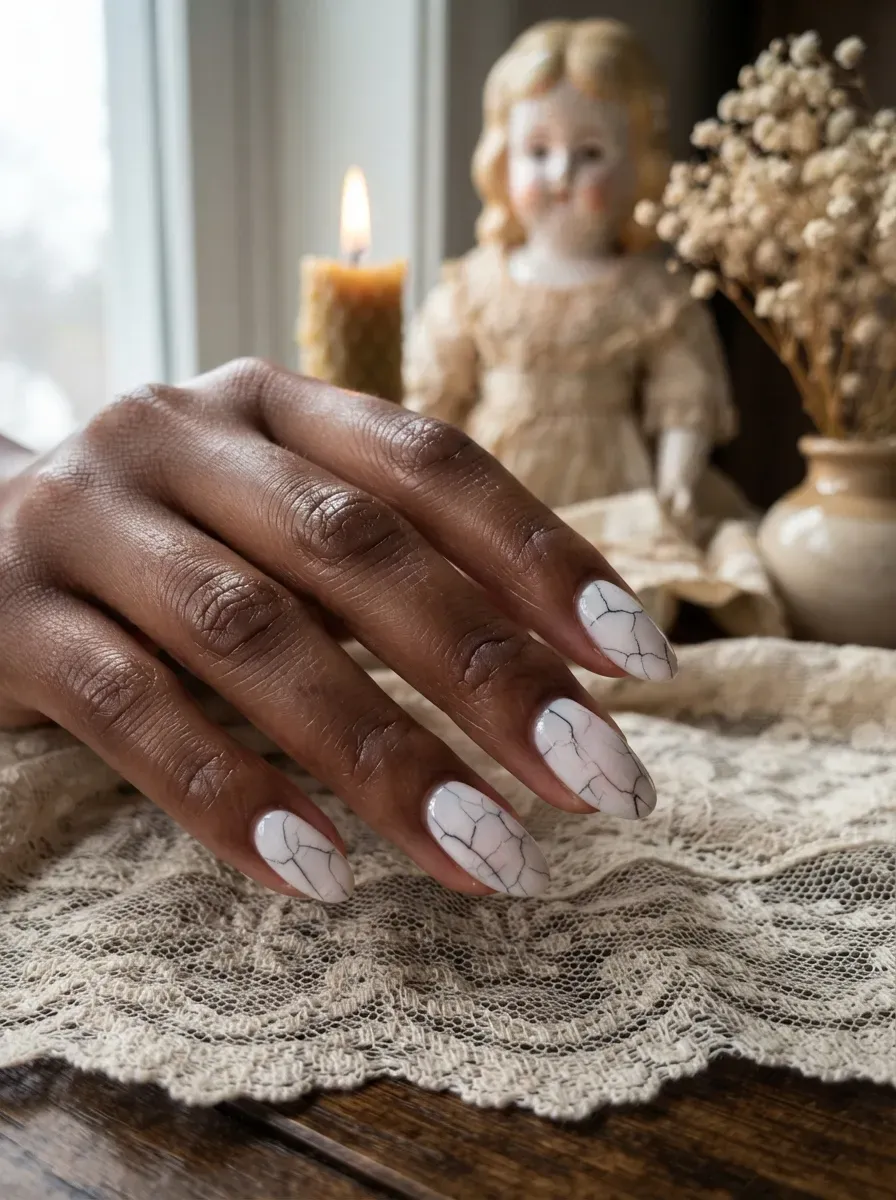
Cracked porcelain doll nails paint a pale, glossy white base with fine black crack lines across the surface, referencing horror-movie doll imagery. High-gloss top coat matters, since the porcelain effect depends on a smooth, reflective surface underneath the cracks.
This suits shorter, rounder nails that echo a doll’s hand shape. Add a faint blush pink for a lifelike porcelain tone.
28. Sunken Grey Undead Skin Tone Nails
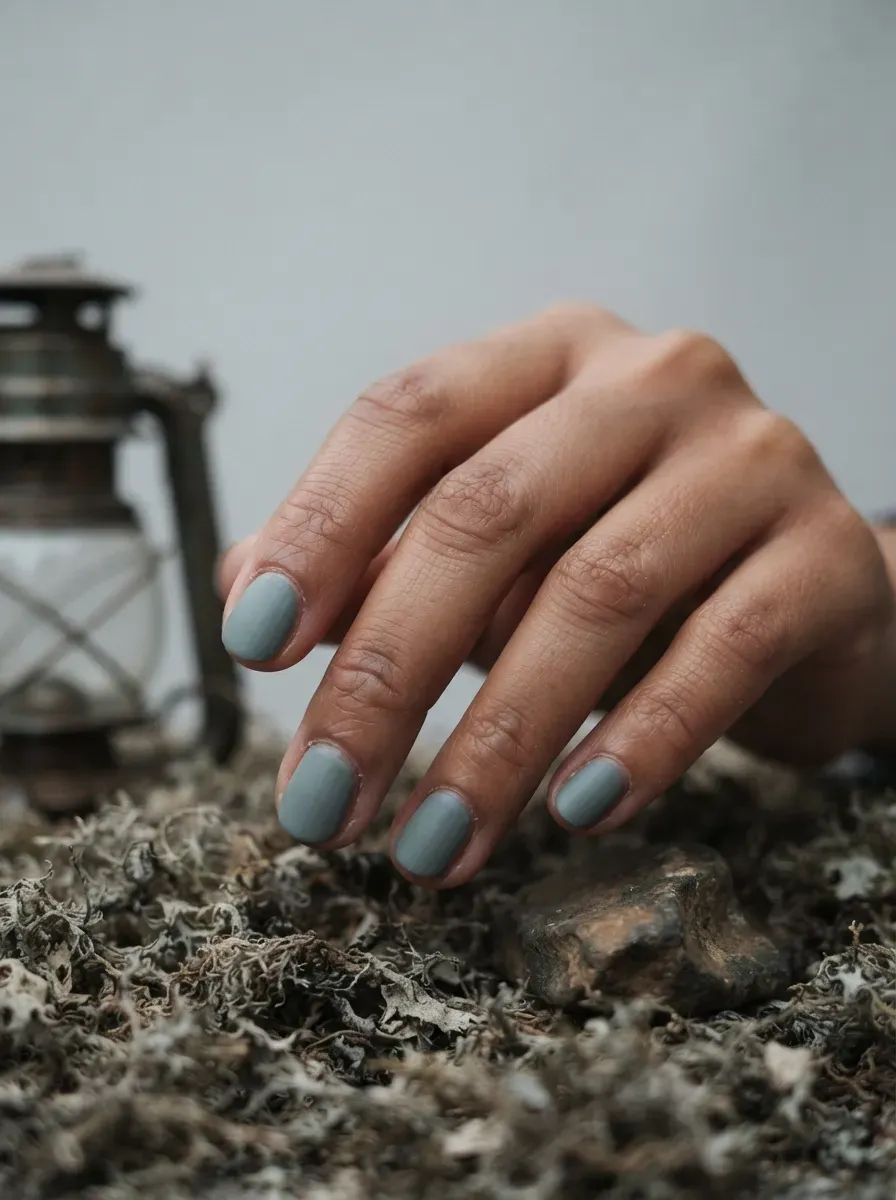
Sunken grey undead skin tone nails use a flat, ashy grey polish that mimics lifeless skin rather than a decorative color. Choosing grey with slight blue or green undertones reads more convincingly undead than a neutral grey.
This can serve as a base for further detail or stand alone. Matte finish sells the lifeless effect better than gloss.
29. Zombie Virus Cell Nail Art
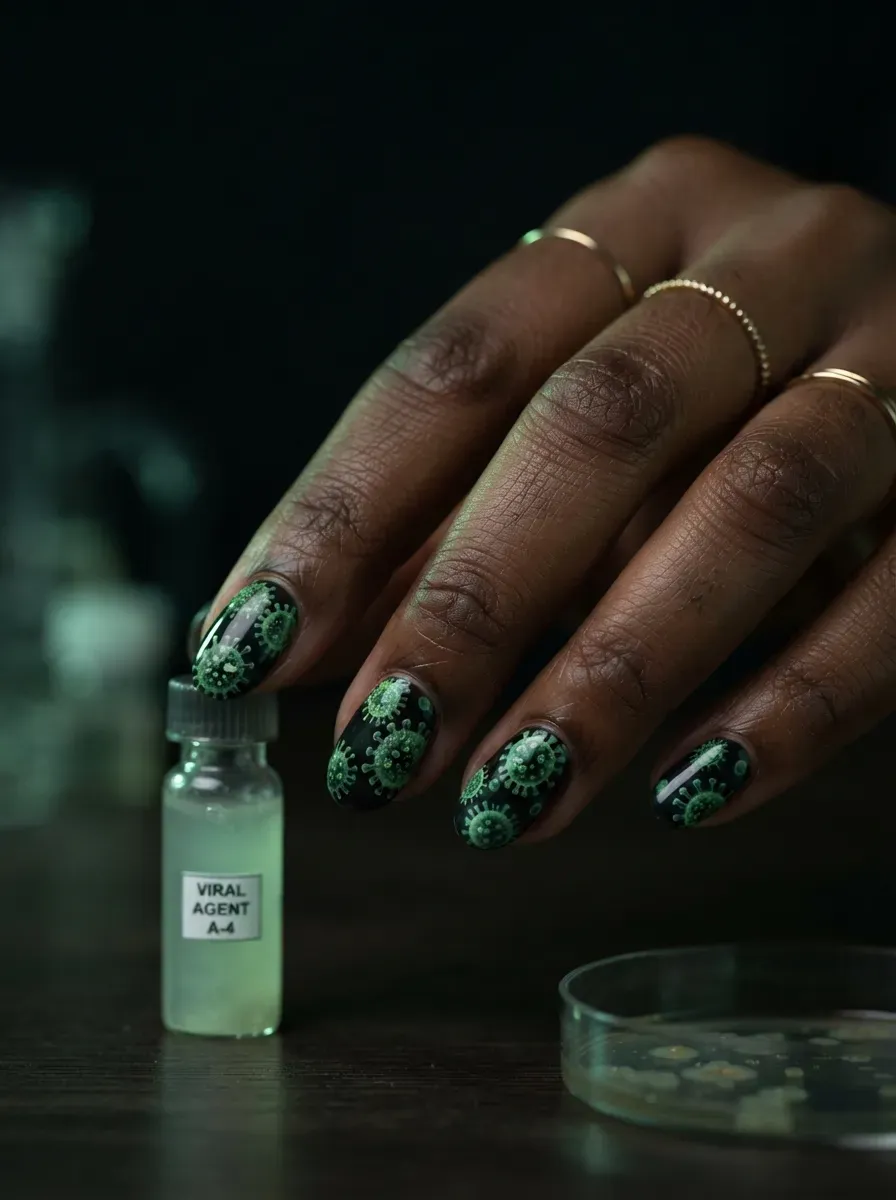
Zombie virus cell nail art paints small, round cell shapes with spiky outer membranes across a dark base, referencing an outbreak-origin visual.
Varying cell sizes and slightly overlapping a few creates a more scientific, believable pattern than evenly spaced circles.
This suits fans of outbreak-style zombie fiction. A sickly green or yellow cell color against black reads clearly.
See more Effortlessly Stylish Layered Fall Fashion Looks to Try Now
30. Rotting Pumpkin Zombie Nails
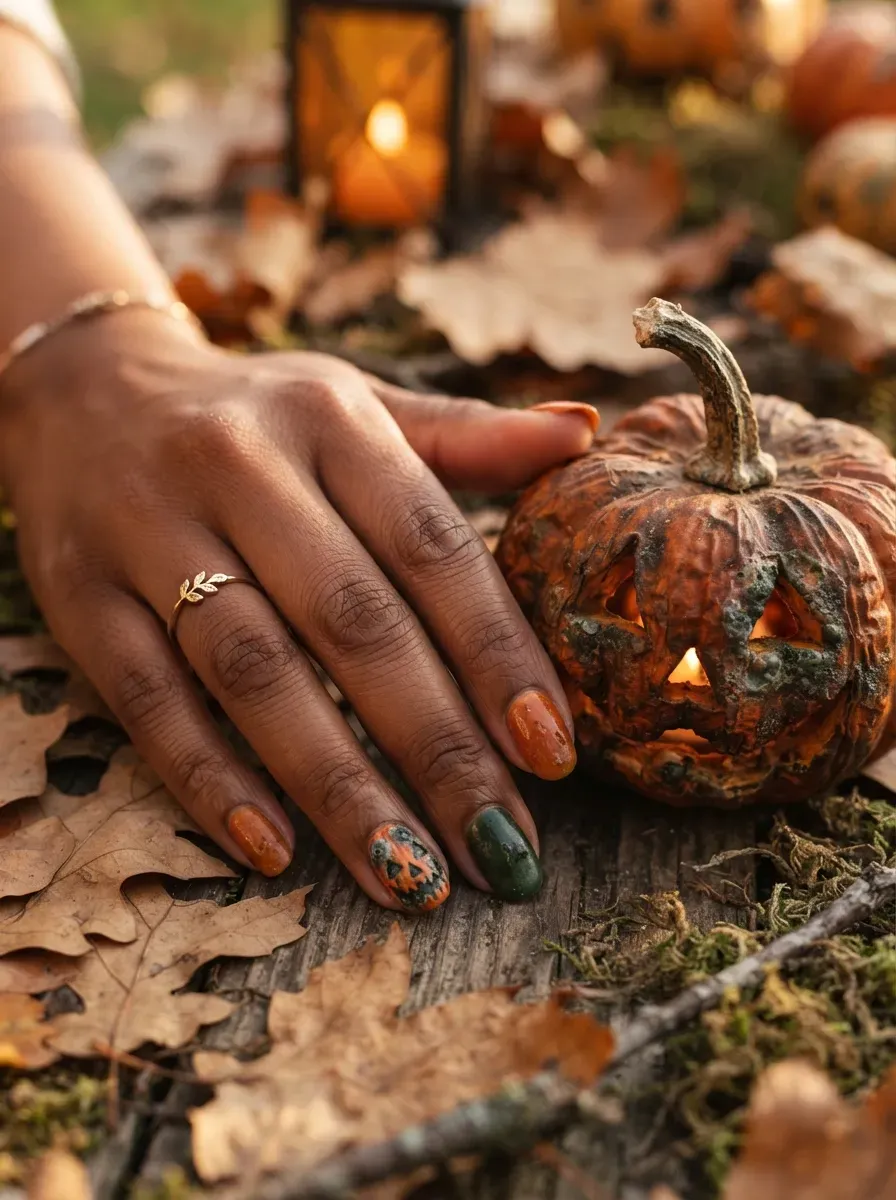
Rotting pumpkin zombie nails blend the Halloween pumpkin motif with decay, painting a caved-in, discolored jack-o’-lantern face instead of a fresh orange one. Grey-green mold spots layered over the orange base sell the rotting effect immediately.
This crossover suits readers wanting both Halloween and zombie themes at once. Limit it to one or two accent nails so detail stays sharp.
31. Toxic Sludge Foil Flake Nails
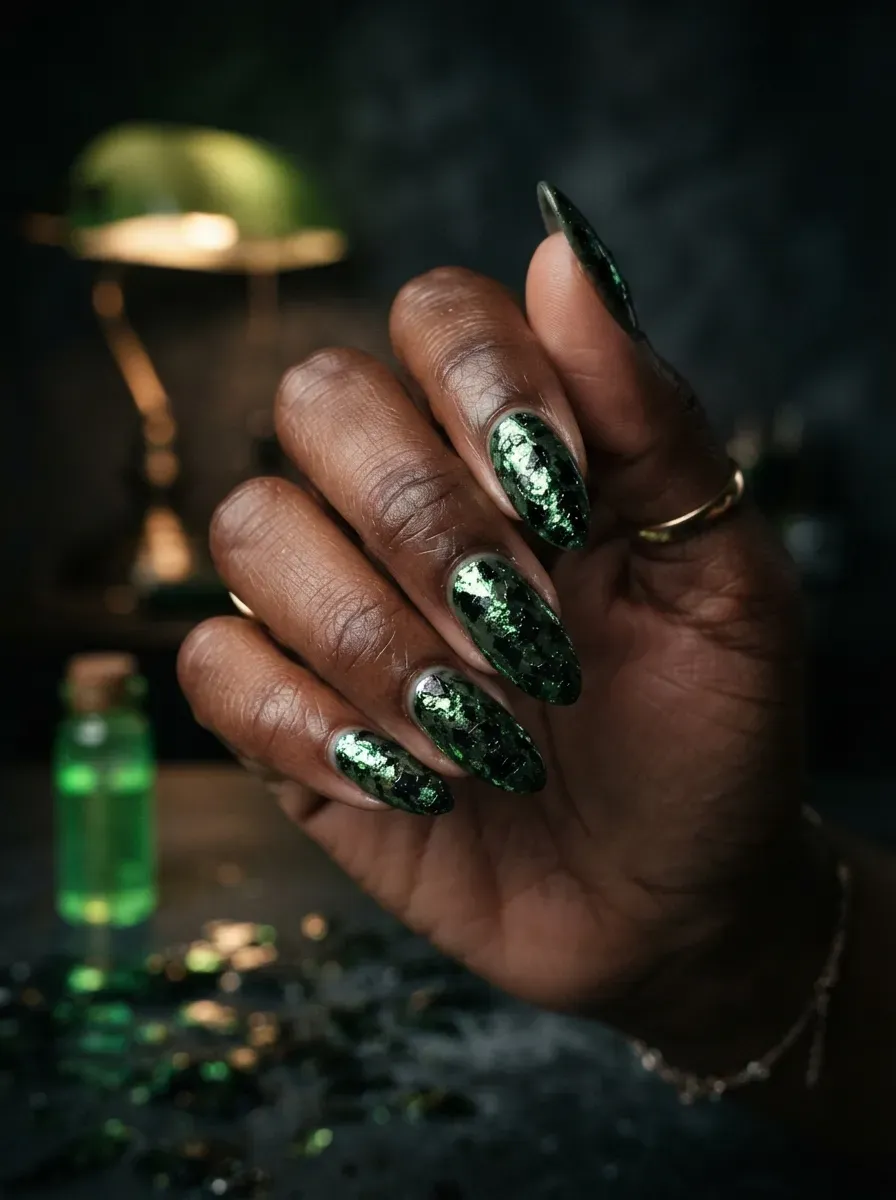
Toxic sludge foil flake nails press metallic green and black flakes into wet polish, creating an irregular, glinting texture like radioactive sludge. Pressing flakes unevenly, rather than in a uniform pattern, keeps the look convincing instead of glittery.
This works best under direct light, where the foil catches and scatters color. A murky green base makes the flakes read toxic.
32. Ash and Soot Smudge Nails
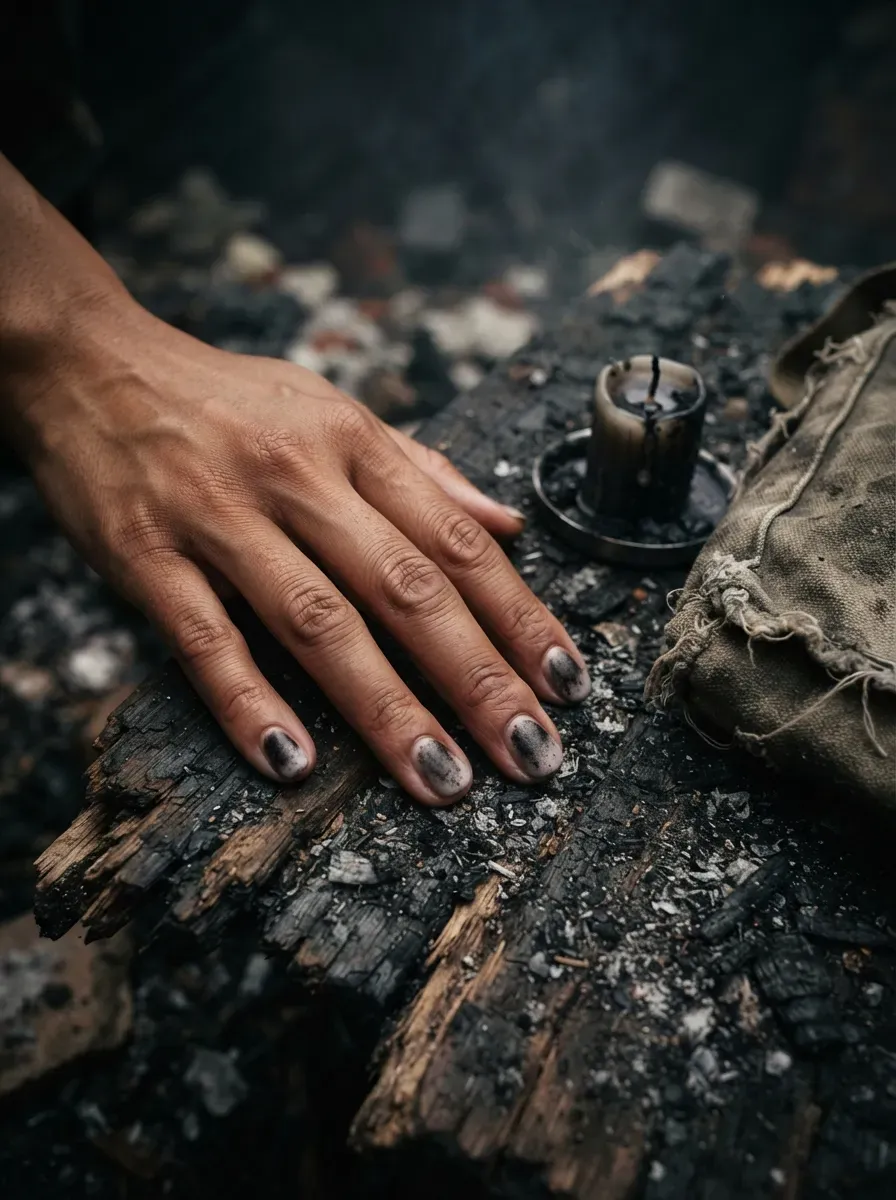
Ash and soot smudge nails blend charcoal grey and black using a sponge, leaving soft, uneven smudges rather than a clean gradient. This finish suggests a post-apocalyptic, ash-covered aesthetic rather than direct gore or decay.
Matte topcoat is essential, since gloss makes ash look like wet paint instead of dust. This pairs naturally with distressed Halloween costumes.
33. Reverse French Blood Cuticle Nails
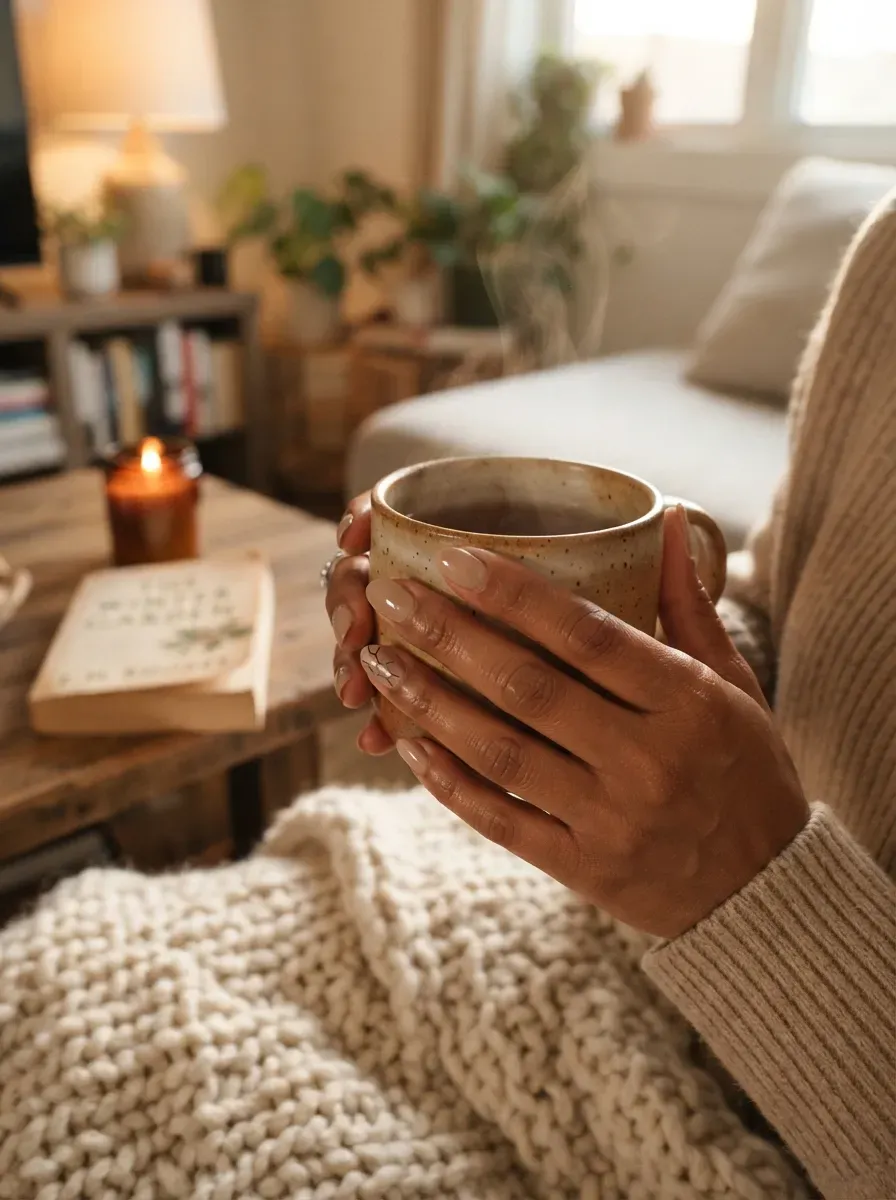
Reverse French blood cuticle nails paint the red detail at the base instead of the tip, suggesting blood pooling near the cuticle rather than dripping from the edge.
This feels fresher than a standard blood-tip design. A thin, precise cuticle line reads cleaner than a thick, sloppy one. This suits shorter nails, since detail doesn’t rely on length.
34. Minimalist Single-Accent Zombie Nail
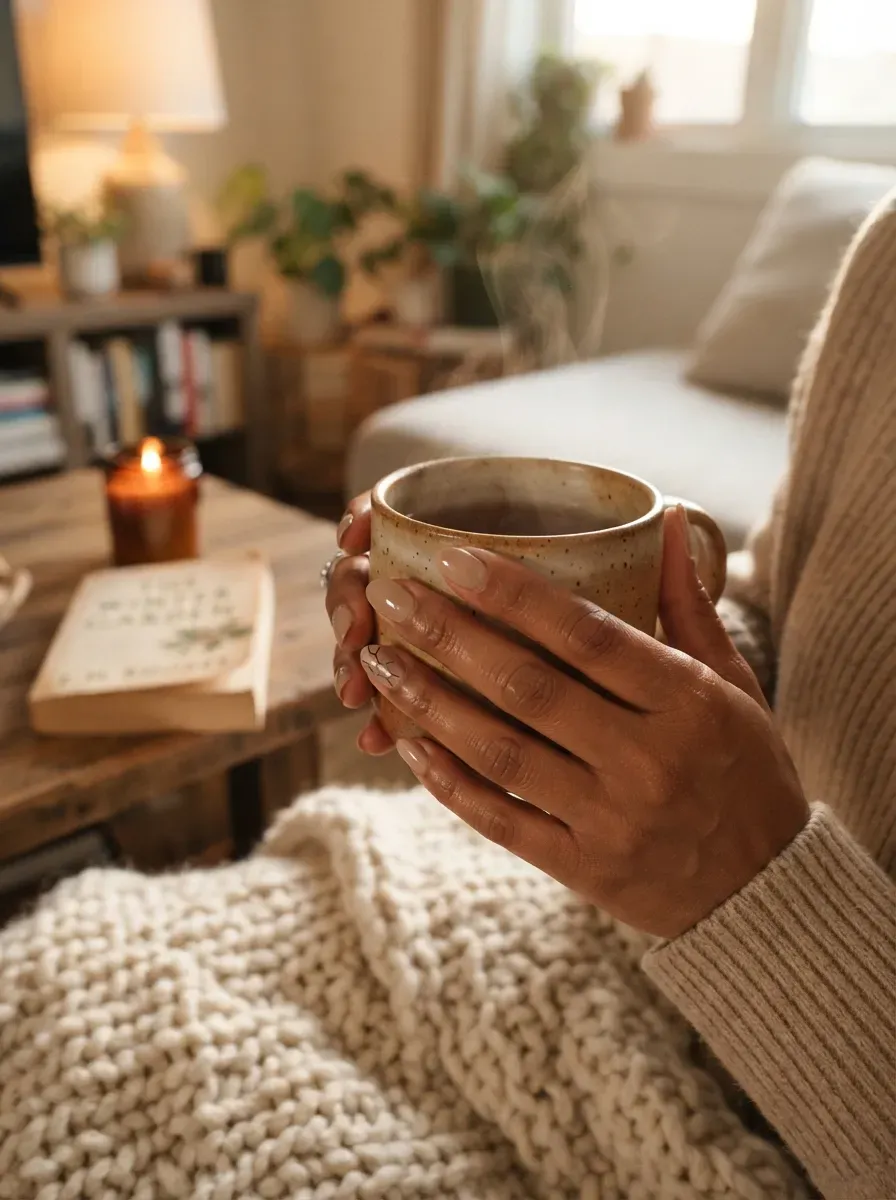
Minimalist single-accent zombie nail keeps nine nails in a plain, neutral shade and reserves zombie detail, like a tiny crack or drop of blood, for one nail.
This suits readers who want the trend without committing to a full decayed look. Short to medium nails keep the set easy to maintain daily. This transitions from a Halloween party to work.
How Long Textured and 3D Zombie Nail Art Actually Lasts
Textured and sculpted zombie nail art doesn’t wear the same way as flat polish or simple nail art, and it’s worth setting expectations before you commit to a full set.
Raised gel texture, like rotting flesh or grave dirt effects, tends to hold up well for the first week, since the texture itself hides small chips better than a smooth surface would.
Sculpted acrylic accents, like a 3D hand or heavy bone detail, are more durable in terms of structure but can catch on clothing, hair, or bedding if you’re not used to wearing raised nail art.
Crackle polish and foil flake finishes are the most fragile of the bunch, since both effects sit closer to the surface and can dull with repeated hand washing.
If you’re wearing this look for a specific event rather than an extended Halloween season, timing your appointment two to three days before matters more than usual, since these techniques often need a full cure before they can safely handle everyday wear.
Ask your technician which specific elements in your chosen design are most vulnerable, since that answer changes based on exactly which techniques they use.
Continue reading Ombré French Tip Nail Ideas for a Soft Gradient Look
Deciding Between Gore-Heavy and Stylized Zombie Details
Zombie nail art generally falls into two camps, and picking one before your appointment keeps the design cohesive instead of mismatched.
Gore-heavy realism leans into believable decay, wounds, and texture meant to actually unsettle, using muted, desaturated colors and detailed shading to sell the effect.
Stylized or comic-inspired takes, like a retro pinup design or a biohazard symbol, wink at the theme instead of aiming for realism, often using brighter colors and cleaner linework.
Neither approach is more difficult technically, but mixing them within the same set tends to undercut both, since a hyper-realistic wound next to a cartoonish detail reads as inconsistent rather than intentional.
If you’re unsure which direction fits your personal style, think about how you’d want to dress for Halloween generally.
Readers who lean toward genuinely scary costumes usually gravitate toward the gore-heavy end, while readers who prefer campy or vintage horror references tend to enjoy the stylized designs more.
Bringing two or three reference photos in the same category, rather than one from each style, helps your nail technician understand which direction to take the rest of the design decisions.
Common Mistakes That Make Zombie Nail Art Look Messy Instead of Scary
The line between convincingly creepy and just messy comes down to a few specific habits, and most of them are avoidable with a little planning.
Overcrowding a single nail with too many details, like combining veins, cracks, and a bite mark all at once, tends to blur together into visual noise instead of reading as intentional decay.
Choosing colors that are too bright or too saturated is another common issue, since real decay and rot skew toward muted, desaturated tones rather than vivid ones.
Skipping a matte topcoat on texture-heavy designs is a smaller mistake with a big visual impact, since gloss makes decayed textures look wet and shiny instead of dry and aged.
Rushing freehand detail work, especially on fine elements like stitches or bone structure, often produces shaky lines that read as sloppy rather than deliberately rough.
Finally, applying the same heavy detail across all ten nails, instead of concentrating it on one or two accents, frequently overwhelms the overall look rather than intensifying it. Slowing down on just a few of these choices usually makes the biggest visible difference in the final result.
What This Costs Compared to a Standard Halloween Manicure
Zombie nail art tends to cost more than a standard Halloween manicure, and the price difference usually comes down to technique rather than the products themselves.
Flat, hand-painted designs, like blood-splatter tips or a simple decay ombré, sit closest to a regular nail art price, since they take roughly the same time as other detailed manicures.
Sculpted or 3D elements, like a raised hand accent or heavy textured flesh, cost significantly more because they require additional product, drying time, and a level of skill not every salon offers.
Techniques like crackle polish or foil flakes fall somewhere in the middle, since they create a dramatic effect without requiring the extra time that sculpting demands.
If budget is a real factor, limiting detailed work to one or two accent nails while keeping the rest of the set a simple base color is the most effective way to get a strong visual impact without paying for a full set of intricate work.
Ask your nail technician which of your shortlisted designs share similar techniques, since combining a few compatible ideas across one set is often more efficient, and therefore cheaper, than mixing wildly different methods.
Start with how committed you want to feel. Short, rounded nails handle subtle details like a single crack or vein well, while coffin and stiletto shapes give heavier texture and 3D accents more room to read clearly.
Muted greys and greens suit realistic decay, while bright red or toxic green fits a more stylized, comic take on the theme.
Full coverage makes the strongest statement for parties, while a single accent nail keeps things wearable for work or school. Heavily textured designs need more careful handling day to day than flat polish does.
Let the occasion and your patience for upkeep guide the final choice, then pick whichever detail level actually excites you to wear.