

Learn How to Reattach a Broken Loc at Home Without Losing Your Progress.
You notice it during your wash day. Or maybe while styling.
A loc, one you have been growing for months, maybe years, has snapped. It is sitting there in your hand, detached from your head.
That moment hits differently when you understand what goes into growing locs.
Every loc on your head represents weeks and months of patience, consistency, and care. Losing one to breakage does not just feel like a hair issue. It feels personal.
However, here is what most people do not know: a broken loc can often be reattached at home.
You do not always need to grieve the loss or rush to a loctician.
With the right approach and a clear understanding of the repair process, you can reconnect a broken loc and give it every chance of healing fully.

This guide How to Reattach a Broken Loc at Home covers everything you need. You will learn why locs break, how to assess whether a broken loc is reattachable, which repair method suits your specific situation, and how to protect the repaired loc during recovery.
Additionally, you will learn what not to do, because the wrong response to a broken loc can cause far more damage than the break itself.
Below are How to Reattach a Broken Loc at Home:
How to Reattach a Broken Loc at Home Without Losing Your Progress
1. Why Locs Break in the First Place
Tension and Traction Damage
Tension is the most common cause of loc breakage.
Tight updos, high buns pulled repeatedly at the same root point, and overly firm retwisting all place concentrated stress on specific sections of the loc.
Over time, that stress weakens the internal structure at the tension point.
Furthermore, styles that pull the locs in one direction consistently, such as a daily high ponytail or very tight braid crown, train the root into a bend.
The loc eventually weakens at that bend point and snaps under its own weight.
Consequently, the break almost always happens at or near the root, where the tension is greatest and the loc structure is thinnest.
Dryness and Brittleness
Dry locs are brittle locs.
When the moisture level inside a loc drops too low, the hair strands that form its internal structure lose their natural elasticity.
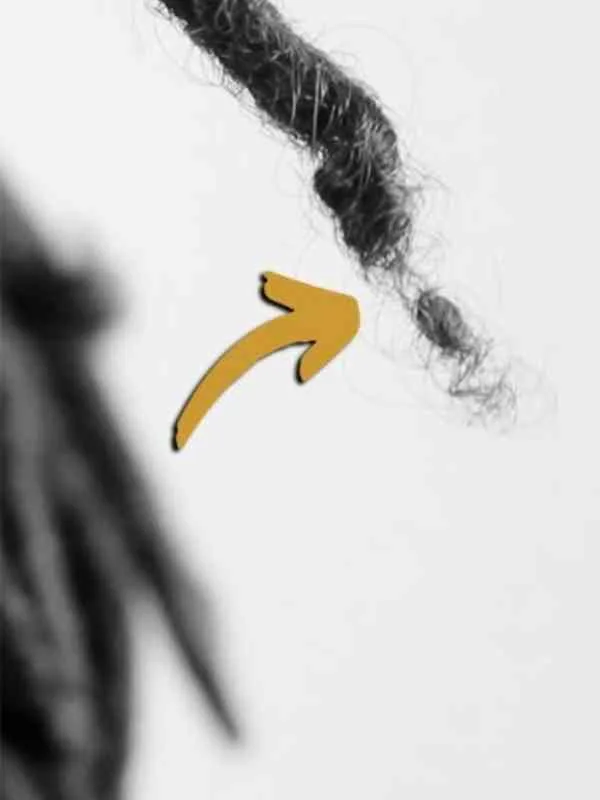
As a result, they become rigid and crack rather than flex under pressure.
A dry loc is significantly more vulnerable to breakage during manipulation, styling, or even sleep movement.
Additionally, the dryness problem compounds when locs are exposed to harsh shampoos, hard water mineral deposits, or prolonged heat.
Each of these strips moisture from the strand progressively.
Therefore, a loc that appears visually healthy can be internally brittle long before a visible snap occurs.
Product Buildup Weakening the Strand
Heavy gels, waxes, and thick butters feel like they strengthen and protect locs.
In reality, they coat the strands in a layer of residue that, over repeated use, hardens inside the loc. That hardened buildup makes the loc rigid and inflexible.
This Post explains Tension-Free Updos for Mature Locs: Protective Styles That Slay Without Pulling
Consequently, when the loc is bent or manipulated, it cracks at the buildup point rather than flexing normally.
Moreover, buildup traps moisture inconsistently. Some sections of the loc become drier while others hold residue.
This uneven internal composition creates weak points throughout the strand.
Over time, those weak points become the sites of eventual breakage — particularly during wash day manipulation or heavy styling.
2. Assessing Your Broken Loc Before You Begin
Where the Break Happened Matters
The location of the break determines how reattachable the loc is and which method will work.
A root break, where the loc separates at or very near the scalp, is the most common type.
It is also the most repairable, because the follicle is intact and the hair is still growing from that root.
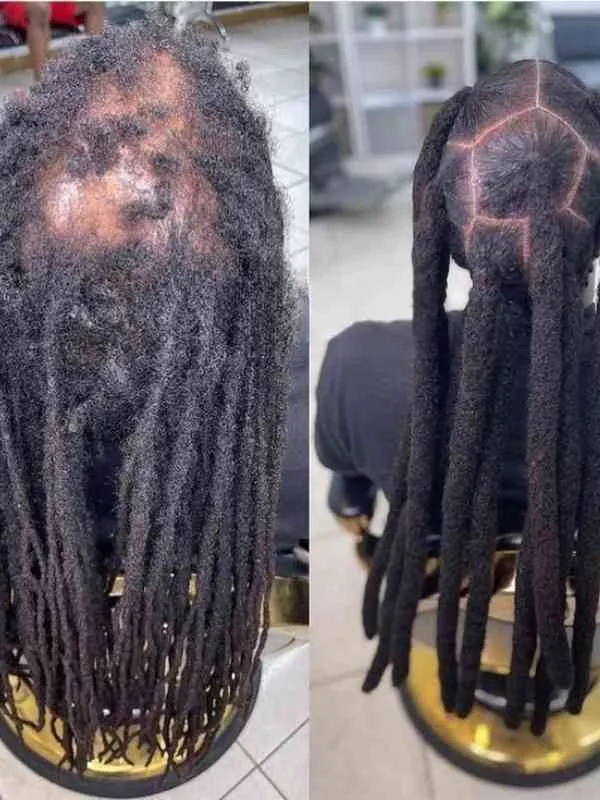
A mid-shaft break happens further down the loc, away from the scalp.
This type is still repairable, though the reconnection point is more visible and requires more precision.
An end break, where the tip of the loc snaps off, is usually the least urgent. The loc itself is still attached to the scalp.
Therefore, trimming the frayed end and protecting the remaining loc is often the most practical response.
How Much Length Remains on Both Pieces
For a successful reattachment, both the detached section and the remaining attached root need enough length to work with.
A detached section shorter than two inches is very difficult to reattach securely. Similarly, a remaining root section shorter than one inch provides very little to anchor the repair to.
Assess the detached loc honestly before attempting repair. If both pieces have workable length and the break is clean rather than severely frayed, reattachment is viable.
For more insight How to Remove Lint from Locs Without Causing Damage: A Gentle Care Guide for Healthy, Clean Locs
However, if the break point is badly damaged, very short, or the loc itself was already thin before breaking, combining the remaining root with an adjacent loc may be a stronger long-term decision than attempting reattachment.
Pro Tip: Do not wash your hair immediately after a loc breaks.
Wait until after you have completed the reattachment and the repair has had at least two weeks to begin bonding.
Washing a freshly repaired loc before it stabilises significantly increases the risk of the reattachment failing.
3. What You Need Before You Start
Gathering the right tools before you begin saves time and prevents mid-repair mistakes.
The tools required for loc reattachment are simple and most are already in most homes.
A fine crochet hook — size 0.75mm to 1.0mm, is the most important tool for the interlocking repair method.
Additionally, a rat-tail comb helps separate the repair area from surrounding locs without disturbing them.
Here’s a closer look at Best Grid Patterns for Small DIY Locs: How to Choose the Perfect One for Your Hair
A spray bottle of plain water keeps the hair pliable and easier to work with throughout the process. Hair clips secure surrounding locs out of the way.

For securing the reattachment, loc bonding glue is used by some professionals.
However, for most home repairs, the crochet interlocking method or a careful wrap-and-tuck technique produces a stronger and healthier bond than glue does.
Glue creates buildup inside the loc structure and can cause damage at the repair point over time.
Therefore, mechanical methods are the preferred approach for home reattachment.
4. The Crochet Hook Reattachment Method
Why This Method Works Best for Most Breaks
The crochet hook method works by threading the broken loc back through the root loc using an interlocking technique.
It mimics the interlocking maintenance method used for many loc types. As a result, the reattachment is mechanical and structural rather than adhesive.
The break point is physically looped back into the body of the loc, which means it holds its own weight without depending on glue or product.
Furthermore, this method is the closest replication of how professional locticians handle broken locs.
It works best when the remaining root section is at least two to three centimetres long and the detached section is long enough to loop through.
Additionally, the crochet method allows the repaired loc to continue growing naturally without the repair point interfering with future maintenance.
Step One — Prepare the Break Point
Begin by misting both the attached root and the detached loc section lightly with plain water.
Damp hair is more flexible and easier to manipulate. Clip all surrounding locs away from the repair area.
Use the rat-tail comb to gently separate any hair that has crossed between the broken loc and its neighbours.
Examine the break point on the attached root.
If you are looking to understand How to Start Locs Yourself at Home Without a Loctician: A Simple, Confident Beginner’s Guide
If the tip of the remaining root is very frayed or unravelled, palm roll it gently between your fingers to re-compress it into a uniform tip.
This gives the crochet hook a cleaner surface to work with. Do not apply any product at this stage, even aloe vera gel can make the surface slippery and harder to grip with the hook.
Step Two — Begin the Interlocking Loop
Take the detached loc section and hold it flat against the attached root, end to end.
Insert the crochet hook through the side of the attached root, approximately half a centimetre above the break point.
Hook a small portion of the detached loc and pull it through the root.
Repeat this process two to three times, working slightly higher up the root with each pass.

Each pass creates a new loop that threads the detached loc further into the body of the attached loc.
Consequently, the two sections begin to share the same internal structure rather than simply sitting against each other at the surface.
This is what makes the crochet method more durable than surface-level bonding.
Step Three — Secure and Compress
Once the detached section has been threaded through the root multiple times, palm roll the entire repair area firmly between your fingers.
Work from the root downward, compressing the interlocked section into a uniform shape. The repair point should feel dense rather than loose after palm rolling.
Allow the loc to air dry completely in its natural hanging position.
Do not clip it up or pin it during drying.
Moreover, avoid touching or testing the repair for at least forty-eight hours.
The hair needs time to begin the natural interlocking process that will eventually reinforce the mechanical bond you have created.
Pro Tip: After completing the crochet reattachment, wrap the repair point loosely with a small piece of soft thread in the same colour as your locs.
This holds the interlocked section together during the first week of healing without adding tension.
Remove the thread at the one-week mark.
You may enjoy reading How to Fix Thinning Locs at the Crown and Bring Your Locs Back to Life
5. The Wrap-and-Tuck Method
When to Use This Method Instead
The wrap-and-tuck method is best suited for mid-shaft breaks where the crochet hook cannot easily reach the repair point, and for loc wearers who do not yet have experience using a crochet hook.
It is a simpler technique.
However, it is less structurally secure than the crochet method and requires more careful protection during the healing period.
Furthermore, this method works well as a temporary stabiliser while you arrange a professional repair appointment.
If the break has happened at a point that is genuinely difficult to reach with a hook.
The wrap-and-tuck technique holds the loc together long enough to get expert help without the detached section being lost or further damaged.
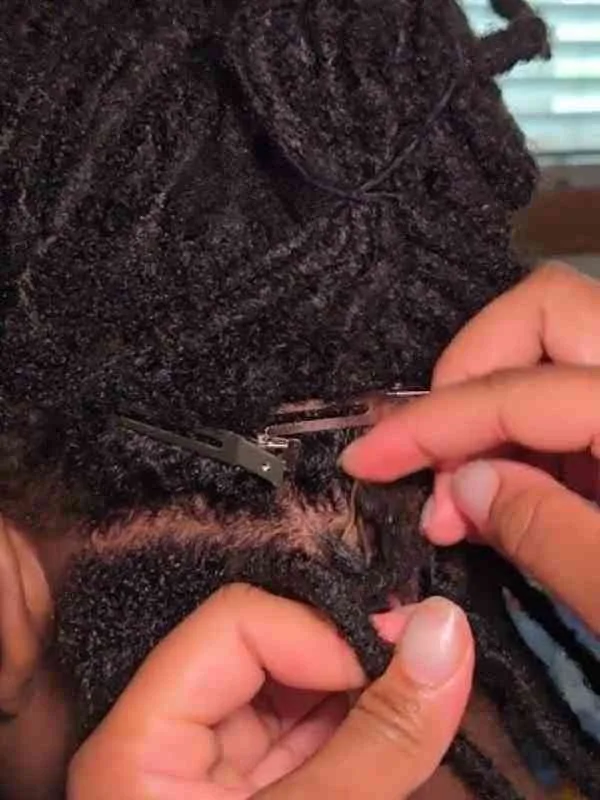
How to Execute the Wrap-and-Tuck
Hold the broken ends of the loc together, aligning them at the break point as closely as possible.
Using a thin piece of satin-covered thread or a soft loc cord in the same colour as your locs, wrap the thread firmly around the repair point.
Start from just below the break and wrap upward past it, covering approximately two centimetres of the loc on each side of the break.
Once wrapped, tuck the thread ends under the final wrap loop and pull firmly to lock.
The thread should feel secure without cutting into the loc surface.
You may enjoy reading How to Start Locs on Short Hair: A Beautiful Beginner’s Guide to Your Loc Journey
This wrap compresses the break point and prevents the two sections from separating further while the loc begins to naturally bond internally.
Replace the wrap every two weeks until the repair has stabilised enough that the loc holds its own structure without external support.
6. The Loc Combination Option
Combination also called merging: is the process of joining the broken loc’s remaining root with an adjacent loc to create one slightly thicker loc.
This is not a repair in the traditional sense. Rather, it is a strategic redirection that produces a healthy, stable result when reattachment is not viable.
Consequently, combination is the right choice when the remaining root is too short to reattach, when the loc has already broken in the same spot more than once, or when the break point shows severe thinning that suggests the loc will break again.

Merging two thin or fragile locs creates one stronger loc with a better internal structure than either of the originals alone.
To combine locs, bring the remaining root section against the base of an adjacent loc and secure them together using the crochet interlocking method.
Palm roll the combined base firmly.
Over the following weeks, the two roots will begin to share their internal structure and eventually mature into a single unified loc.
The adjustment in loc count is barely noticeable on most heads, and the result is far more durable than a fragile reattachment on a compromised root.
Pro Tip: If you are unsure whether to reattach or combine, photograph both the break point and the surrounding locs in good lighting before deciding.
A clear photo often reveals details about root thickness and damage that are harder to assess by touch alone. Use that information to guide your decision.
7. Caring for a Reattached Loc During Recovery
The First Two Weeks Are Critical
The first two weeks after a reattachment determine whether the repair holds or fails.
During this period, the loc is most vulnerable.
The mechanical bond created by the crochet method needs time to begin reinforcing itself through natural hair interlocking.
Therefore, minimal manipulation is essential.
Avoid any styling that places tension on the repaired loc during this period.
Additionally, keep the loc hanging freely rather than gathering it into an updo that bends the repair point.
Sleeping on a satin pillowcase, or wearing a satin bonnet, prevents overnight friction at the repair site that could disturb the new bond before it stabilises.
Washing After a Repair
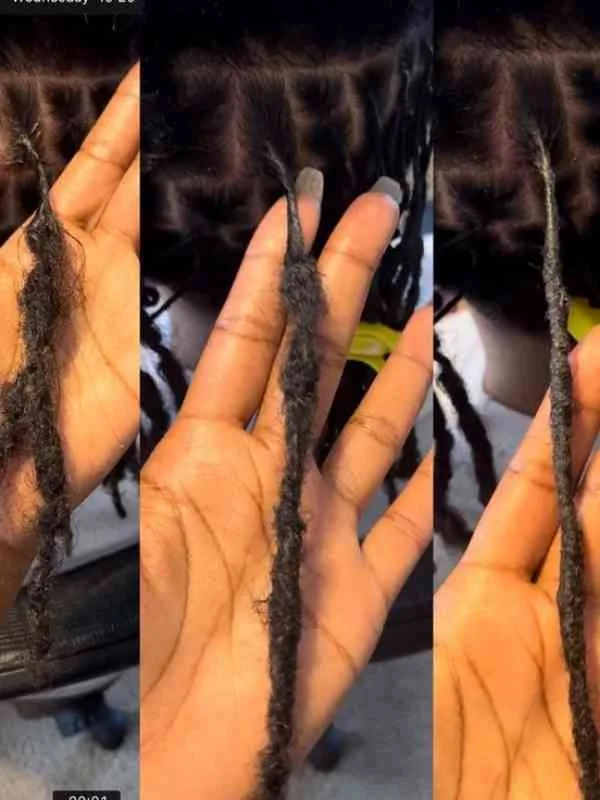
Wait at least two weeks before washing the repaired loc.
When you do wash, avoid directing strong water pressure at the repair point.
Instead, allow water to flow gently over the loc during rinsing rather than pressing or squeezing at the repair site.
You might enjoy reading How to Start Sisterlocks on Natural Hair: A Beginner’s Step-by-Step Guide
Furthermore, do not co-wash a repaired loc during the recovery period.
Conditioner softens the hair temporarily, which can loosen the interlocked repair before it has fully set.
Use a gentle clarifying shampoo instead.
After washing, squeeze water from the repaired loc downward toward the end, never upward toward the root repair point.
Allow it to air dry completely in its natural hanging position.
Moisturising the Repair Site
Moisture supports the flexibility of the hair strands attempting to interlace at the repair point.
Therefore, lightly misting the repaired loc with plain water every two to three days helps keep the hair pliable during recovery.
A very small amount of pure aloe vera gel applied to the repair point every week provides additional hold and gentle moisture without coating the loc in heavy residue.
Avoid applying oils directly to the repair point during the first month.
Oils make the surface slippery and reduce the friction that allows interlocked strands to grip each other.
Apply oil to the scalp only, keeping the repair site as clean and product-light as possible during recovery.
8. How to Prevent Loc Breakage Going Forward
Understanding what caused the break in the first place is the most important step in preventing future breakage.
As a result, the same care assessment that helps you choose a repair method should also inform how you adjust your routine after the repair is complete.
If tension was the cause, rotate your styling positions.
Avoid gathering all locs at the same point day after day.
Instead, alternate between low buns, half-up styles, and loose hanging to distribute weight and tension across different root zones.
For more insight How I Prevented Thinning and Hair Loss in My Locs (And You Can Too)
Furthermore, always use satin scrunchies rather than elastic bands.
Elastics create a cutting pressure at the tie point that weakens loc structure over repeated use.
If dryness was the cause, build a consistent moisture routine.
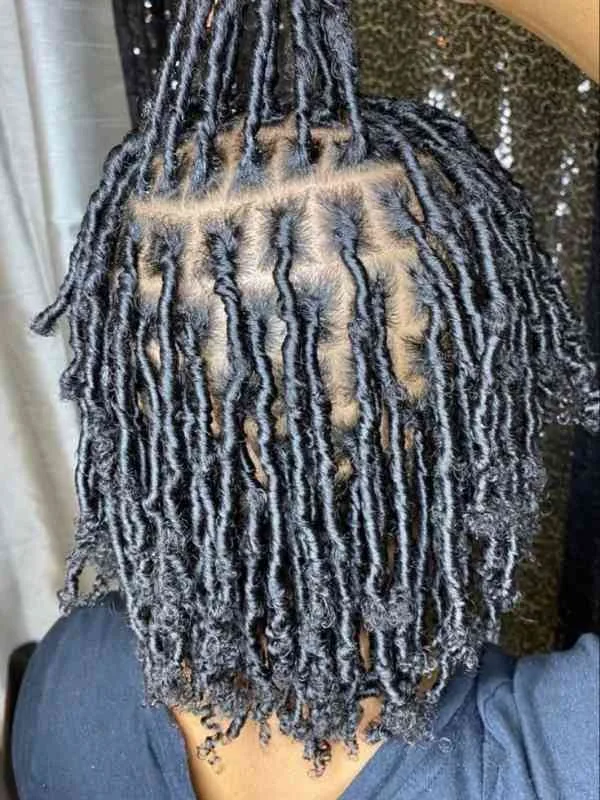
A light water-based spray applied to the locs every two to three days prevents the level of internal dryness that leads to brittleness.
Additionally, seal with a lightweight oil after moisturising to slow moisture loss between sessions.
Avoid heavy products entirely, they create the buildup that contributes to the rigidity that precedes breakage.
Pro Tip: Do a monthly loc health check. Run your fingers gently along each loc from root to tip, feeling for thin spots, unusual rigidity, or sections that feel significantly weaker than the surrounding loc.
Catching a weak point early, before it breaks, gives you the option of strengthening it proactively rather than repairing it after the fact.
Bad Ideas When Trying How to Reattach a Broken Loc at Home
Using hair glue or loc bonding adhesive as the primary repair method.
Glue creates immediate adhesion but hardens inside the loc structure over time. It prevents the natural interlocking process that a healthy loc repair requires.
Furthermore, removing glue from a loc later is nearly impossible without causing significant additional damage.
Mechanical methods are always safer and more durable than adhesive-based repairs.
Washing the repaired loc within the first two weeks.
Water softens the hair during washing and significantly increases the chance of the repair separating before it has had time to stabilise.
Additionally, manipulating a freshly repaired loc during washing applies exactly the kind of pressure the repair point needs to avoid. Wait at least two weeks.

The patience is worth it.
Pulling tightly on the repaired loc to test whether it is holding.
The instinct to check the repair by tugging on it is understandable but genuinely counterproductive.
Any significant pulling force on a fresh repair disrupts the early interlocking process.
Consequently, you may feel the repair hold briefly and then separate days later because the bond was disturbed before it fully set.
Trust the process and leave the repair alone. Styling the repaired loc into a tight updo during recovery.
Gathering the repaired loc into a bun or updo bends and tensions the repair point repeatedly throughout the day.
This is the same mechanism that caused many root breaks in the first place.
Therefore, keep the repaired loc hanging freely and tension-free for at least the first month.
Protective styling can resume once the repair has clearly stabilised.
Hiding the break and doing nothing because you are afraid of making it worse.
A broken loc that is not reattached does not simply stay as it is. The detached section frays further at the break point over time.
Moreover, the remaining root thins progressively as it loses the structural support of its full length.
Acting promptly with the right method gives the loc its best chance of a full repair. Avoidance makes the eventual damage worse, not better.
When to See a Professional Loctician For How to Reattach a Broken Loc at Home
Most loc breaks can be repaired at home using the methods in this guide.
However, there are specific situations where professional help produces a significantly better outcome than a home repair attempt.
If the break has occurred at the very base of the root, less than one centimetre from the scalp, home reattachment is very difficult.
The remaining root section is too short to thread through effectively with a crochet hook without risking damage to the scalp or adjacent locs.
In this situation, a professional loctician can assess whether the follicle is intact, whether combination is the better option, and execute whichever repair is safest with the precision that very short roots require.
You may be interested in reading Teen Love: How to Navigate First Crushes and Young Relationships
Additionally, if multiple locs have broken in a short period.
This is a sign of a systemic issue, widespread brittleness, severe buildup, or significant traction damage, that a loctician is better positioned to identify and address.
Furthermore, if a previous home repair attempt has not held after three weeks, a professional reassessment is worthwhile before attempting a second repair on the same loc.
Repeated failed repairs on the same root can cause enough additional damage to make combination the only viable long-term solution.
Final Words On How to Reattach a Broken Loc at Home
How to Reattach a Broken Loc at Home is not the end of the journey. It is a setback, and a manageable one.
The loc you are holding in your hand after a break represents real growth and real time. In many cases, it can be returned to your head and given the chance to continue that journey.
Assess the break honestly.
Choose the right method for your specific situation.
Work carefully and patiently. Protect the repair during recovery.
Then adjust your routine to address whatever caused the break in the first place, so it does not happen again.
That is the complete response to a broken loc; not panic, not grief, and not avoidance.
Your loc journey has room for setbacks. It always has. What matters is how you respond to them.
Repair with patience, protect with intention, and keep going. The locs you will have in a year from now are worth every careful decision you make today.
You have Learnt How to Reattach a Broken Loc at Home Without Losing Your Progress.